


These babies all share the same EK Success 5-petal
flower punch for a Mommy
(petal progenitor of blossom siblings? flower family?):
flower punch for a Mommy
(petal progenitor of blossom siblings? flower family?):

You clever people have me thinking about faster ways to make painted paper flowers. Thank You! (I think I need 180 of them to decorate 3 tired old lamp shades, so thanks for the idea to do them with punching/die cutting. You're the best!)

shimmery

pearly

...make embossed fresco flowers:
(1-punch or cut a flower;
2-dry emboss it;
3-colour it;
4-paint it white
5-sand it;
6-shape it;
7-embellish it!)
You will need these...

- Cardstock (80-100lb seems best for shaping)
- Something to make Flower shapes (punches, die cuts, digital cutter--or hand cutting)
- Embossing tools: machine (Cuttlebug or whatever and embossing folders) or brass embossing plate & stylus. I used Provo Craft folder (3 from the Asian collection, textile, and swiss dots.)
- Colouring medium Copic or other Markers (or what have you)
- White acrylic paint (and paint brush or rag to apply it)
- Misc common tools: Sanding block, dusting rag, scissors
- Shaping tools (a stylus & foam mat or hands) ;o)
- Shiny stuff: Lumiere, Shimmer Mist, Perfect Pearls, Shimmerz...
- Bits for centers: gems, buttons, beads, glitter...
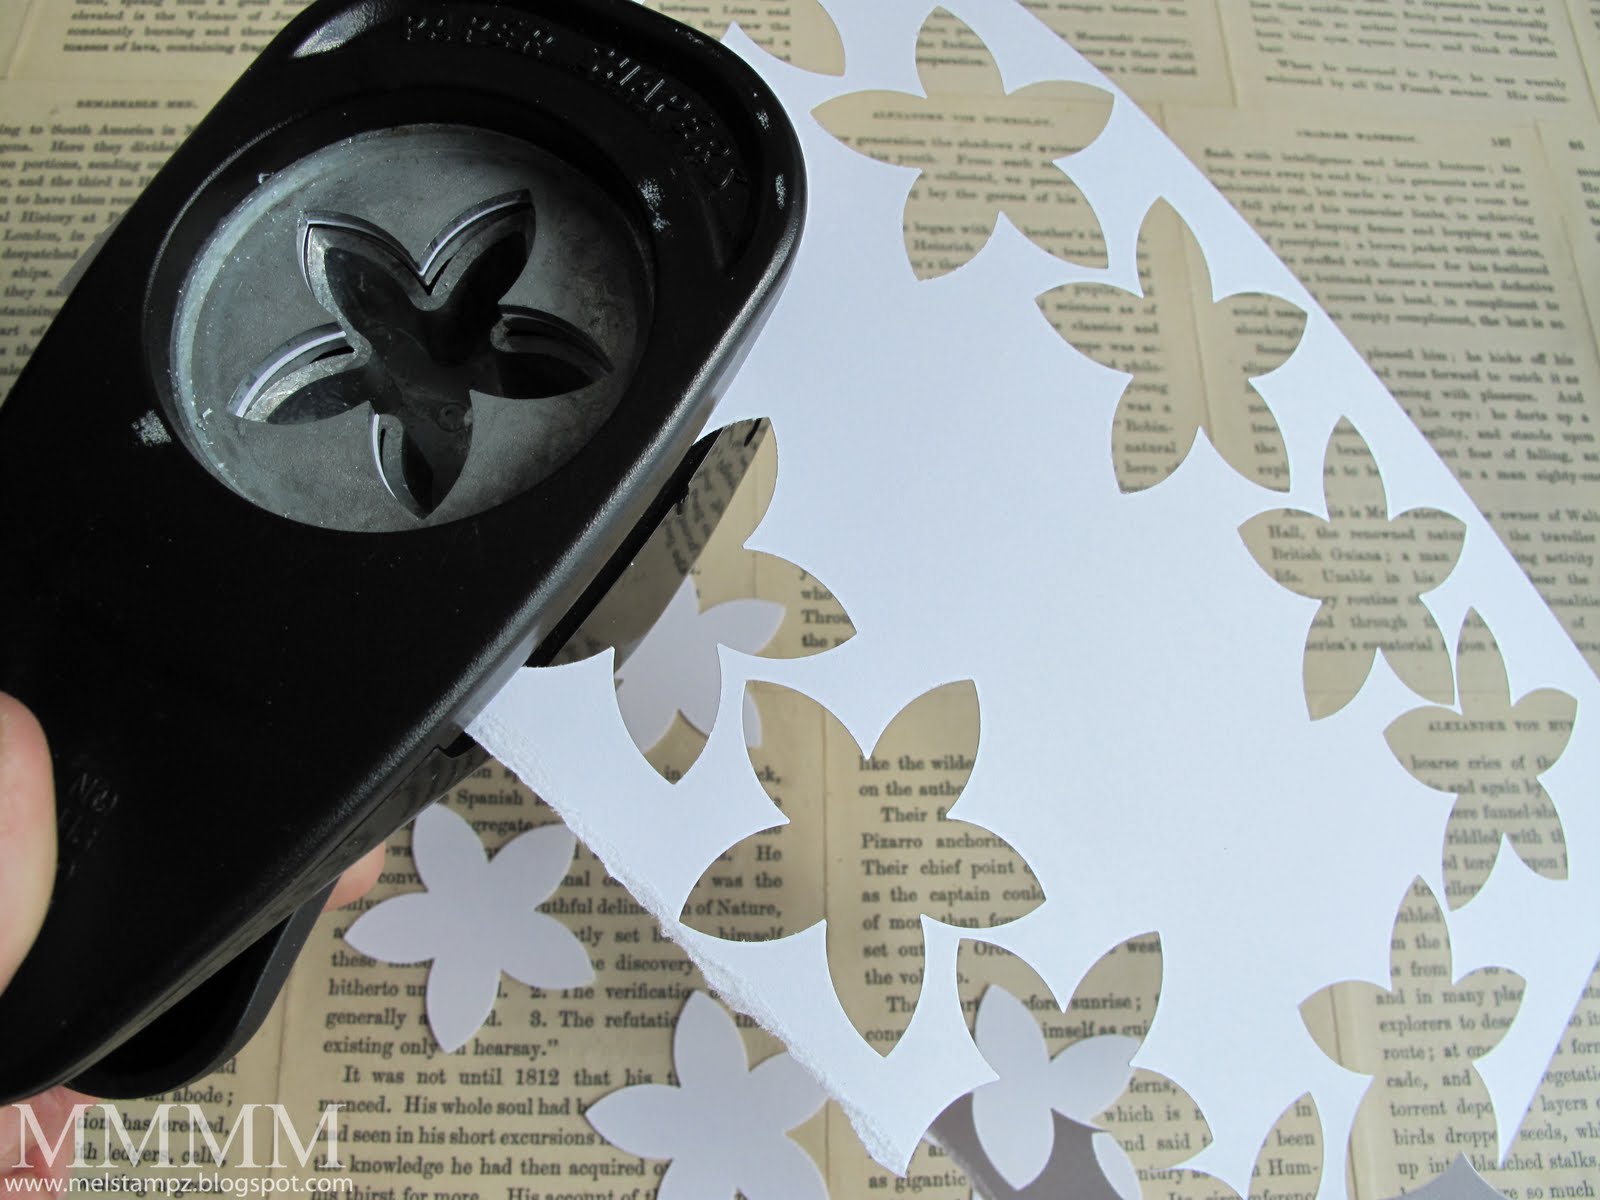
Step 1) Make a flower shape: Punch out, die cut or freehand cut your flower shapes.
This is a great way to use up scraps of cardstock or patterned paper. This is just medium quality white 80lb cardstock.

Step 2) Dry Emboss it: Dry emboss using a Cuttlebug, Big Shot, or other pressure embossing machine or the hand done dry embossing.


Step 3) Colour it: I used Copic markers, but you could ink it (apply the ink pad directly, drop watery colours on, sponge it, or brayer colour on...whatever you like best.)

3B) Add different colours & don't be afraid to go bold & messy. You can really slop the ink on there.
There's no need to worry about even coverage;
It can look hideous when it's simply coloured:

...but when you add the white paint, it's magically fixed:

Step 4) Apply a thin coat of white acrylic paint: I used white paint to get a fresco look, but you could try whatever colour you like, of course. You could use your flowers simply painted as is after this step (just as pastel flowers with embossing and paint texture) or continue on to the fun stuff.... ;o)

Step 5) Sand it to remove a little paint & expose colours (adds neat-o texture too.) I use a hardware store sanding block; my fave is 120 grit, or thereabouts.

Step 6) Remove the dust created by sanding. (I love using a Swiffer cloth.)

Step 7) Shape the flower using your fingers or a stylus.
And for Step 8)...
my ultimate fave of

ever

ever
To get a hand cut look from speedily punched flowers,
you can just trim them a little bit:
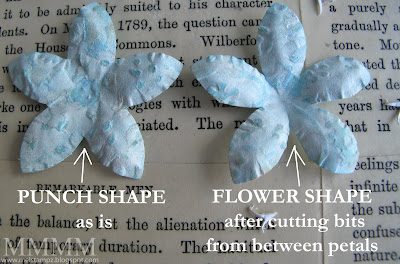
All it takes is a couple snips to make your punches brand new to you! ;o)
you can just trim them a little bit:

All it takes is a couple snips to make your punches brand new to you! ;o)

here's a close up shot of how I trimmed this 5-petal flower shape
(an EK Success punch):

...snippity snip snip snip...
Here's a double hand-shaped flower with two of these snipped 5 petal
EK success punched flowers (an old SU flower punch):
EK success punched flowers (an old SU flower punch):

I'll share all the details of the fancier cutting ideas soon,
in case you have the 5-petal EK success flower punch (or want
ideas for revamping other punches or dies in your collection.) :-)
in case you have the 5-petal EK success flower punch (or want
ideas for revamping other punches or dies in your collection.) :-)


Tips for multiple flower making:
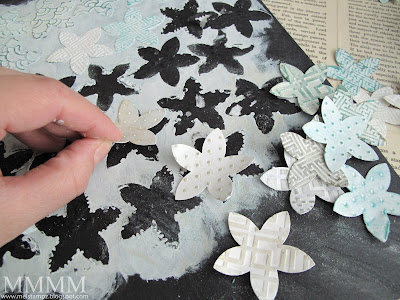
To make multiple flowers easier to colour and so forth,
just glue them (lightly) to a piece of paper:

I used Zip Dry from Beacon Adhesives, being sure to add a little
to the back of each petal so they held up to sanding
then pulled them off of the paper when they were finished:
just glue them (lightly) to a piece of paper:

I used Zip Dry from Beacon Adhesives, being sure to add a little
to the back of each petal so they held up to sanding
then pulled them off of the paper when they were finished:

I used black paper here for demonstration purposes, but I would use white, normally, so that any bits of paper that stuck from the adhesive would be inconspicuous. (Using quite a thin coat of paint, when you're gluing to paper, makes this much easier & tidier, ask me how I know...) ;o)
These wee little "3 for you" punch flowers worked
well stuck onto wax paper first & then embossed...

...so there was no fiddling with teeny flowers falling everywhere.
These wee little "3 for you" punch flowers worked
well stuck onto wax paper first & then embossed...

...so there was no fiddling with teeny flowers falling everywhere.

Shape with a stylus on a fun foam mat
You can work in little ovals or circles with a stylus:

or the rounded end of a paint brush
...or shape with your hands:
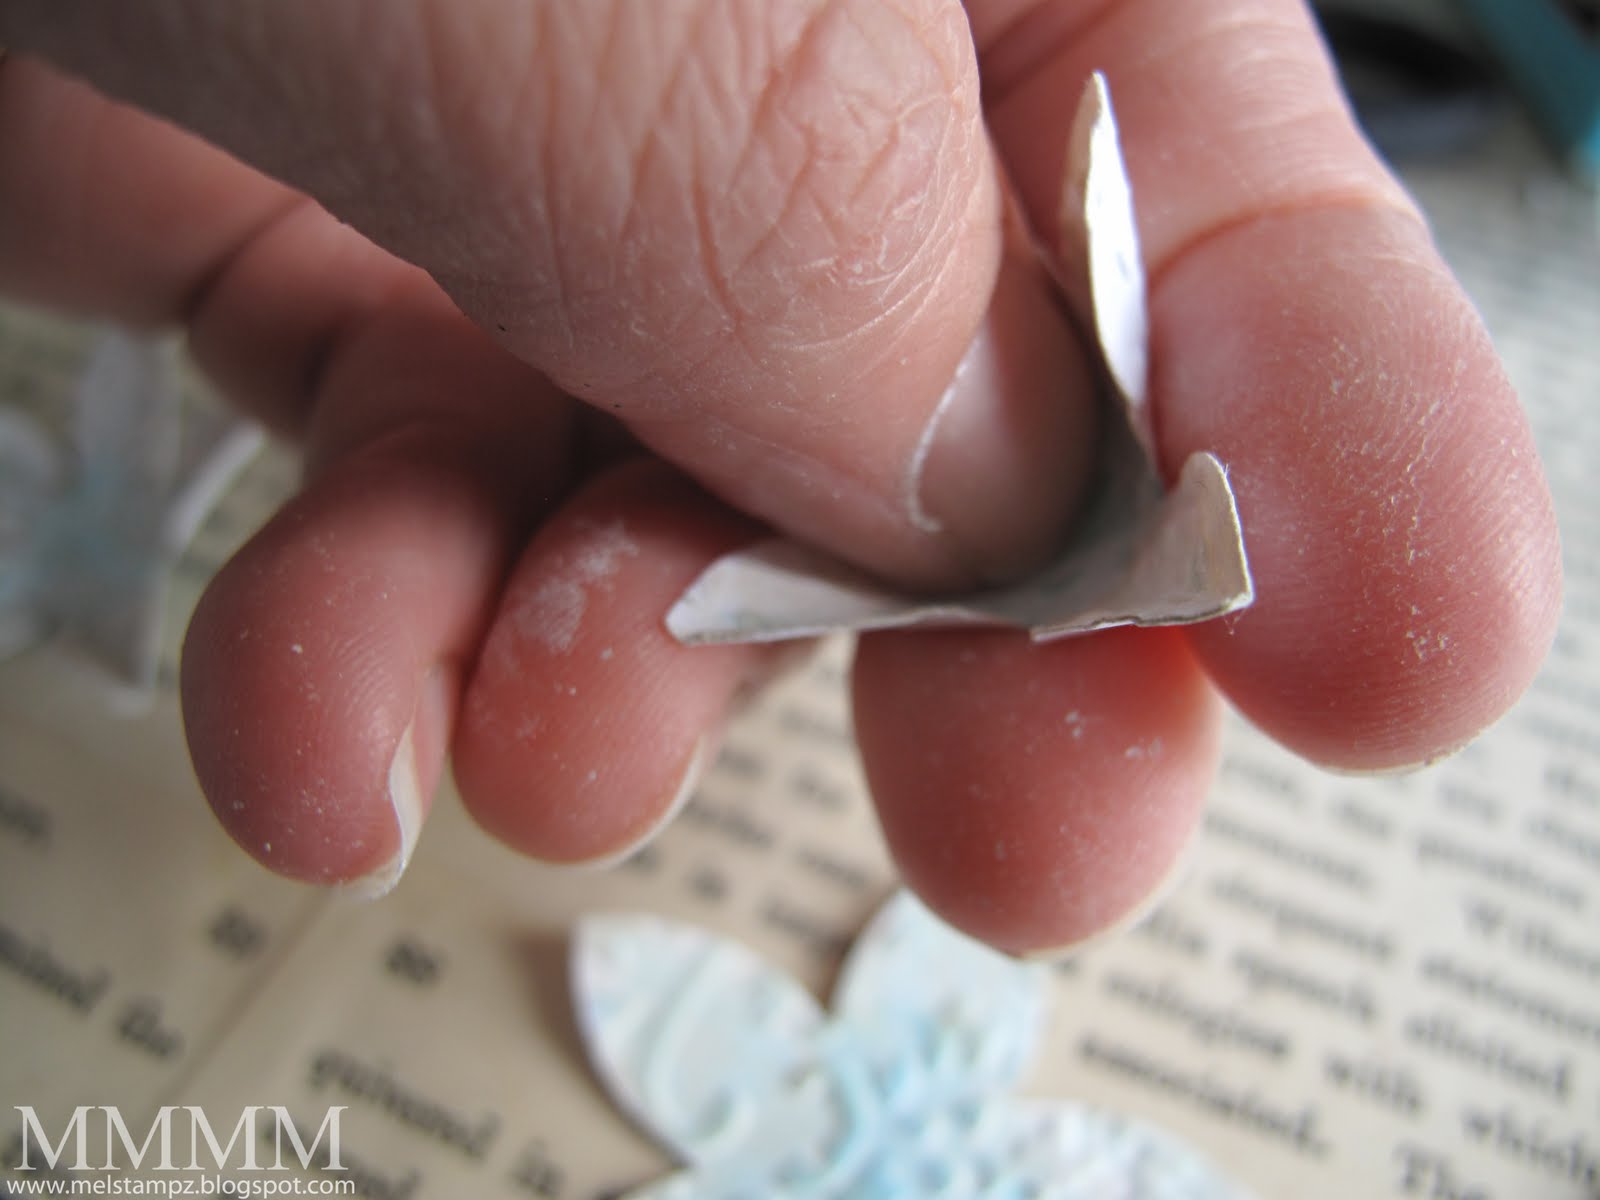
Mold them however you like: the way I see it, the more you work them,
the more distressed & vintage they look...

Sanding one flower at a time:

If you really want to get at the colour under the paint on one particular flower
(or you just want to have a go making only one or two flowers) try holding down
the petals to protect them while you sand a couple at a time--it helps prevent rips.

Save them to colour or alter later
(when you need to use them)
(when you need to use them)
You can set your painted flowers aside & when you need a particular look for
a project, you can colour over them in Copic markers (or
what have you) ...to get them to match a paper colour or something:
a project, you can colour over them in Copic markers (or
what have you) ...to get them to match a paper colour or something:

Please note: Paint can clog the nibs on your Copic markers, my solution to this potential problem is to always use the broad chisel tips of my Copics for things like this, since I don't colour with them often. Then I can play this way with all kinds of things, but not wreck my good brush tips. (I know I've said it before, sorry, but it can't hurt to repeat...since I do strange things with my Copics & don't want to wreck yours on you.) ;O)
...but I really love the colour Copics give over paint:

(This is a Putty YG91 Copic marker over the paint after sanding)
...and then crackle lacquer over the Copic colour brings it out even more:

If you prefer to keep your Copics markers pristine,
here's an alternate way to add more colour:

Inking it up. These were inked with distress ink
(on the distress applicator with a foam pad on it.)

For more texture:
texture A) Double emboss (run it through another different
embossing folder, after you sand to reveal the pattern of the first one,
or use the same folder a couple of times):

texture B) Create a pattern while you're sanding by
using a sanding file or the edge of a sanding block:
embossing folder, after you sand to reveal the pattern of the first one,
or use the same folder a couple of times):

texture B) Create a pattern while you're sanding by
using a sanding file or the edge of a sanding block:

texture C) Scratch lines on with a paper piercing tool:

Bling:
bling A) For shine, you can apply a clear lacquer glue
and crackle or try heat embossing in clear:
and crackle or try heat embossing in clear:

bling B) For shimmer:

You can use Lumiere or add glitter product like Perfect
Pearls or Pearlex to your white paint or Use a glue pen to add
glitter, or simply use a glitter pen.
For more colour, try coloured paint. I wanna try some black paint!
...and that's all she wrote!

Thanks so much for being You!
Hope you have a supercalicraftystampyscrumptious day!


(please click if you'd like to visit the blog
from an email or reader)

Thanks so much for being You!
Hope you have a supercalicraftystampyscrumptious day!
from an email or reader)


0 comments:
Post a Comment