StampznewBright

  • Subscribe to our RSS feed.
  • Twitter
  • StumbleUpon
  • Reddit
  • Facebook
  • Digg
Showing posts with label 'Mouse'-the-cat. Show all posts

Monday, 23 July 2012

Squeak?

Posted on 10:00 by Unknown
Just wanted to say how sorry I am that
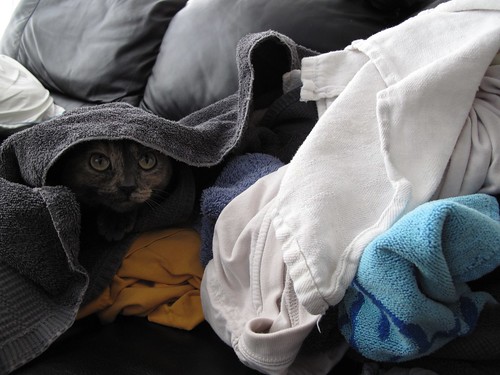
I've been as quiet as a Mouse...

...for so long.


Truth be told, I've been feeling simply broken, and I think
I've just finally admitted to myself that what I thought was the Winter Blues
was really a bad case of chronic depression. (Yup, it's July, hmmph?) ;-)
Not sure why I feel so ashamed to talk about it, since intellectually I know
it's a physical medical condition just like Diabetes or any ailment, but...


So anywho, long story short:
I lost my voice rather completely,
but I'm going to try and get it back starting today!


Much Love,


P.S. Thank you so much for your lovely emails letting me know that Google Reader is sending out blank posts all by itself. I found out that Feedburner is broken as well, and I'll do my best to fix them as soon as I can wrap by migraine-brain around it all.
Read More
Posted in 'Mouse'-the-cat | No comments

Wednesday, 1 February 2012

Hiding away with the Blues

Posted on 00:50 by Unknown
I'm so sorry for being gone so long.
Anyone else feeling those Winter blues?

I've been taking a beating from the relentless migraine-beast
lately (and to be honest) quite a bad case of depression
that has had me feeling extremely tongue-tied in life & online,
so I've been hiding away...

mouse's halloween costume (1)

(I normally have a dash of melancholy in my constitution
but not as much as recently. Winter has really konked
me over the head this year, I tell ya!)

mouse's halloween costume (2) - Copy

But...
And I am working on getting ready to poke
my head out into the world again:

mouse's halloween costume (3)

(and I've been pinning to try &
stay in the creative mindset)


Just wanted to stop in to say sorry for my absence &
Thank You so much for your patience. I hope you have been very
well lately & that your days are filled with creativity and happiness.

much love,


(and love from Mouse too--who is just wonderful and much healthier than
usual, lately ...knock on wood!)
Read More
Posted in 'Mouse'-the-cat | No comments

Friday, 21 October 2011

sorry no posts for a while

Posted on 15:21 by Unknown


Sorry, no posts of late. Our Mouse is doing good. We were so worried about having her fixed, but she's recovering quite nicely. Just a lot of sleepless nights trying to keep her from pulling out the stitches. She can't lift the cone up to walk around because she's so wee. Poor thing. So I have to put it on & off for her to eat etc.

And I feel very safe in saying that I'm not exaggerating when I whinge that I have never been so ill in my life. I think it must be the flu or a bad virus. Feels like both.

Hope You're all doing much better than we are in this zoo ward.

I'm not sure when I'll be able to post next, but I have a whack
of Halloween stuff that I'll be heartbroken not to show Youse,
so hopefully before then...

Happy Crafting,
xox
Read More
Posted in 'Mouse'-the-cat | No comments

Thursday, 22 September 2011

Some creatures can't 'resist' temptation! ;o)

Posted on 03:45 by Unknown
Once upon a time, there was a scary snarfy
little creature lurking in the shadows...


....sniffling & sneaking up on her prey...


...and she couldn't resist devouring it! ;o)


Here's what Miss Mouse has been eating
in her spare time:

Black cat lamp hanging mel stampz
(I guess there's only room for one spooky kitty around here!)

It's a Halloween decoration
("No Duh!" hey?)
It's the size of a standard A2 card: 5-1/2" x 4-1/4" +the border.


There are holes pierced right through it...

005

...so that the light
sparkles through like stars...

pin hole stars

...when you hang it on a lamp:

lamp hanging pin hole stars mel stampz
(I used chain to hang it, so there's no fire hazard
& just stuck the chain over the finial at the top of the lamp shade)

Wish you could see the sparkly star action in person;
it looks much better in real life.


It started out as these pieces:
All the main pieces for black cat lamp hanging

I made this thinger for the Simon Says Stamps
resist challenge at Lily Pad Cards here

and tried to come up with a new resist technique
for the background...

So next post here will be a tutorial on how to go from
this piece of patterned paper:

1) Pressure emboss a piece of patterned paper (or plain cardstock or stamped) in an embossing folder

to this texture:

.

The cat is an image from Claire Keay's Halloween extras.

Claire Keay cat with circle behind Scraped away shimmer paint from cat B4 scored fur texture

I pasted a circle behind it in photoshop & coloured it as a moon
with distress inks (Mustard Seed & Pumice Stone)
then painted over that with shimmer paint.

But the cat got covered in shimmer, which looked awfully schloppy
at first, then turned out to be a happy accident when I scratched off the
paint and made fur texture on him (using a paper piercer):

.

It left some shimmer so it looks like he's kind of sparking in the moonlight.

fur texture -Close
(It's goofy, but I'm obsessed with texture).

The Fence:

The fence was cut free-hand from a digi patterned paper that
I made using Hero Arts Woodgrain digital stamp printed in beige
on Kraft cardstock:

Fence cut from DIY digi patterned paper Hero Arts Woodgrain on Kraft

The fence posts have wavy cuts in them to make them look more spooky:

fence curvy edges

To give them more grainy texture, I score lines in them using a paper piercer
(following the lines of the printed woodgrain).

fence scratched texture

The Mini Banner:

BOO banner

The teeny "BOO" banner was made by:

1) Typing BOO in a word document in red leaving space around them "B O O"
2) Printing it out on watercolour paper.
3) drawing triangles around them in pencil, cutting them out & erasing the pencil.
4) Piercing around the edges & stitching with yellow thread (by hand).
5) Adhering the banner triangles to the fence.
6) Piercing & stitching around them to add the blue bow & banner thread.

The Spider Web Border:

Spider web EK success edge punch

The spider web border at the bottom was made using an EK Success
large spider web edger punch (that was sent to me by the lovely Megan)
Thanks Megan. I love it!

I especially like that the web is wide enough that you could add doodling,
or little spiders in the center like these gem guys:

gem & thread spiders

They are made of thread & black gems, like this...

1) Threading a needle so it has 4 'layers' of thread
2) Piercing two holes in the spider web center
3) Putting the needle through the front so it leaves the thread ends on the front
4) Holding the ends in place & bringing the needle back out front again
5) Adhering the thread at the back & trimming it at the front
6) It should look like 8 legs when you stick gems on
7) Adhere one black gem for the spider body & a smaller one for the head


And That's that!
Hope you're having a lovely day,


Read More
Posted in 'Mouse'-the-cat, Claire-Keay, Cuttlebug, decor, Digital-Images, Halloween, Hero-Arts, techniques, Tutorials | No comments

Friday, 24 June 2011

missing for a little bit...

Posted on 14:56 by Unknown
Whoops! Looks like things are
stacking up around here a bit...


Be back to blogging soon, sorry!

Sick Mouse kitty, messy house, happy garden, icky allergies (seasonal and the ol' allergic to 3 major food groups thing) & the sweet Hubby are all needing a little too much attention!) Life has some nerve, hey!? ;)

I should have a post by early next week.
Thanks for understanding!
:O)
Mel
Read More
Posted in 'Mouse'-the-cat | No comments

Friday, 20 May 2011

Damask Basket with matching box & patterned paper

Posted on 11:25 by Unknown


Been trying to stretch out that vacation feeling, lately
but boy have I've missed you guys!

We had some great family time: a lovely visit on Vancouver Island.
We've gotten some household chores done. (With Charles's bum-knee and
my miscellaneous schtuff sometimes just getting the groceries all
stocked up feels like such a grand accomplishment!) :-D

We've also done a little happy hibernating:


(Our cat, Mouse, in a paper bag, heeheehee)

But since it's been eons since I shared a craft project,
I figured it might be time to come out of hibernation already!
So here's a printable template collection for that
curvaceous basket (now it's all doodled up with damask).

You can find the plain version linked in this older post.


You can find the whole damask set
linked here on flickr

( JPGs loaded to flickr
and links there to the PDFs on acrobat.com)

Click the pics and choose save as to save as a jpg
(or if you prefer, you can click the links before each template if you'd like to
save the page to your flickr faves or find the links to PDFs)

The basket box:


side panels for the basket:


damask patterned paper:
(to make a matching card, if you like)


jewelery box:
(2 and 1/4 inch square
1 and 1/4 inch tall)


Thanks for checkin' this out,

Read More
Posted in 'Mouse'-the-cat, *TEMPLATEs, Freebies | No comments

Thursday, 20 January 2011

Mouse (the cat) reads Murakami...

Posted on 00:34 by Unknown
Miss Mouse has been busy reading!
(And I--the crazy cat lady--have been at it again) ;o)

...

Mouse can often be found with her nose in a book:


One of Mouse's favourite authors is Haruki Murakami. Here she is
engrossed in his novel The Wind Up Bird Chronicle (for obvious reasons):


She will tell you that she is often enthralled and thrilled by
Murakami's mastery of magical realism:


Mouse gets rather grumpy if you interrupt her reading --
especially if you disrupt her enjoyment of the the last pages of a chapter
(or heaven forbid, you marr the end of the novel!):


She also detests it when you ask her stupid questions
about the narrative and will not hesitate to give you "the look":


Mouse has been known to read until she is
so very very sleepy that....


...she can't keep
her eyes open a second longer:


The End

Hope you're having a great week!

Read More
Posted in 'Mouse'-the-cat | No comments

Friday, 31 December 2010

Winter B-day Basket (à la Mo) + a wee CATastrophe

Posted on 00:01 by Unknown
a playful image....

detail bronte wants it now

....printed and embossed on a basket:

Mo's Digital Pencil Bronte Wants it Now basket by mel stampz
(to wrap a winter birthday gift)

...and a little perty on the inside:

Bronte Wants it Now basket INSIDE

The full-view picture of this basket up there is kind of botched,
but I have a good excuse, I swear! ;o) Can you guess what it is?...


teeheeheehee


1...the image
2...how-to add images to a 3D box template
3...in a word, catastrophe
4...free template for a BIG Basket (an oldie)
-1-


Mo's Digital Pencil Bronte Wants it Now
(A flexible image since it's adorable for Christmas or birthdays.)


It was fun to cut the gift stack out digitally and use it as an element
for the tag & inside of the basket too. (Bonus!) ;o)

-2-


Print a digital image on a 3D template
& build this basket

This cheap trick of printing your image at the same time as
you print a 3D template might be a fun way to do several
treat-bags for a child's birthday party. Faster than stamping!


  • Digital image Mo's Digital Pencil Bronte Wants it Now
  • Candido Incandescent cardstock
  • Clear embossing powder, & heat gun
  • Copic Markers
  • BasicGrey snowflake paper (retired)
  • Silver thread
  • Adhesive
  • A crazy cat

Step 1) Add the image to the template file:


1A) Open the digital image of your choice (You could use free clip art or colouring pages. Your own doodle or a child's drawing would be so special for this!)

1B)You could paste the image sized as it is, or you could turn the image into a photoshop brush to have control over the size. (I always like to make sure I label photoshop brushes that are made this way with the artist's name so I can always make sure to follow copyright and give due credit) :o)

Front & back: I used Photoshop, and rotated the image to get it printed right-side-up on the front & back of the basket.


Step 2) Print the image & emboss it, if you like. This Candido Incandescent cardstock from Paper Temptress is embossable straight out of the printer [using clear embossing powder and a heat gun (just print in an inkjet printer (the high quality setting is usually perfect); then, sprinkle the embossing powder quickly when it comes out of the printer & heat set with the heat gun.]


Step 3) Score, and cut out the the basket. The blue lines, in the photo above, indicate the score lines.


Step 4) Print, score, cut & assemble a liner out of patterned paper. (To get a liner, for any box, I just print it again at 98.5%)


Step 5) Colour the image with Copic markers (or whatever you prefer).

If you are using the
Candido Incandescent cardstock from Paper Temptress to emboss, you will want a marker with some permanence, since it is glossy and water-based markers might not set well on it.

Copics
work wonderfully on it, since they float and are very forgiving. (You can even go back and fix colouring "mistakes" days later)

AND the incandescent cardstock gives your
copic colours a pretty sparkle:


(The watercolour paper texture of it is nice too.)


Step 6) Assemble the basket and its bits:

6A) Fold & adhere the basket.

6B) Add the liner to the inside of it.

6C) Create 4 side pieces for the basket (The sides aren't included on the template in order to get a BIG basket in the printer on a 8.5" wide paper, but they're just plain rectangular pieces that are easy to cut).

To make the sides, cut 4 pieces of cardstock to measure:
2 and 6-8 inches by
just a hair under 2 and 1-2 inches


I also added images inside of the basket by using photoshop:


A) Cut the stack of gifts from the image digitally.
B) Make a copy of it reversed for the other side of the basket (inside)
C) Print & cut the 4 ide pieces (2 patterned 2 plain)
D) Attach the 4 side pieces to the basket

(P.S. Can you see the "foreshadowing of imminent catastrophe" in the photo above? HINT: Furry Mouse shadow.... giggle giggle)


Step 7) Make a matching tag:


8A) Print 2 of the gift stack image on more Incandescent cardstock, emboss them, & colour them in.


8B) Adhere the two images to a piece of cardstock (sandwiching silver thread inside to make a string for the tag)

And then, you have a gift basket & tag:


with that cute image on the front & back:


perfect for a little someone to sabotage...


"catastrophe"

Someone
decided to crawl right into this basket:


and she went straight through!:


(no kitties were harmed in the mauling of this basket)

She even got the tag in her mouth & sat in the basket
for a second
; man, I wish I got a shot of that!

Do you think Mouse may have a thing against dogs?:

hehehe

-4-

for a BIG Basket

There's a tutorial with details on how to
assemble the basket template here

and


Please click this link if you'd like to
download the templates

(or click the photos for JPG versions):


I printed this one with no dotted lines right
onto the cardstock & patterned paper for this project:


When finished, the basket measures:
  • width: 6" (at the basket top) and 4 2/8" at the basket bottom
  • height: 2 6/8" (for the basket height) and (7" high, with the handle)
  • depth: 2 1/2" (from basket front to basket back)
To make sides cut 4 pieces to measure:
2 and 6-8 inches by
just a hair under 2 and 1-2 inches


Thanks for visiting!


P.S. Thank you so much for your kind well wishing,
C is still in relative agony but healing more & more each day!

P.P.S. This post is unsolicited, but I was formerly on the
design team for Mo's Digital Pencil & Paper Temptress, two fabulous ladies!
Read More
Posted in 'Mouse'-the-cat, *TEMPLATEs, 3D-projects, cheap-tricks, Freebies, Mo's-Digital-Pencil, Paper-Temptress | No comments
Older Posts Home
Subscribe to: Comments (Atom)

Popular Posts

  • free Butterfly Silhouette .studio cut files (in 3 styles)
    Hi, All! Here are those butterfly Silhouette .studio cut files. They are for only for the Silhouette machine... But I do hope to share other...
  • Flying by to say ... 'hello'
    Do you shop for stamps often? I don't have a huge crafting budget, but every once in a while I find some images that call out "you ...
  • a Silhouette Challenge project
    This might look like a card in the photo, but...   ... it's actually a collage on a wooden canvas  to hang on the wall (or give as a gif...
  • Silhouette Cameo - Sketch pen Camera card
    Happy Happy Independence Day, to my American Friends! (and happy belated Canada Day to my fellow Canadians!) So, have those of you with Silh...
  • over 100 free pattern overlays ... at a glance
    Would you believe that the free overlay total is at 139 overlays and counting? (I might have a wee little addiction) ;-) Since overlays can ...
  • Graphics Fairy Inspiration (+vintage printables)
    Thank You all so much for your wonderful comments about the papers I've been obsessed with. Your kind words make me grin so big that I g...
  • Circle Overlays (to revamp your papers!)
    Can you ever have too many ways to use your stash? No card today, just popping in with a cheap trick for revamping your "old" pat...
  • New Popcorn Box template set (pretty stamp room storage) :o)
    Are you in the mood for a template or two? I was going to wait until I had really good photos and a full pictorial, but then I would take fo...
  • "Honey, I shrunk the stationery!" (Hero Arts typewriter notebook)
    Still trying to make more of my cards into little gifts. This Hero Arts typewriter card is another take on the card turned refillable notebo...
  • Everything I've Ever Made (at a glance)
    This post is a visual overview of my blog history-- with thumbnails that are linked to tutorials & templates for pretty much everything ...

Categories

  • 'Mouse'-the-cat (10)
  • *TEMPLATEs (98)
  • 3D-projects (144)
  • A-Day-For-Daisies (7)
  • Amber Ink (9)
  • Angel's-Landing (2)
  • BASICS (47)
  • Blogging-tips (7)
  • Caardvarks (48)
  • Cat's-Pajamas (2)
  • cheap-tricks (224)
  • Christmas (33)
  • Claire-Keay (2)
  • Cricut (3)
  • cut-file (2)
  • Cuttlebug (45)
  • decor (6)
  • Digital-Images (131)
  • Distress-Inks-etc (14)
  • DIYstamps (1)
  • Eat-Cake-Graphics (11)
  • Faves (207)
  • Fred-She-Said (5)
  • Freebies (77)
  • GESSO (9)
  • Halloween (10)
  • Heather Ellis (3)
  • Hero-Arts (14)
  • ISC (7)
  • Jessica-Sprague (2)
  • Just-Rite (2)
  • LPS (63)
  • Mo's-Digital-Pencil (16)
  • My-Favorite-Things (33)
  • organizing (7)
  • Other-People's-Tutorials (36)
  • Paper-Garden-Projects (54)
  • Paper-Temptress (39)
  • Punches (21)
  • Purple-Onion-Designs (23)
  • S.U. (1)
  • SCOR-PAL (4)
  • silhouette (4)
  • Skipping-Stones-Design (7)
  • Squigglefly (6)
  • SRM-Stickers (8)
  • techniques (191)
  • templates (26)
  • Tiffany-Doodles (4)
  • Tutorials (252)

Blog Archive

  • ▼  2013 (16)
    • ▼  July (4)
      • A Triple-stamped Fancy-cut Flower card
      • Flying by to say ... 'hello'
      • a Silhouette Challenge project
      • Silhouette Cameo - Sketch pen Camera card
    • ►  June (4)
    • ►  May (3)
    • ►  April (1)
    • ►  March (1)
    • ►  February (3)
  • ►  2012 (53)
    • ►  December (2)
    • ►  November (2)
    • ►  October (1)
    • ►  August (3)
    • ►  July (2)
    • ►  June (5)
    • ►  May (7)
    • ►  April (8)
    • ►  March (9)
    • ►  February (13)
    • ►  January (1)
  • ►  2011 (74)
    • ►  December (1)
    • ►  November (5)
    • ►  October (10)
    • ►  September (9)
    • ►  August (12)
    • ►  July (5)
    • ►  June (9)
    • ►  May (2)
    • ►  April (6)
    • ►  March (7)
    • ►  February (4)
    • ►  January (4)
  • ►  2010 (84)
    • ►  December (7)
    • ►  October (1)
    • ►  September (6)
    • ►  August (1)
    • ►  June (1)
    • ►  May (7)
    • ►  April (21)
    • ►  March (3)
    • ►  February (17)
    • ►  January (20)
  • ►  2009 (234)
    • ►  December (16)
    • ►  November (21)
    • ►  October (11)
    • ►  September (23)
    • ►  August (29)
    • ►  July (26)
    • ►  June (10)
    • ►  May (16)
    • ►  April (26)
    • ►  March (22)
    • ►  February (27)
    • ►  January (7)
  • ►  2008 (39)
    • ►  December (14)
    • ►  November (25)
Powered by Blogger.

About Me

Unknown
View my complete profile