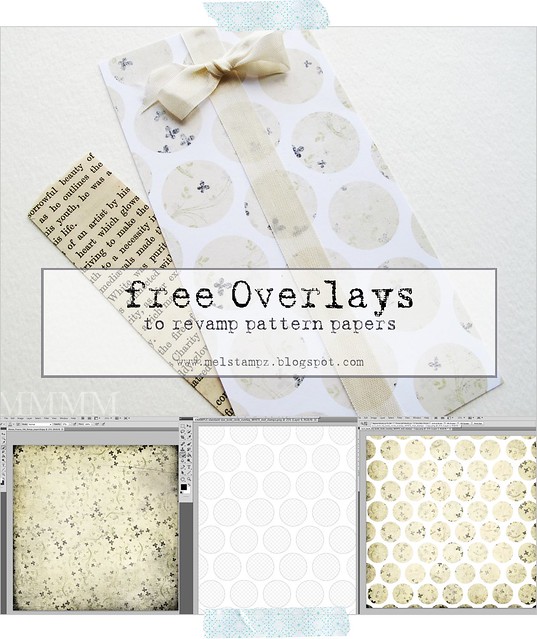
No card today, just popping in with a cheap trick for
revamping your "old" patterned papers
using some overlay freebies I've made that you can
quickly drag and drop using Photoshop
or simply print out.
Go from this...

revamping your "old" patterned papers
using some overlay freebies I've made that you can
quickly drag and drop using Photoshop
or simply print out.
Go from this...

Here's a closer look at the bold circles
that the white overlay makes:
that the white overlay makes:
(The digital paper used to make the paper above is from
Old Things Papers By Vinnie Pearce from Two Peas in a Bucket)
Old Things Papers By Vinnie Pearce from Two Peas in a Bucket)
This post focuses on a stash-busting idea for your digital papers.
Don't do digital?
If you want this look...
(and you are okay with using up some black printer ink)...
you could print the black circle overlay
over top of store-bought patterned papers instead of digital ones.
Don't do digital?
If you want this look...
(and you are okay with using up some black printer ink)...
you could print the black circle overlay
over top of store-bought patterned papers instead of digital ones.

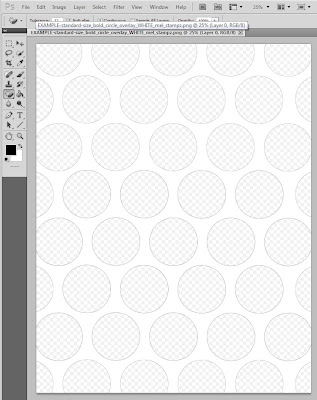
I like working with the PNG files in Photoshop,
since that keeps the transparency of the overlay:

(The checkered grey pattern indicates the transparent areas where your patterns will show as circles or whatever shape the overlay has as the transparent portion. Your "gamut" which is the technical name for the background showing through, may be set at another colour so it might look different than this.)
However, there are also JPEGs & PDFs
in case you prefer working with them.

Circle Overlays in black:
12.5 inch square
(300 dpi)

Click these links for the best download quality:
Download the PNG here (acrobat)
or
Download the PDF here (acrobat)
the JPEG here (acrobat)
JPG (Flickr)

standard size
8-1/2 x 11 inches (300 dpi)

Click these links for the best download quality:
Download the PNG here (acrobat)
or
Download the PDF here (acrobat)
the JPEG here (acrobat)
JPG (Flickr)

Circle Overlays in WHITE:
12.5 inch square
(300 dpi)

Click these links for the best download quality:
Download the PNG here (acrobat)
or
Download the PDF here (acrobat)
the JPEG here (acrobat)
JPG (Flickr)

standard size
8-1/2 x 11 inches (300 dpi)

Click these links for the best download quality:
Download the PNG here (acrobat)
or
Download the PDF here (acrobat)
the JPEG here (acrobat)
JPG (Flickr)

Please note: the white overlay images above are just an example
not the actual file. The circles do not have such pronounced
black outlines in the actual downloads.
12.5 inch square
(300 dpi)

Click these links for the best download quality:
Download the PNG here (acrobat)
or
Download the PDF here (acrobat)
the JPEG here (acrobat)
JPG (Flickr)

standard size
8-1/2 x 11 inches (300 dpi)

Click these links for the best download quality:
Download the PNG here (acrobat)
or
Download the PDF here (acrobat)
the JPEG here (acrobat)
JPG (Flickr)

Circle Overlays in WHITE:
12.5 inch square
(300 dpi)

Click these links for the best download quality:
Download the PNG here (acrobat)
or
Download the PDF here (acrobat)
the JPEG here (acrobat)
JPG (Flickr)

standard size
8-1/2 x 11 inches (300 dpi)

Click these links for the best download quality:
Download the PNG here (acrobat)
or
Download the PDF here (acrobat)
the JPEG here (acrobat)
JPG (Flickr)

Please note: the white overlay images above are just an example
not the actual file. The circles do not have such pronounced
black outlines in the actual downloads.
...use these five different ways:
Basic ways to use the overlay:
#1 Use the black ones as is: just print & use for dotted paper (or use them digitally as is for background on digital scrapbook pages).
#2 Fill the white overlay area (the space around the circles) with any custom colour and save it.
#3 ...Or fill the white overlay area with any custom pattern.
#4 The Drag & Drop method: A speedy way to make a custom paper with circles of a single pattern:
It takes only a couple of minutes to make the paper & print:
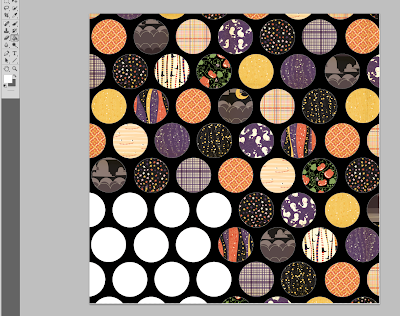
Step 1) Copy the patterned paper file that has the pattern you want to make the circles out of.
Step 2) Drag & Drop the circle overlay PNG file onto the patterned paper.
Step 3) Right click & select "place" (or choose it when prompted to).
Step 4) Use the Move Tool to center the overlay.
Step 5) Save as a copy and print it out, or use it digitally.
(The screenshot above shows the overlay as I was moving
it into position in step 3)
A fancy custom way to use the overlays
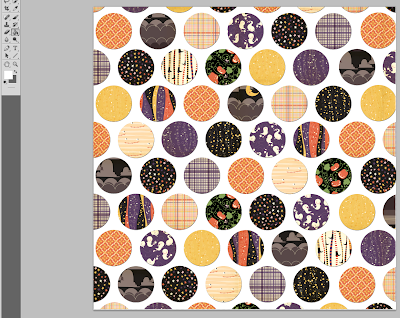
#5 The Fill with Pattern method: Make a custom paper with different circles
that feature a variety of patterns:
that feature a variety of patterns:

(This paper was made with the black circle overlay & Cosmo Cricket's
digital paper pack Matilda & Printed on 140lb watercolour paper)
Fill each individual circle with a different pattern.
This takes a little bit of time, but you end
up creating something one of a kind.
It's a fun way to show off all
of the different papers in digital packs
or use colours/patterns you might normally shy away from.
You can even change it up each time you use it by printing it on
different types of paper.
Here's how to make multi-pattern circles
using these overlays:

Step 1) Open the circle overlay PNG file in Photoshop or the program of your choice.

Step 2) Fill each circle with a different pattern. Turn your digital papers into patterns (using edit and define pattern). Then hover over each circle with the paint bucket tool (set to pattern instead of foreground) and click to fill each circle.
For a complete pictorial on how to create your own custom patterns
in Photoshop and how to use them to fill things, please visit this post:
Step 3) Save a copy & print it out, or use it digitally.
Here are some examples of variations on the paper above.
You can change the colour of the overlay area after you fill in the patterns to get different looks in a hurry:

Once I had created the black version, I decided I wanted a white one,
so I just filled the black area with white to make the lighter version above.
You can even change the colours after making the patterns:

This version was made by taking the white one, inverting it in Photoshop (image - adjustments - invert); then, changing the colour (sliding the yellow scale all the way to the left).
No resale of these as digital files, of any kind, please.
Please feel free to share any digital papers that you make with these,
as long as they are shared for free. Link this post, pretty please. :o)
You can also sell any crafts you make using these,
(provided that they are handmade items). Thanks!
as long as they are shared for free. Link this post, pretty please. :o)
You can also sell any crafts you make using these,
(provided that they are handmade items). Thanks!
Hope these tickle your fancy!

P.S. Mouse is doing so fabulously you wouldn't even believe it! And all our snugglin' is helping me get better too. Thank You ever so much for being the finest blog buddies in the Universe.
P.P.S. Photo dressing thanks to Pugly Pixel tape (re-coloured) from here


0 comments:
Post a Comment