StampznewBright

  • Subscribe to our RSS feed.
  • Twitter
  • StumbleUpon
  • Reddit
  • Facebook
  • Digg
Showing posts with label decor. Show all posts

Thursday, 22 September 2011

Some creatures can't 'resist' temptation! ;o)

Posted on 03:45 by Unknown
Once upon a time, there was a scary snarfy
little creature lurking in the shadows...


....sniffling & sneaking up on her prey...


...and she couldn't resist devouring it! ;o)


Here's what Miss Mouse has been eating
in her spare time:

Black cat lamp hanging mel stampz
(I guess there's only room for one spooky kitty around here!)

It's a Halloween decoration
("No Duh!" hey?)
It's the size of a standard A2 card: 5-1/2" x 4-1/4" +the border.


There are holes pierced right through it...

005

...so that the light
sparkles through like stars...

pin hole stars

...when you hang it on a lamp:

lamp hanging pin hole stars mel stampz
(I used chain to hang it, so there's no fire hazard
& just stuck the chain over the finial at the top of the lamp shade)

Wish you could see the sparkly star action in person;
it looks much better in real life.


It started out as these pieces:
All the main pieces for black cat lamp hanging

I made this thinger for the Simon Says Stamps
resist challenge at Lily Pad Cards here

and tried to come up with a new resist technique
for the background...

So next post here will be a tutorial on how to go from
this piece of patterned paper:

1) Pressure emboss a piece of patterned paper (or plain cardstock or stamped) in an embossing folder

to this texture:

.

The cat is an image from Claire Keay's Halloween extras.

Claire Keay cat with circle behind Scraped away shimmer paint from cat B4 scored fur texture

I pasted a circle behind it in photoshop & coloured it as a moon
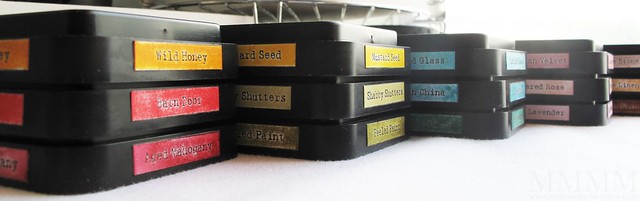
with distress inks (Mustard Seed & Pumice Stone)
then painted over that with shimmer paint.

But the cat got covered in shimmer, which looked awfully schloppy
at first, then turned out to be a happy accident when I scratched off the
paint and made fur texture on him (using a paper piercer):

.

It left some shimmer so it looks like he's kind of sparking in the moonlight.

fur texture -Close
(It's goofy, but I'm obsessed with texture).

The Fence:

The fence was cut free-hand from a digi patterned paper that
I made using Hero Arts Woodgrain digital stamp printed in beige
on Kraft cardstock:

Fence cut from DIY digi patterned paper Hero Arts Woodgrain on Kraft

The fence posts have wavy cuts in them to make them look more spooky:

fence curvy edges

To give them more grainy texture, I score lines in them using a paper piercer
(following the lines of the printed woodgrain).

fence scratched texture

The Mini Banner:

BOO banner

The teeny "BOO" banner was made by:

1) Typing BOO in a word document in red leaving space around them "B O O"
2) Printing it out on watercolour paper.
3) drawing triangles around them in pencil, cutting them out & erasing the pencil.
4) Piercing around the edges & stitching with yellow thread (by hand).
5) Adhering the banner triangles to the fence.
6) Piercing & stitching around them to add the blue bow & banner thread.

The Spider Web Border:

Spider web EK success edge punch

The spider web border at the bottom was made using an EK Success
large spider web edger punch (that was sent to me by the lovely Megan)
Thanks Megan. I love it!

I especially like that the web is wide enough that you could add doodling,
or little spiders in the center like these gem guys:

gem & thread spiders

They are made of thread & black gems, like this...

1) Threading a needle so it has 4 'layers' of thread
2) Piercing two holes in the spider web center
3) Putting the needle through the front so it leaves the thread ends on the front
4) Holding the ends in place & bringing the needle back out front again
5) Adhering the thread at the back & trimming it at the front
6) It should look like 8 legs when you stick gems on
7) Adhere one black gem for the spider body & a smaller one for the head


And That's that!
Hope you're having a lovely day,


Read More
Posted in 'Mouse'-the-cat, Claire-Keay, Cuttlebug, decor, Digital-Images, Halloween, Hero-Arts, techniques, Tutorials | No comments

Wednesday, 17 August 2011

Want to buy this project? Stamp out cancer Auction (secret box canvas)

Posted on 03:00 by Unknown
So I have an evil plan, for a good cause:

breast cancer fundraising.


I'm going to try and entice you guys to buy this thinger

by adding elements to it bit by bit,

and by customizing it to your taste as much as I can.


Today is day 3 of Skipping Stones Design's

second annual Blogs 4 Boobies fundraiser

And it's a series of auctions!


my piece up for auction looks like a card in this photo...


SSD blogs 4 boobies wooden canvas box


...but it's actually a canvas on wood

(renewable resource archival-quality wooden canvas)


SSD b4b stitched embossing squares


It measures 6 inches by 6 inches

and is decorated with:

  • Gesso,
  • Watercolour paper,
  • Heat-embossed vellum
  • Canvas,
  • Hand stitching
  • and heat-embossed pieces on all 4 sides.


I made little wee embossed flowers for it

(from the Stampin' Up Birds & Blooms die).

They have paint-distressed snaps in the centers...


SSD b4b detail


...but left it customizable,

so what would YOU

like to see on this?
:


white on white SSD b4b box


I'll be making a couple different flower options and

sending them to the winner...

....so if that's you, then

you can choose which flowers you like best

and keep the rest to switch out for a new look to the canvas,

or use however you like.


If you don't like flowers, then

you can put whatever you'd like on it. :o)


If you'd like this wooden canvas

to come live at your house,


You can bid on it in the comments

-just say how much you'd like to donate, and be sure to

leave your email (or send it to me at melstampz@gmail.com)

pretty please.


The bidding ends on the 23rd, so until then

I'll keep adding details to this project to try to entice you. :o)


&


Please check out all of the great

projects for auction on Day 1 & 2


(linked up here)! (You can read the "rules" there as well)


Please visit these talented ladies

who are also auctioning cards off today:


Skipping Stones Design blog (all 3 days' designers are there)

You can bid on all 3 days worth of projects until Aug. 23rd!

  • Rae Ann Barthel
  • Karen Baker
  • Pam Hornschu
  • Jennifer Ingle
  • Ria Johnson
  • Stephanie Mino
  • Kandi Phillips
  • Wendy Price
  • Julia Stainton
  • Taylor Usry


Don't forget you can help just by shopping, too.


This project uses these two of my ultra fave stamp sets

from Skipping Stones Design:


Timeless Textures and Grunge sets:


I know my family is far from being the only one to be

fighting cancer in its different forms,

so thank you in advance for helping however you can!


Please spread the word & please remember

to get screening for early detection,


P.S. This wooden canvas has a secret box compartment hidden

in the back too. (I'll reveal photos of that soon.) :o)
Read More
Posted in decor, Skipping-Stones-Design | No comments

Thursday, 7 April 2011

Craft Room pictures & Organizing Distress inks

Posted on 20:45 by Unknown
Many of you have been kind enough to wonder over the years what my space looks like. I can never seem to manage photos of the whole thing, so instead I thought I'd share it piecemeal. This little corner is a fave--one that gives you a little peek at my reformation from complete slob to relative neatnik:

It used to look (shamefully) like this:............But lately it looks (mostly) like this:

versus
------Mess.....................................versus.........................................Bliss

Do you find crafty cleaning to be a guilty pleasure?

For the last year or so (since we moved) I've been putting more time, bit by bit, into the space and have almost stopped feeling guilt over that. (I've always felt like I should be crafting & blogging tutorials or doing general house-keeping instead of prettifying my craft studio, but having a clean space feels oh so NICE!)

The lay of the land:

The space is about 8 foot by 9 foot. It's the master bedroom of our 700 sq foot condo (she says with a guilty snicker of happiness). The furnishings were done on the cheap [using pieces we already had: 99% mismatched Ikea beaver-puke (particleboard) pieces] ;o). And it's a blissful thing to have "a room of one's own!"

I thought I'd include a pictorial here of one of the little projects that has added to the organized bliss: ink labels...

distress ink tops

My Sweetheart spoiled me with 8 new Distress inks and other goodies for ye olde upcoming birthday. (He keeps teasing me about almost being 40 and calls me "OLD." Can you imagine!?! I'm a spring chicken! :O) His thoughtfulness makes up for his sassy nerve, though.)

Don't crafty gifts make getting older a little bit easier? I never shop anymore except on holidays, so it's an extra big thrill. (I will love these inks that much more: talk to them, feed them and water them, give them goofy nicknames, pet them! teeheehee). Thanks, Honey!


1...pictorial for making distress ink labels
2...a break down of my craft studio corner: "colour shelf"
3...some ideas for curtains: 2 kinds for a creative closet
4...pencil sharpener storage idea


(love up your inks)
make Distress ink labels:

Distress ink Labels CLOSE mel stampz


  • inks you want to label
  • paper (i love Paris Bleedproof)
  • computer & ink jet printer
  • clear embossing powder & heat gun
  • strong double-sided tape
  • wax paper or acetate (or something similar)
  • water & a rag
  • Microglaze or other sealer


Step 1} Make Do It Yourself label "stickers":

A) Print the labels with ink names. I wanted four of each name so that all sides of the ink pad are labeled, that way I can just shove them back on the shelf willy-nilly.

For labels that won't smudge: heat-emboss label names onto paris bleedproof paper (using an inkjet printer or print on a lazer printer if you have it.

B) Cut the labels and adhere them to wax paper with strong double-sided tape.

C) Adhere the label "stickers" to a piece of wax paper temporarily to make them easy to ink & work with.

Hopefully you can see why I like the paris bleedproof paper in this photo
(it let's you heat emboss the printer ink!)
(You can read more about that digital embossing technique here if you like).


Can you see how the letters are slightly raised? That's clear embossing powder & it means no smearing when you ink it up:


Step 2}
Ink the labels. I applied the matching distress ink colours direct to paper and then blended with a little water.


Step 3}
Seal the labels so they will stay nice & clean and not absorb other colours of ink when you work. I used Judikin's Microglaze. It's got a nice waxy quality that makes it a good waterproofer. I rubbed off the excess with a rag. Alternatively, you could use mod podge, gel medium, or another clear sealer. Just be sure not to stick the labels permanently to the wax paper, of course. ;o)

and there you have it...


Custom ink labels.

Step 4} Then simply stick them on the ink pads (all four sides):

distress ink sides

...and here's the shelf where they live,
with their close neighbours the other inks
(sorted into rainbow-ness):

distress ink labels shelf

They are all on old shelves (20 bucks a piece back in the day).
I wasn't worried about damaging the shelves, so the
scissors hang on push pins that are stuck everywhere to
hang things from. It's so nice to have everything within easy reach.

The shelves are conveniently located at the left of my main work desk:

studio work desk colour & media shelf

They are actually along the inside of the closet
(I needed the space, so I took the doors off)


(for 2 curtain layers in a closet)

One convenient thing is that I put up a curtain rod,
high up in side the closet, so that it can all
be closed off for a more clean look.

Hopefully this picture also gives you a better idea of
how the desk is arranged in the closet area:

studio curtain drawn

(The desk is stuck into the closet so that part of it is
tucked away against those shelves
& the curtains hide the shelf of hoard-y goodness.
It's a beveled glass piece from an old broken Ikea coffee table
on top of a junky drafting table hidden with a vintage table cloth.
Working on glass is a joy, since it cleans up ever so easily.)

The other gray shelf there blocks a big bright window
which may seem crazy but is actually a good thing since it not only
increases storage, it also affords a little privacy from
my hundreds of neighbours who are in the condos right out there.
You can see into peoples' places across the way alarmingly clearly.
(Translation: secretly stamping in my pajamas!)

There are extra sneaky curtain clips left empty between
the ones that are holding those white curtains:


Why? The spare clips make it so that I can quickly clip up a
painter's drop sheet that will serve to protect the clean curtains
when I get to painting large canvases etc. (Eventually!)

Here are some other things that live on the shelves:

craft studio work desk colour & media shelf

And this is another one of those little random organizing
things that makes me strangely happy.

A pencil sharpener & shavings holder:

pencil sharpener & shavings tray (antique bottle lid)

It's a little tray that fits in the palm of your hand
(but really it's a lid from an antique bell jar)
It makes for a great thingamabobber to sharpen pencils in.
Works to catch the shavings for dumping in the garbage bin later.
It's glass, so it has a lovely heft to it, but any little container would do.

What's your organizing style?

Things work better, I find, if I plan for my style of organizing (slightly lazy with a chance of intermittent cleaning sprees. Kind of like the weather. In other words, I often save my cleaning for a rainy day--As you know, it used to be that I saved it for a blue moon!) ;o)


Well, thanks for letting me ramble!
Hope you are feeling wonderful.
Read More
Posted in BASICS, cheap-tricks, decor, Distress-Inks-etc, organizing, Tutorials | No comments
Older Posts Home
Subscribe to: Comments (Atom)

Popular Posts

  • free Butterfly Silhouette .studio cut files (in 3 styles)
    Hi, All! Here are those butterfly Silhouette .studio cut files. They are for only for the Silhouette machine... But I do hope to share other...
  • Flying by to say ... 'hello'
    Do you shop for stamps often? I don't have a huge crafting budget, but every once in a while I find some images that call out "you ...
  • a Silhouette Challenge project
    This might look like a card in the photo, but...   ... it's actually a collage on a wooden canvas  to hang on the wall (or give as a gif...
  • Silhouette Cameo - Sketch pen Camera card
    Happy Happy Independence Day, to my American Friends! (and happy belated Canada Day to my fellow Canadians!) So, have those of you with Silh...
  • over 100 free pattern overlays ... at a glance
    Would you believe that the free overlay total is at 139 overlays and counting? (I might have a wee little addiction) ;-) Since overlays can ...
  • Graphics Fairy Inspiration (+vintage printables)
    Thank You all so much for your wonderful comments about the papers I've been obsessed with. Your kind words make me grin so big that I g...
  • Circle Overlays (to revamp your papers!)
    Can you ever have too many ways to use your stash? No card today, just popping in with a cheap trick for revamping your "old" pat...
  • New Popcorn Box template set (pretty stamp room storage) :o)
    Are you in the mood for a template or two? I was going to wait until I had really good photos and a full pictorial, but then I would take fo...
  • "Honey, I shrunk the stationery!" (Hero Arts typewriter notebook)
    Still trying to make more of my cards into little gifts. This Hero Arts typewriter card is another take on the card turned refillable notebo...
  • Everything I've Ever Made (at a glance)
    This post is a visual overview of my blog history-- with thumbnails that are linked to tutorials & templates for pretty much everything ...

Categories

  • 'Mouse'-the-cat (10)
  • *TEMPLATEs (98)
  • 3D-projects (144)
  • A-Day-For-Daisies (7)
  • Amber Ink (9)
  • Angel's-Landing (2)
  • BASICS (47)
  • Blogging-tips (7)
  • Caardvarks (48)
  • Cat's-Pajamas (2)
  • cheap-tricks (224)
  • Christmas (33)
  • Claire-Keay (2)
  • Cricut (3)
  • cut-file (2)
  • Cuttlebug (45)
  • decor (6)
  • Digital-Images (131)
  • Distress-Inks-etc (14)
  • DIYstamps (1)
  • Eat-Cake-Graphics (11)
  • Faves (207)
  • Fred-She-Said (5)
  • Freebies (77)
  • GESSO (9)
  • Halloween (10)
  • Heather Ellis (3)
  • Hero-Arts (14)
  • ISC (7)
  • Jessica-Sprague (2)
  • Just-Rite (2)
  • LPS (63)
  • Mo's-Digital-Pencil (16)
  • My-Favorite-Things (33)
  • organizing (7)
  • Other-People's-Tutorials (36)
  • Paper-Garden-Projects (54)
  • Paper-Temptress (39)
  • Punches (21)
  • Purple-Onion-Designs (23)
  • S.U. (1)
  • SCOR-PAL (4)
  • silhouette (4)
  • Skipping-Stones-Design (7)
  • Squigglefly (6)
  • SRM-Stickers (8)
  • techniques (191)
  • templates (26)
  • Tiffany-Doodles (4)
  • Tutorials (252)

Blog Archive

  • ▼  2013 (16)
    • ▼  July (4)
      • A Triple-stamped Fancy-cut Flower card
      • Flying by to say ... 'hello'
      • a Silhouette Challenge project
      • Silhouette Cameo - Sketch pen Camera card
    • ►  June (4)
    • ►  May (3)
    • ►  April (1)
    • ►  March (1)
    • ►  February (3)
  • ►  2012 (53)
    • ►  December (2)
    • ►  November (2)
    • ►  October (1)
    • ►  August (3)
    • ►  July (2)
    • ►  June (5)
    • ►  May (7)
    • ►  April (8)
    • ►  March (9)
    • ►  February (13)
    • ►  January (1)
  • ►  2011 (74)
    • ►  December (1)
    • ►  November (5)
    • ►  October (10)
    • ►  September (9)
    • ►  August (12)
    • ►  July (5)
    • ►  June (9)
    • ►  May (2)
    • ►  April (6)
    • ►  March (7)
    • ►  February (4)
    • ►  January (4)
  • ►  2010 (84)
    • ►  December (7)
    • ►  October (1)
    • ►  September (6)
    • ►  August (1)
    • ►  June (1)
    • ►  May (7)
    • ►  April (21)
    • ►  March (3)
    • ►  February (17)
    • ►  January (20)
  • ►  2009 (234)
    • ►  December (16)
    • ►  November (21)
    • ►  October (11)
    • ►  September (23)
    • ►  August (29)
    • ►  July (26)
    • ►  June (10)
    • ►  May (16)
    • ►  April (26)
    • ►  March (22)
    • ►  February (27)
    • ►  January (7)
  • ►  2008 (39)
    • ►  December (14)
    • ►  November (25)
Powered by Blogger.

About Me

Unknown
View my complete profile