


a playful image....
....printed and embossed on a basket:

(to wrap a winter birthday gift)
...and a little perty on the inside:

The full-view picture of this basket up there is kind of botched,
but I have a good excuse, I swear! ;o) Can you guess what it is?...
but I have a good excuse, I swear! ;o) Can you guess what it is?...

teeheeheehee

1...the image
2...how-to add images to a 3D box template
3...in a word, catastrophe
4...free template for a BIG Basket (an oldie)
-1-

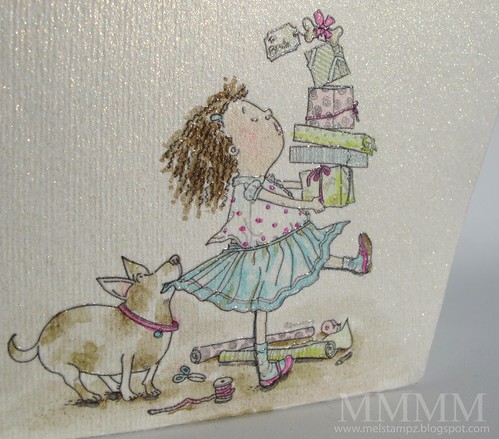
Mo's Digital Pencil Bronte Wants it Now
(A flexible image since it's adorable for Christmas or birthdays.)
It was fun to cut the gift stack out digitally and use it as an element
for the tag & inside of the basket too. (Bonus!) ;o)
(A flexible image since it's adorable for Christmas or birthdays.)
It was fun to cut the gift stack out digitally and use it as an element
for the tag & inside of the basket too. (Bonus!) ;o)
-2-

Print a digital image on a 3D template
& build this basket
This cheap trick of printing your image at the same time as
you print a 3D template might be a fun way to do several
treat-bags for a child's birthday party. Faster than stamping!
& build this basket
This cheap trick of printing your image at the same time as
you print a 3D template might be a fun way to do several
treat-bags for a child's birthday party. Faster than stamping!

- Digital image Mo's Digital Pencil Bronte Wants it Now
- Candido Incandescent cardstock
- Clear embossing powder, & heat gun
- Copic Markers
- BasicGrey snowflake paper (retired)
- Silver thread
- Adhesive
- A crazy cat
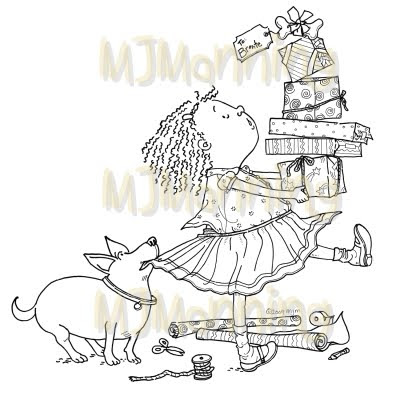
Step 1) Add the image to the template file:
1A) Open the digital image of your choice (You could use free clip art or colouring pages. Your own doodle or a child's drawing would be so special for this!)
1B)You could paste the image sized as it is, or you could turn the image into a photoshop brush to have control over the size. (I always like to make sure I label photoshop brushes that are made this way with the artist's name so I can always make sure to follow copyright and give due credit) :o)
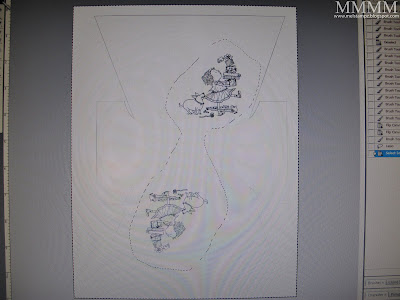
Front & back: I used Photoshop, and rotated the image to get it printed right-side-up on the front & back of the basket.


8A) Print 2 of the gift stack image on more Incandescent cardstock, emboss them, & colour them in.
8B) Adhere the two images to a piece of cardstock (sandwiching silver thread inside to make a string for the tag)

"catastrophe"
Someone decided to crawl right into this basket:

and she went straight through!:

(no kitties were harmed in the mauling of this basket)
1A) Open the digital image of your choice (You could use free clip art or colouring pages. Your own doodle or a child's drawing would be so special for this!)
1B)You could paste the image sized as it is, or you could turn the image into a photoshop brush to have control over the size. (I always like to make sure I label photoshop brushes that are made this way with the artist's name so I can always make sure to follow copyright and give due credit) :o)
Front & back: I used Photoshop, and rotated the image to get it printed right-side-up on the front & back of the basket.

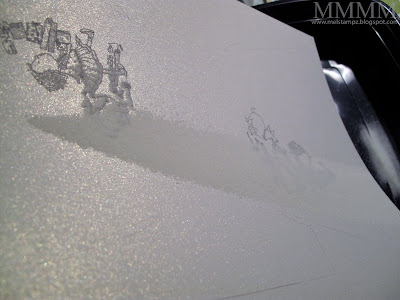
Step 2) Print the image & emboss it, if you like. This Candido Incandescent cardstock from Paper Temptress is embossable straight out of the printer [using clear embossing powder and a heat gun (just print in an inkjet printer (the high quality setting is usually perfect); then, sprinkle the embossing powder quickly when it comes out of the printer & heat set with the heat gun.]

Step 3) Score, and cut out the the basket. The blue lines, in the photo above, indicate the score lines.


Step 4) Print, score, cut & assemble a liner out of patterned paper. (To get a liner, for any box, I just print it again at 98.5%)

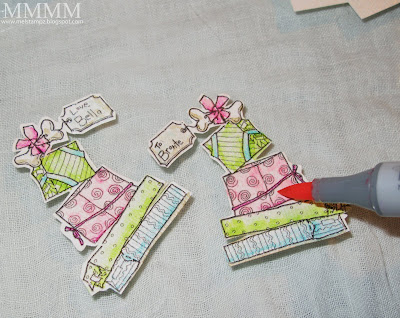
Step 5) Colour the image with Copic markers (or whatever you prefer).
If you are using the Candido Incandescent cardstock from Paper Temptress to emboss, you will want a marker with some permanence, since it is glossy and water-based markers might not set well on it.
Copics work wonderfully on it, since they float and are very forgiving. (You can even go back and fix colouring "mistakes" days later)
AND the incandescent cardstock gives your
copic colours a pretty sparkle:
copic colours a pretty sparkle:

(The watercolour paper texture of it is nice too.)

Step 6) Assemble the basket and its bits:
6A) Fold & adhere the basket.
6B) Add the liner to the inside of it.
6C) Create 4 side pieces for the basket (The sides aren't included on the template in order to get a BIG basket in the printer on a 8.5" wide paper, but they're just plain rectangular pieces that are easy to cut).
I also added images inside of the basket by using photoshop:

A) Cut the stack of gifts from the image digitally.
B) Make a copy of it reversed for the other side of the basket (inside)
C) Print & cut the 4 ide pieces (2 patterned 2 plain)
D) Attach the 4 side pieces to the basket
(P.S. Can you see the "foreshadowing of imminent catastrophe" in the photo above? HINT: Furry Mouse shadow.... giggle giggle)
6A) Fold & adhere the basket.
6B) Add the liner to the inside of it.
6C) Create 4 side pieces for the basket (The sides aren't included on the template in order to get a BIG basket in the printer on a 8.5" wide paper, but they're just plain rectangular pieces that are easy to cut).
To make the sides, cut 4 pieces of cardstock to measure:
2 and 6-8 inches by
just a hair under 2 and 1-2 inches
2 and 6-8 inches by
just a hair under 2 and 1-2 inches
I also added images inside of the basket by using photoshop:

A) Cut the stack of gifts from the image digitally.
B) Make a copy of it reversed for the other side of the basket (inside)
C) Print & cut the 4 ide pieces (2 patterned 2 plain)
D) Attach the 4 side pieces to the basket
(P.S. Can you see the "foreshadowing of imminent catastrophe" in the photo above? HINT: Furry Mouse shadow.... giggle giggle)
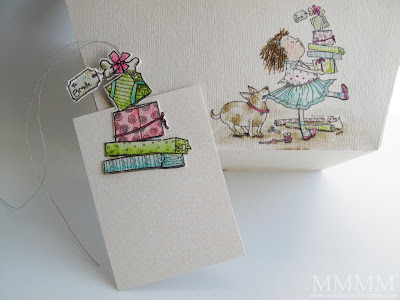
Step 7) Make a matching tag:

8A) Print 2 of the gift stack image on more Incandescent cardstock, emboss them, & colour them in.

8B) Adhere the two images to a piece of cardstock (sandwiching silver thread inside to make a string for the tag)
And then, you have a gift basket & tag:
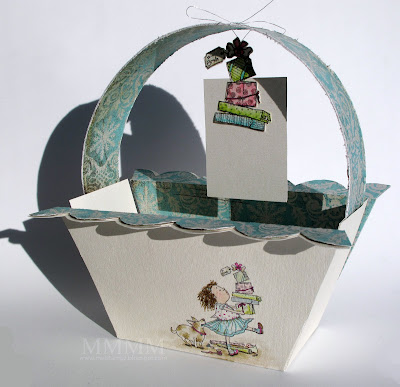

with that cute image on the front & back:

perfect for a little someone to sabotage...

perfect for a little someone to sabotage...

"catastrophe"
Someone decided to crawl right into this basket:

and she went straight through!:

She even got the tag in her mouth & sat in the basket
for a second; man, I wish I got a shot of that!
Do you think Mouse may have a thing against dogs?:

hehehe
-4-

for a BIG Basket
There's a tutorial with details on how to
assemble the basket template here
and
(or click the photos for JPG versions):
_melstampz.jpg)
.jpg)
I printed this one with no dotted lines right
onto the cardstock & patterned paper for this project:
.jpg)
When finished, the basket measures:
- width: 6" (at the basket top) and 4 2/8" at the basket bottom
- height: 2 6/8" (for the basket height) and (7" high, with the handle)
- depth: 2 1/2" (from basket front to basket back)
2 and 6-8 inches by
just a hair under 2 and 1-2 inches
Thanks for visiting!

P.S. Thank you so much for your kind well wishing,
C is still in relative agony but healing more & more each day!
P.P.S. This post is unsolicited, but I was formerly on the
design team for Mo's Digital Pencil & Paper Temptress, two fabulous ladies!


0 comments:
Post a Comment