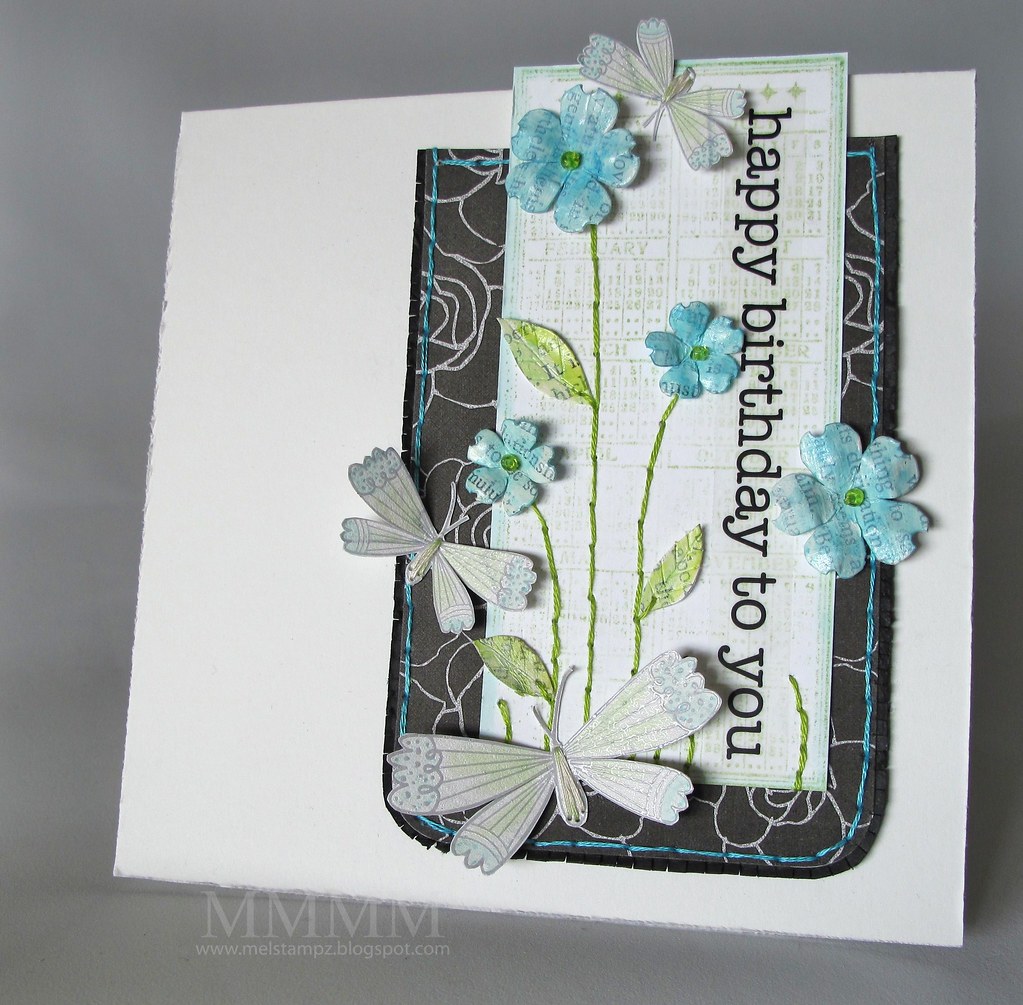
Sadly, I missed posting in time for the Caardvarks challenge
that this card was for, a photo inspiration challenge:
that this card was for, a photo inspiration challenge:
And the challenge was even sponsored by our very own Vark, Eva! :o( but hopefully this tutorial might still have something interesting... it's pretty basic. I'm still under the weather, so it's all that I have finished for now, BUT I'm working on some nifty things to share with you soon!

- Calendar stamp used as a Background stamp --from Purple Onion Designs
- light green ink
- "Happy Birthday to You" sentiment is from S.R.M. stickers.
- Moths are from a Two Pea's Digi Kit - Mod Moths Mini Kit by Holly Brooke Jones
- Black rose paper Two Pea's digi paper - Glitterati: Uptown By Betsy Tuma
- Flower image (Fred She Said's Digi flowers from the Smelling Cherry Blossoms set)
- 100lb cardstock (white)
- Paper piercer, green, turquoise & cream thread, needle, beads

Step 1) Make the background:
1A) Stamp the POD Calendar stamp in light green ink onto white cardstock & trim it.
1B) Add the S.R.M. "Happy Birthday to You" sentiment sticker.
1C) Place some flowers on the image temporarily (where you'd like them) & pierce lines for their stems using a paper piercing tool.
+Stitch+stems+in+green+thread+%26+then+stitch+on+flowers+%28come+up+through+back+to+front+of+image+add+flower+add+a+bead+%26+go+back+down+the+same+hole+adhere+on+back%29+copy.jpg)
Step 2) Stitch the flower stems & add the flowers:
2A) Sew the stems on in green thread.
2B) Stitch the flowers on:
1) Come up with a threaded needle, through back to the front of the image & adhere the thread-end at the back of the cardstock to secure it.
2) Add a flower (with a hole in its center) to your needle and add a bead to it to
3) Go back down the same hole in the image & adhere the thread end on the back of the image.)
+Glue+leaves+on+%26+pierce+a+hole+a+bit+of+a+ways+up+on+each+leaf.JPG)
Step 3) Glue the leaves on & pierce a hole a bit of a ways up on the base of each leaf (to add the stitched stem in the next step...)
+Stitch+a+stem+on+each+leaf.JPG)
Step 4) Stitch a stem on each leaf.
+Pierce+lines+%26+add+grass+with+more+green+stitching.JPG)
Step 5) Grow some grass: Pierce lines & add grass with more green stitching.
+Make+a+mat+with+patterned+paper.+This+is++digital+paper+from+Hero+Arts+betsytuma+glitterati+uptown+papers+printed,+on+a+fringed+black+mat+%26+stitched.JPG)
Step 6) Make a mat with patterned paper. This is digital paper from Two Pea's Betsy Tuma Glitterati uptown papers--printed and adhered on a black mat of cardstock that I fringed with scissors, ruffled & then stitched a little with turquoise thread.
+Print+Hero+Arts+Mod+Moths+%28these+are+lightened+%26+printed+%28at+10%25+7%25+6%25%29+on+patterned+gesso+cardstock+to+keep+the+ink+wet+long+enough+to+heat+emboss+them+in+clear+e.p..JPG)
Step 7) Make Moths: Print the Mod Moths (these are lightened quite a bit & then printed (at 10% 7% 6%) on cardstock that I painted with gesso (to keep the ink wet long enough to heat emboss them in clear embossing powder.)
+Glue+the+flowers+to+the+stitched+gliterati+mat,+adhere+the+mod+moths+onto+it+%26+then+pierce+%26+stitch+the+bodies..JPG)
Step 8) Adhere the flower image & glue and stitch the moths: Glue the image with the flowers to the stitched patterned mat; adhere the mod moths onto it & then pierce & stitch their little moth bodies.
...and that's it:
If you're curious how to make these flowers & leaves,
please see the tutorial in this previous post:


please see the tutorial in this previous post:


Things are starting to shape up around our place. I've been: trying to get caught up on all the email; trying to cook some healthy meals for my hard working sweetie (love the gas stove); cuddling the sweet baby Mouse (our new kitten); and I have a semi-fab stamp room already!


0 comments:
Post a Comment