


Hi All,
So sorry for having been away. I've been ill, but this week will be full of posts... :o)
xox mel

What do you think of mini tutorials? I thought they might be a good idea. Partly because I'm sure all my blabbering about details can be overwhelming sometimes & partly just so ya don't think I'm insane, LOL. (Pssst. a little secret: it's totally true--I really am crazy, heeheehee)So sorry for having been away. I've been ill, but this week will be full of posts... :o)
xox mel

Truth be told, these LONG pictorials are wearing me out--a tad. Secretly, I think I just wish I could craft with all of You in person, so I think I try to recreate that a little...
For the first mini tutorial--the technique I use the most. Embossing digital images from the printer using Matte Medium.

Emboss a digital image QUICKLY
using Matte Medium (or Digital Ground)
Many of you fabulous "regulars" have heard me go on about this dozens of times, but it's the thing I get the most email questions about, and I'm liking using Matte Medium now (better than gesso and acrylic paint) so here it is...
...You can heat emboss a digital image (using an ink jet printer.) It takes just minutes and can be done on many types of papers. Some favourites: Vellum cardstock, Metallic cardstocks, Core-dinations Whitewash cardstock.

If you'd like to try this, you can simply start experimenting on
papers you already have in your stash by....
papers you already have in your stash by....
- Printing an image on the paper
- Quickly sprinkling the printed ink with embossing powder
- Melting the embossing powder with a heat gun
(If the embossing powder sticks to the ink, then it's
a good paper for this. If not, try another out.) ;o)
a good paper for this. If not, try another out.) ;o)
BUT
This next method is my favourite FAST method
of embossing absolutely any kind of paper in the printer
(especially when I run out of those papers or
want to paper piece parts of digital images on patterned papers):

- paper (any kind that fits in your printer is great for this treatment)
- digital image, computer & a printer (ink jet printer)
- matte medium (I got mine here. Art supply stores carry it.)
- embossing powder (I like clear but any will work)
- a tray of any kind (to catch extra powder)
- heat gun
- Optional: brush, sandpaper
- Copic markers (or another colouring medium)

Heat Emboss a Digital Image
with Matte Medium:
with Matte Medium:
2) Sand it (if you like) & remove any dust.
3) Prepare embossing powder & tray.
4) Print digital image on it in the printer & Sprinkle with embossing powder.
5) Heat the image with a heat gun to melt the powder
6) Colour your embossed image.
Step 1) Gather supplies: The key to this is "mis en place" (or having the supplies ready ahead of time.) It lets you work quickly, which is the only trick to this.

Step 2) Smoosh matte medium all over the area you want to print on.
TiP: If you like you can brayer or brush it on. Different methods of application will give you neat textures. You can even stamp textures into it (just be sure to clean stamps right away.)
I like using my hands since it means no wear and tear on my beloved brushes & is the quickest. By the time I go wash my hands and come back my paper is dry for the next steps....

Step 3) Let the matte medium dry
Then--if you like--you can sand it with fine sand paper (to smooth or remove dusty bits) You can use coarse sand paper for a funky texture--or you can leave it as is with no sanding at all. :o)
Please note: If you do choose to sand, a swiffer cloth or old drier sheet is a good way to remove dust from the cardstock (and keep it out of your printer.)

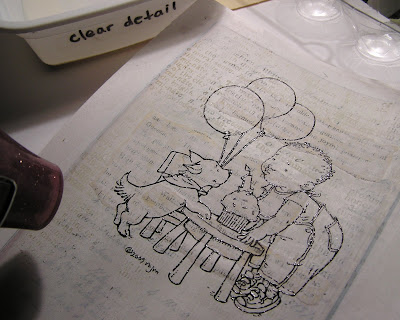
Step 4) Emboss your digital image:
A) Have all the supplies ready, so you can work quickly. (Embossing powder, a tray, & heat gun.)
B) Print the image on your treated cardstock. Standard (or mid-range setting) is my favourite. Fast enough for the ink to stay wet, but still good quality. It may vary with your printer.
You can print in black & white or any colour! (Clear embossing powder will give you embossing in any colour you can print in--even for photographs or multiple colour images.)
C) As soon as it comes out of the printer, sprinkle embossing powder on & Heat to set the embossing powder to melt it.
D) Colour your image. (I like Copic markers since the Matte Medium & embossing powder resist some water-based inks a little.) It's a little different colouring on the Matte Medium. You can blend more since the ink stays on the surface--which I absolutely love, but it might take some getting used to. :o)

You can tint areas of the clear embossing with Copic markers.

Copics: This digitally-embossed image is coloured with Copic Markers. Please note: " I'm not "technically" sure of the effect of Matte medium on Copics, but I am a sucker for the blend-ability (and floating quality that Matte Medium gives).
I fall back on the fact that the tips are replaceable if the need ever arises. Mine are A-okay so far (and I do this often) but I thought you should be aware of the possibility of clogged Copic nibs.
Printers: Likewise, please realize that the digital embossing on Matte Medium is just something I made up and hence I'm not sure about what effect it might have on your particular brand of printer. I know that Golden makes "Digital Grounds" that go on liquid as well, so perhaps it's okay?
I've been doing this for years & just clean the heads occasionally on my $50.00 Canon MP250-- ink jet printer--it's still printing wonderfully. If you are worried about your expensive printer, but want to try out heat embossed digital images, perhaps you could get an affordable (cheap) ink jet printer for the purpose.
All that said, I wouldn't give up digital heat embossing for all the riches in the world. It prevents smudging and adds such rich depth & fine detail to the line of images.
B) Print the image on your treated cardstock. Standard (or mid-range setting) is my favourite. Fast enough for the ink to stay wet, but still good quality. It may vary with your printer.
You can print in black & white or any colour! (Clear embossing powder will give you embossing in any colour you can print in--even for photographs or multiple colour images.)
C) As soon as it comes out of the printer, sprinkle embossing powder on & Heat to set the embossing powder to melt it.
D) Colour your image. (I like Copic markers since the Matte Medium & embossing powder resist some water-based inks a little.) It's a little different colouring on the Matte Medium. You can blend more since the ink stays on the surface--which I absolutely love, but it might take some getting used to. :o)

You can tint areas of the clear embossing with Copic markers.

Considerations with Copics on Matte Medium
(and with Printing on it too)
(and with Printing on it too)
Copics: This digitally-embossed image is coloured with Copic Markers. Please note: " I'm not "technically" sure of the effect of Matte medium on Copics, but I am a sucker for the blend-ability (and floating quality that Matte Medium gives).
I fall back on the fact that the tips are replaceable if the need ever arises. Mine are A-okay so far (and I do this often) but I thought you should be aware of the possibility of clogged Copic nibs.
Printers: Likewise, please realize that the digital embossing on Matte Medium is just something I made up and hence I'm not sure about what effect it might have on your particular brand of printer. I know that Golden makes "Digital Grounds" that go on liquid as well, so perhaps it's okay?
I've been doing this for years & just clean the heads occasionally on my $50.00 Canon MP250-- ink jet printer--it's still printing wonderfully. If you are worried about your expensive printer, but want to try out heat embossed digital images, perhaps you could get an affordable (cheap) ink jet printer for the purpose.
All that said, I wouldn't give up digital heat embossing for all the riches in the world. It prevents smudging and adds such rich depth & fine detail to the line of images.

Text/Sentiments
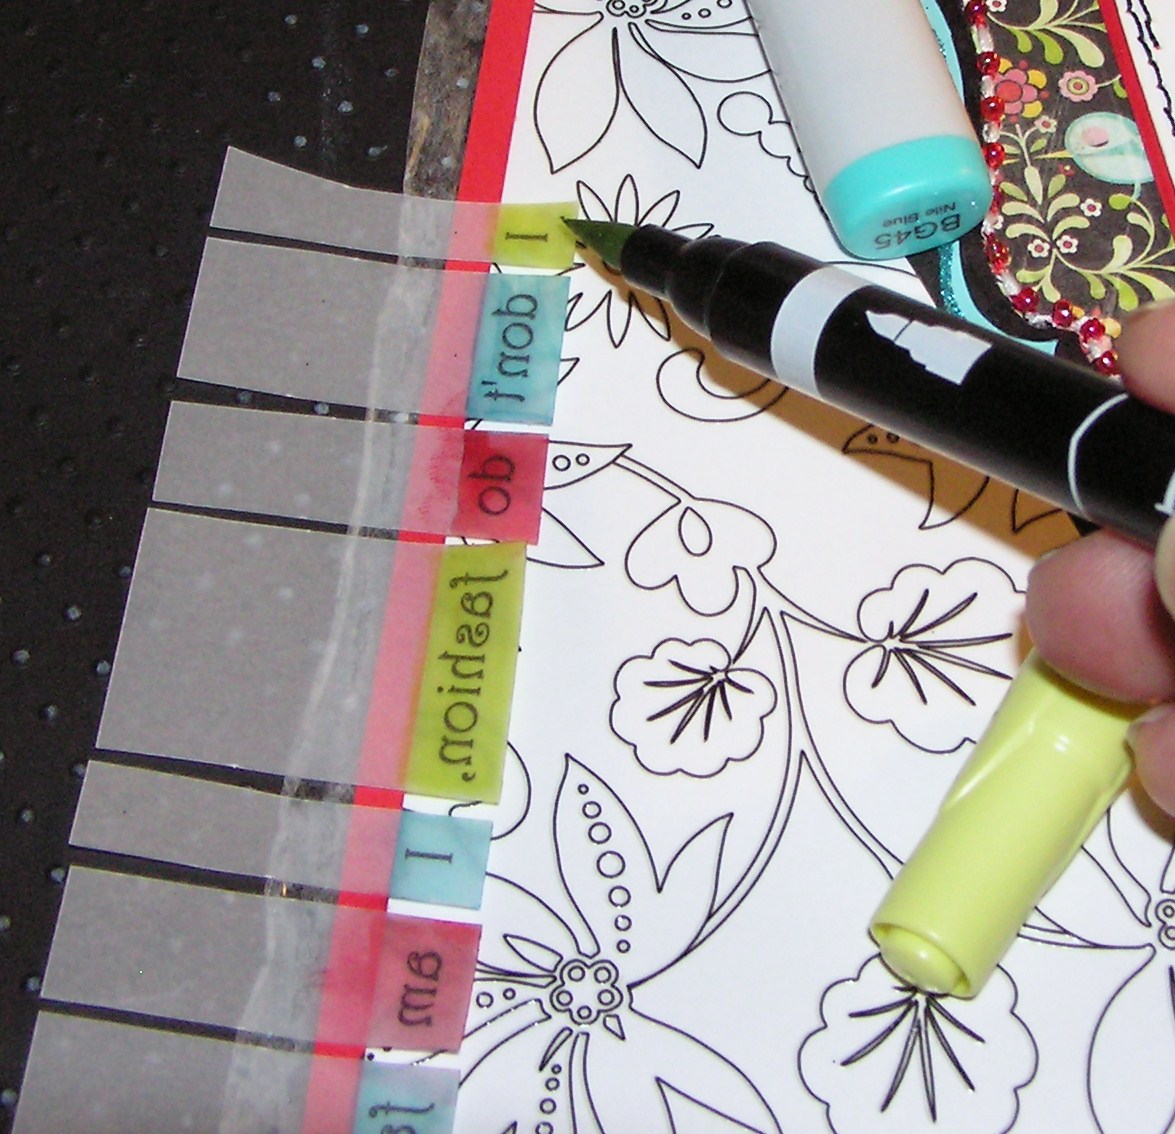
Another method of "embossing"
(using souffle or gel pens to colour over areas the image):
Just colour or emboss a single part of an image

Souffle pens will be matte and not show the black lines of the image through them (assuming you have covered fully when you write on it.) Depending on the brand, gel pens will be shiny & sheer--so they'll show the lines of the image beneath.

with other details of how to emboss digital images
(and some other methods or ideas.)
.JPG)


P.S. Last but not least, you can find all kinds of challenges on
Mo's Digital Challenge Blog here!
P. P. S. Don't do Digital?
Does all of this digital business leave you in the cold? ;o)
To be fair to you traditional stampers are out there;
now there's some Mo for you too! You can see the stamps here.


.JPG)
0 comments:
Post a Comment