


And now, for something completely girl-i-fied! :-)
When Verónica at The Paper Shelter asked me if I would like to
play with some of their digital product I was ultra excited to do a little
something with this scrumptious Tea Party in Wonderland image:

(Don't those wee treats and that tea set give you the Happies?)
Two special little girls I know adore tea parties,
so I thought I'd make them this card.
(Sending mail is something I really need to do much more of.)
How about you?
Do you love to send cards,
or do you find sometimes that you forget to?


(stuff I did to make this girly card)
I used digital papers & textures to
fill parts of the image to make a scene:

The table cloth is filled with the pink paisley paper in the Little Sylfie paper pack. (It made me drool when I first saw it, it's so pretty & looks like fabric.)
Want to know more about creating custom patterns
& using them to fill things?
You can find a detailed tutorial here.

Sections of the treats and the tea set are filled with
the rose paper from the Little Sylfie paper pack and the grass
is filled with the green textured paper from that pack too.
The sky is filled with a cloud texture, and the whole image is
filled (on a new layer) with Lewis Carroll's handwriting in light grey.
(The clouds & handwriting are linked below as freebies, if you like them).
I printed the image, then coloured parts of it in
with Copic markers and sanded
some areas of the patterns to distress them:

There are little pink seed beads stitched onto the treats:

(And I added a little clear lacquer to the dishes for shine).
--------
And the table cloth has a little
quick hand stitching:

(It's easy to add some stitch detail: just pierce some holes;
sew every other stitch with needle & thread & a needle; then fill in the skipped
stitches with a marker in the same colour).
--------
I added a little triangular pennant to a beaded pin to
make a flag for the cake:

To add the flag to the image, I just:
a) Cut a slit in the paper above the cake (using a hobby knife).
b) Slid the pin into the slit.
c) Affixed the bottom of the pin on the back of the image.
d) Glued the flag onto the card to secure it.
--------
The "Tea Party" sticker...

...is from an SRM sticker set: Everyday Girl. I put a little white paint on a page from a book
and stuck the sticker over top. Then glued it to some cardstock, cut it into a flag shape, coloured in the outline letters with pink Copic marker and added some random stitches.

Finally... I did this stuff:

When Verónica at The Paper Shelter asked me if I would like to
play with some of their digital product I was ultra excited to do a little
something with this scrumptious Tea Party in Wonderland image:
(Don't those wee treats and that tea set give you the Happies?)
Two special little girls I know adore tea parties,
so I thought I'd make them this card.
(Sending mail is something I really need to do much more of.)
How about you?
Do you love to send cards,
or do you find sometimes that you forget to?


(stuff I did to make this girly card)
I used digital papers & textures to
fill parts of the image to make a scene:
The table cloth is filled with the pink paisley paper in the Little Sylfie paper pack. (It made me drool when I first saw it, it's so pretty & looks like fabric.)
Want to know more about creating custom patterns
& using them to fill things?
You can find a detailed tutorial here.
Sections of the treats and the tea set are filled with
the rose paper from the Little Sylfie paper pack and the grass
is filled with the green textured paper from that pack too.
The sky is filled with a cloud texture, and the whole image is
filled (on a new layer) with Lewis Carroll's handwriting in light grey.
(The clouds & handwriting are linked below as freebies, if you like them).
I printed the image, then coloured parts of it in
with Copic markers and sanded
some areas of the patterns to distress them:
There are little pink seed beads stitched onto the treats:
(And I added a little clear lacquer to the dishes for shine).
--------
And the table cloth has a little
quick hand stitching:
(It's easy to add some stitch detail: just pierce some holes;
sew every other stitch with needle & thread & a needle; then fill in the skipped
stitches with a marker in the same colour).
--------
I added a little triangular pennant to a beaded pin to
make a flag for the cake:
To add the flag to the image, I just:
a) Cut a slit in the paper above the cake (using a hobby knife).
b) Slid the pin into the slit.
c) Affixed the bottom of the pin on the back of the image.
d) Glued the flag onto the card to secure it.
--------
The "Tea Party" sticker...
...is from an SRM sticker set: Everyday Girl. I put a little white paint on a page from a book
and stuck the sticker over top. Then glued it to some cardstock, cut it into a flag shape, coloured in the outline letters with pink Copic marker and added some random stitches.
Finally... I did this stuff:
a) Adhered a cut lattice (using this Geometric Background cut file from Silhouette) in white to the bottom of a 5.5" panel of white cardstock (stitched the edge).
b) Added some tracing paper up top that I stamped with Tim Holtz's reflections stamp in white
and glued on stamped side down so the lettering was readable.
c) Adhered some pieces of patterned paper (from Crate Paper's Paper Heart 6x6 pack). I painted the paper with white acrylic paint to make it match.
d) Stuck it all on a 5.5" square white card... the image, the sentiment,
...and some Do It Your flowers:b) Added some tracing paper up top that I stamped with Tim Holtz's reflections stamp in white
and glued on stamped side down so the lettering was readable.
c) Adhered some pieces of patterned paper (from Crate Paper's Paper Heart 6x6 pack). I painted the paper with white acrylic paint to make it match.
d) Stuck it all on a 5.5" square white card... the image, the sentiment,


&
And here's the The Paper Shelter
paper packs I used:
Let's Make a Picnic paper pack
(the green paper to fill the grass and the pretty
little rose paper to fill the treats & tea set):
paper packs I used:
Let's Make a Picnic paper pack
(the green paper to fill the grass and the pretty
little rose paper to fill the treats & tea set):


To save these files, click the following:
1) the image 2) File 3) Save Page As 4) Save
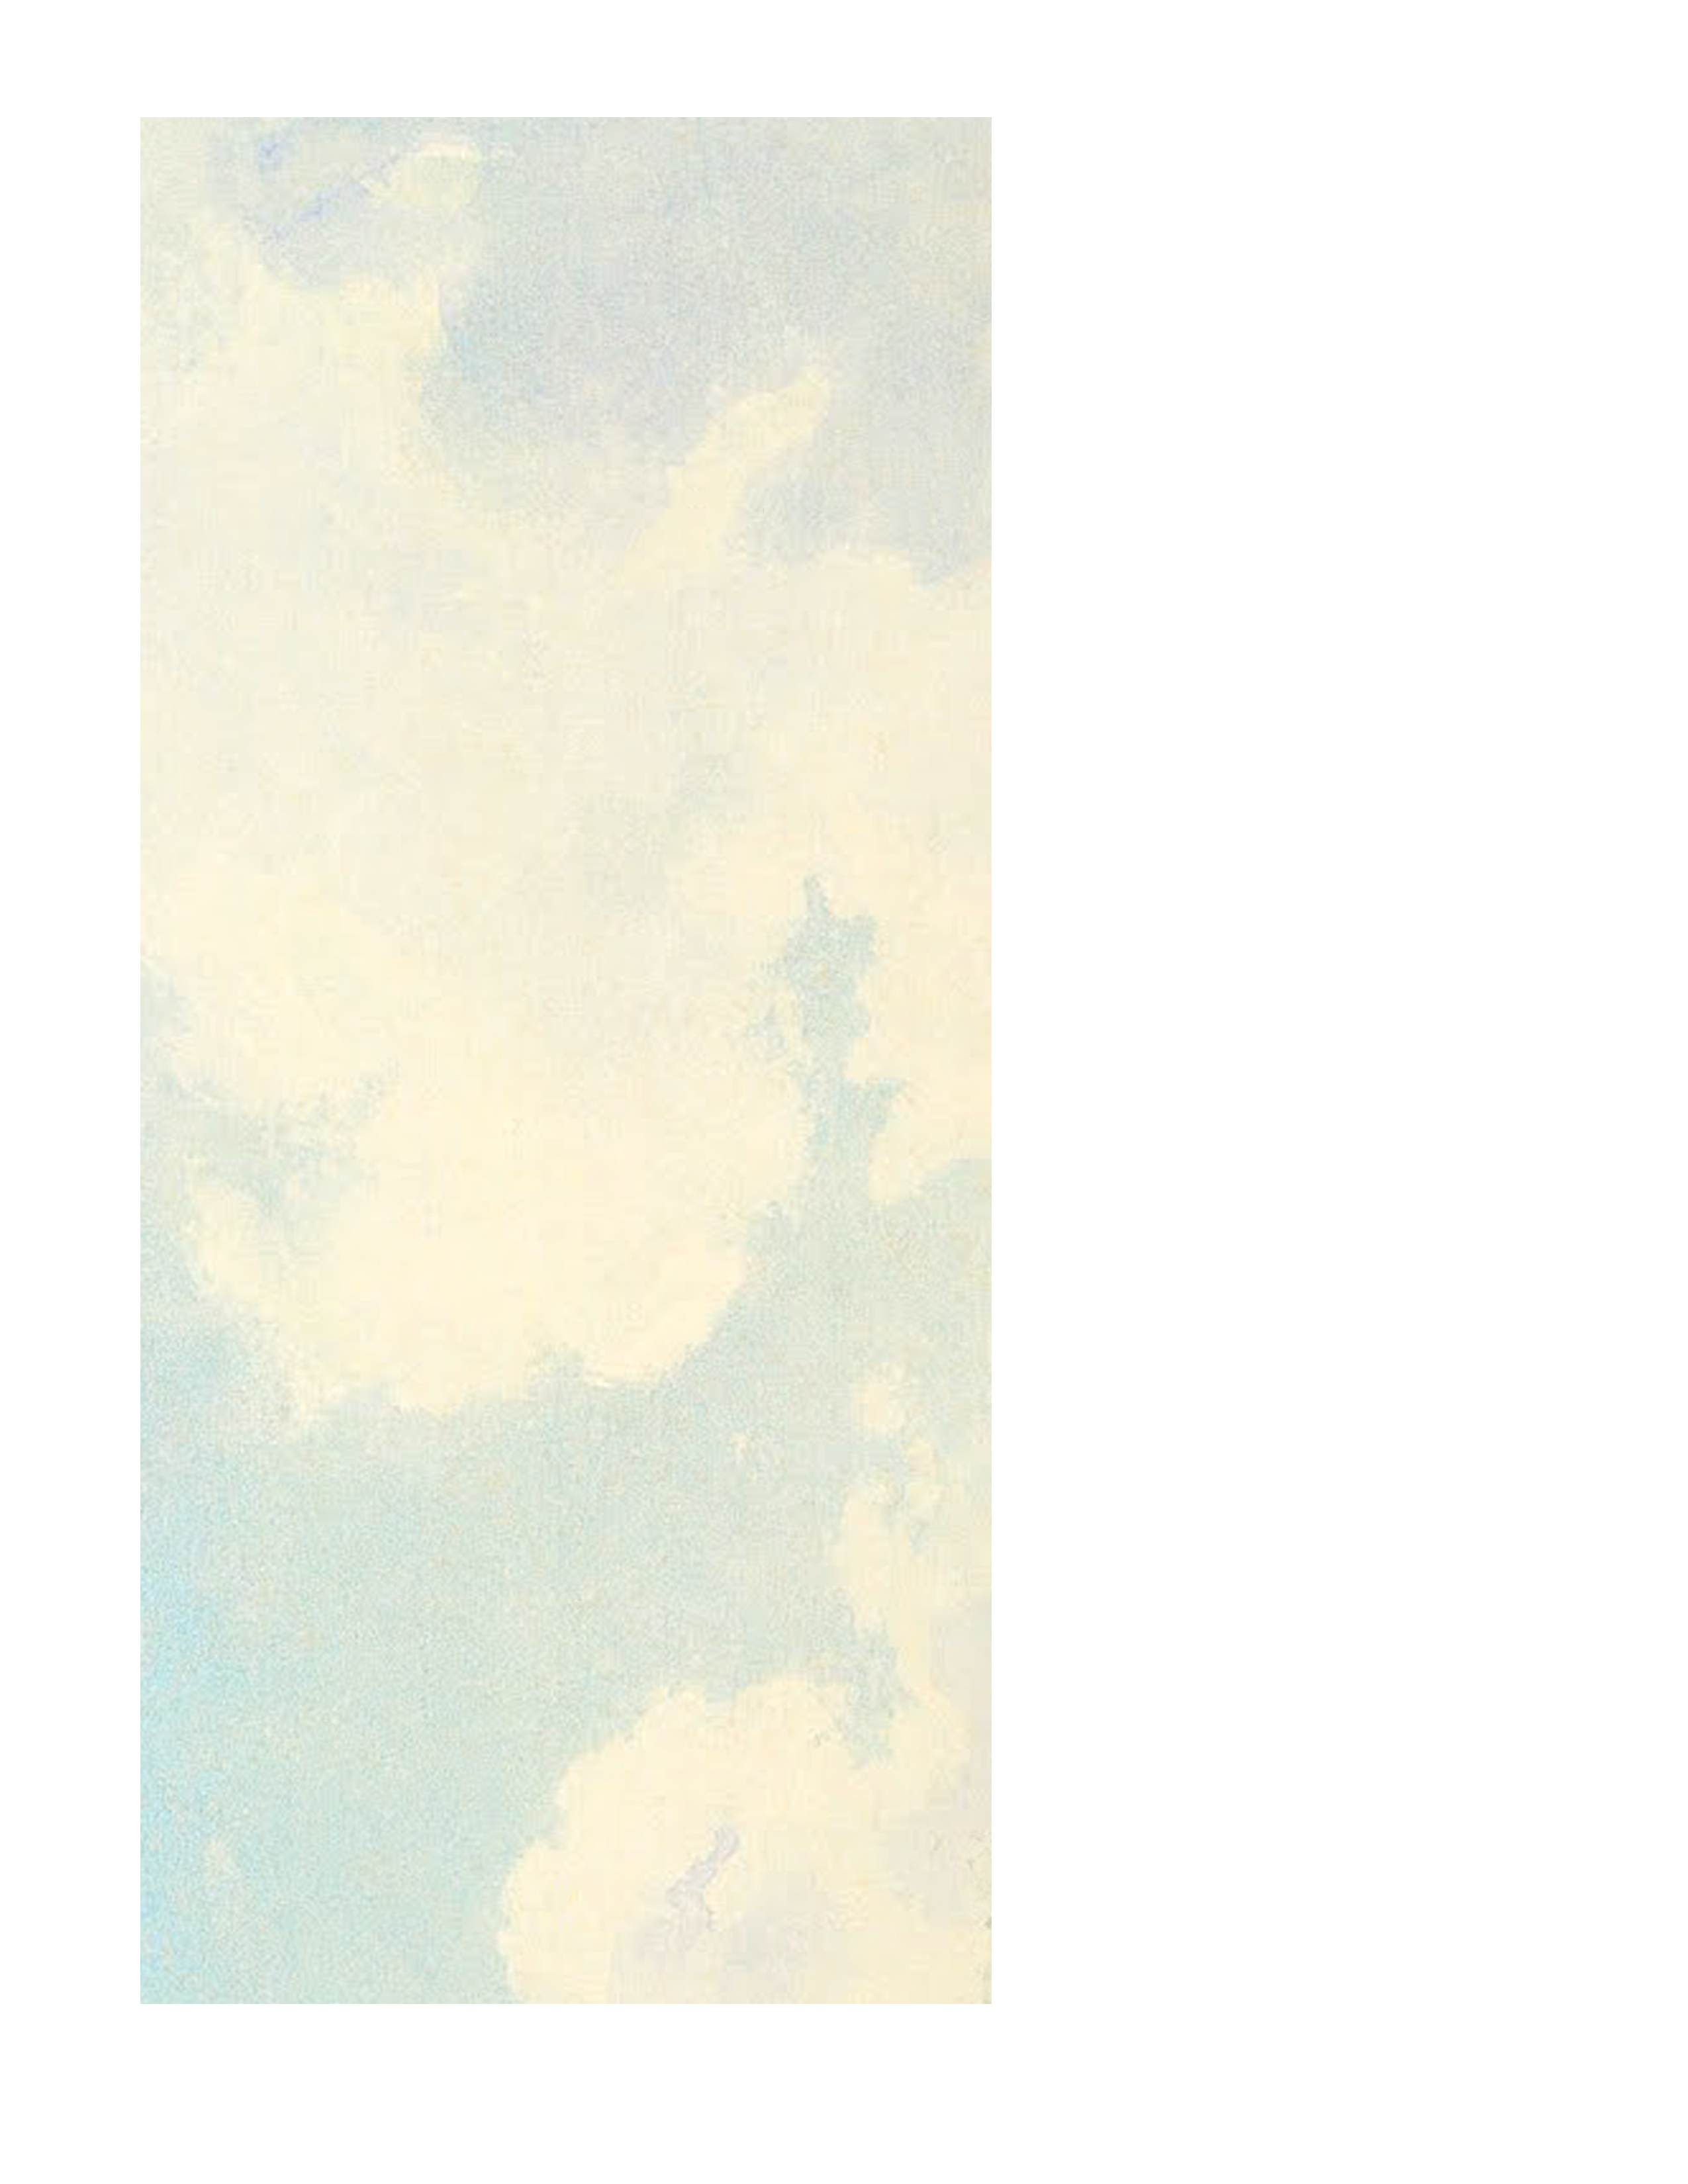
This cloud snippet is from a castle landscape image that was shared here by
Karen, The Graphics Fairy. Please link her up if you use it:

It is 300dpi & measures 9.5 x 4.3 inches
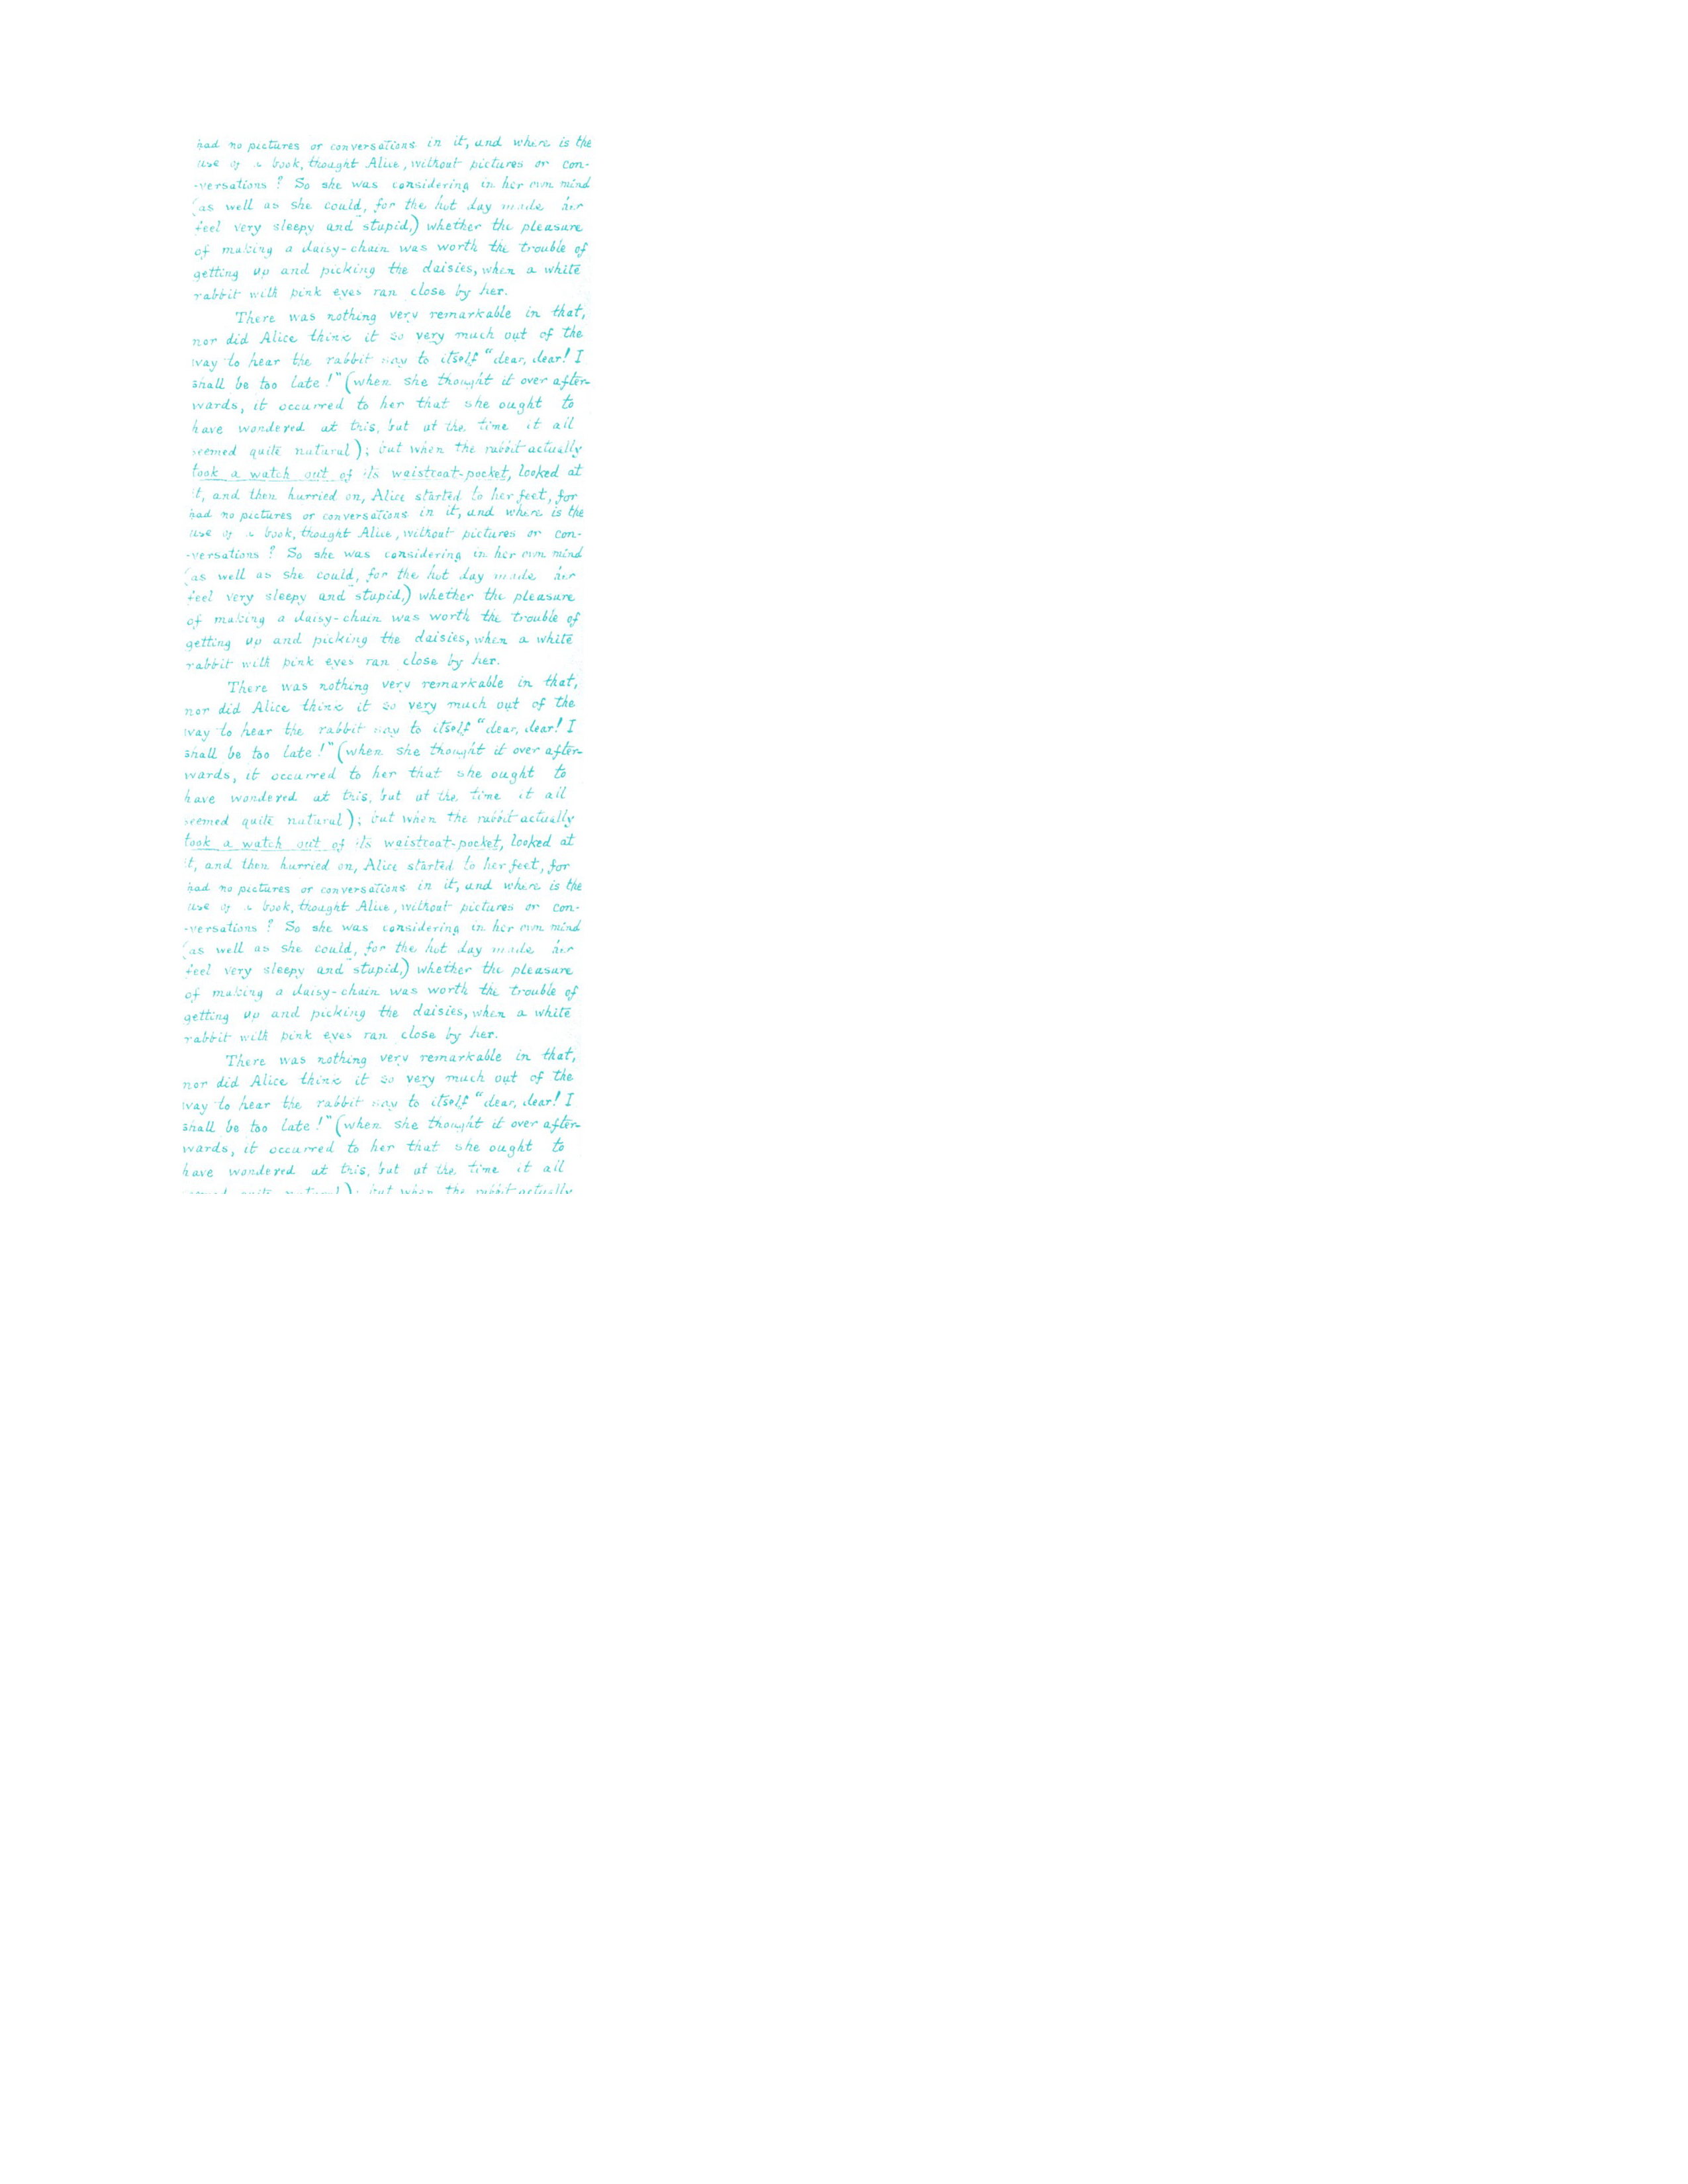
Alice in wonderland - Lewis Carroll's handwriting here:

It's 300dpi & measures 2 x 5.3 inches
Karen, The Graphics Fairy. Please link her up if you use it:
It is 300dpi & measures 9.5 x 4.3 inches
Alice in wonderland - Lewis Carroll's handwriting here:
It's 300dpi & measures 2 x 5.3 inches
Thank You so much for checking this out.
Hope you are having a lovely week!

P.S. Full disclosure: I was lucky enough to receive my choice of image &
the papers for free from The Paper Shelter. Thank You, Verónica! :-)


0 comments:
Post a Comment