StampznewBright

  • Subscribe to our RSS feed.
  • Twitter
  • StumbleUpon
  • Reddit
  • Facebook
  • Digg
Showing posts with label Caardvarks. Show all posts

Monday, 6 June 2011

Felt-based cards (Rock-a-Bye Baby tutorial)

Posted on 16:15 by Unknown
New idea, Old projects....

I've been debating whether or not to post some older projects/tutorials since the big bad insecurity beast is nibbling away at my creativity big time, but I'm trying to remind myself: "better brave and posting than missing entirely" so here are some oldies...

Caardvarks C&S rock-a-bye felt card mel stampz

New?

A new supply idea. (Well, new for me anyhow) You might find it hard to tell from the photo, but this is a card with a card-base of stiff felt instead of cardstock. I bought the stiff felt sheet at Michael's and thought it would make a good card base. [The stuff I bought was black, but it comes in white and other colours as well if you want a softer look.'


I was surprised at how sturdy a card-base the stiff felt made & it even folded nicely. I just cut it on a paper cutter, & stuck paper inside to give somewhere to write on. (There's soft white felt adhered to the card-front also).

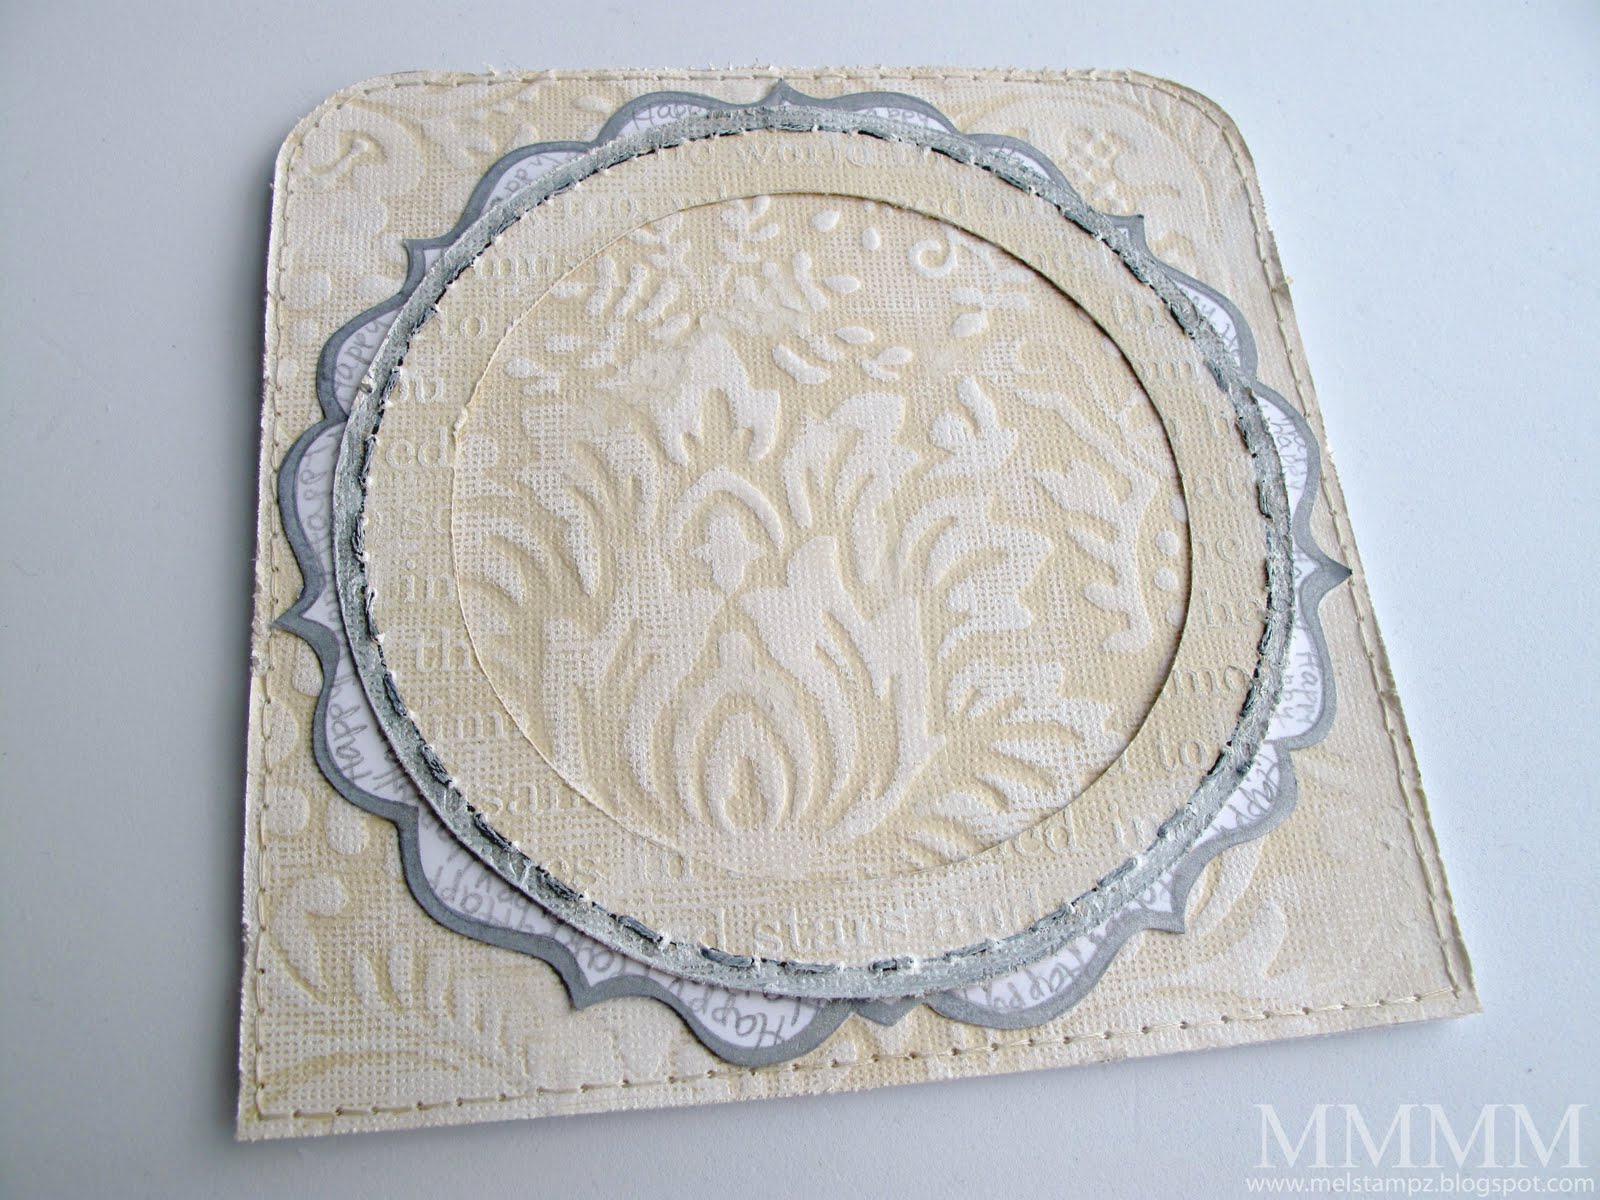
And here's a softer version, using all the
same Clear and Simple Stamps:

Caardvarks C&S rock-a-bye quilt card mel stampz

The buttons, ribbon, and label shape are
from Clear & Simple Stamps as well...

.

Old?


So, here's the scoop on these old projects: Back when my 24-hours-a-day-7-days-a-week-crafty-world started to fall apart, I was putting together these cards and this little tutorial for Caardvarks (with the sponsor Clear & Simple Stamps), but... I had to stop blogging due to major health breakdown (and crafty-system-crash).

Now that I'm back a little bit, I wanted to finally post these cards to say a belated thank you to the Caardvark crew (who I dearly miss) for being beyond amazing.... and to Clear & Simple Stamps as well for havin' such inspirational stamps, templates, and stuff.

So here's how the black felt card was made.


...make a felt card:


  • Rock-a-Bye stamp from Clear & Simple Stamps
  • Black Brilliance ink & clear embossing powder on white paper
  • Green with Envy ink, buttons & ribbon from Clear & Simple Stamps
  • Main Card: stiff black felt
  • White mat: soft white felt
  • Patterned Papers by BasicGrey Origins 6x6
  • Star background stamp (also from Rock-a-Bye set)
  • Green paper behind horse is My Mind's Eye Abbey Road-Nice Ride.
  • Misc. metal sewing snaps; Green, white, & black thread
  • Little label from same stamp set


Step 1) Make The Rocking Horse:

1A) Emboss Rock-a-Bye horse in black on white cardstock.
1B) Colour with Copic markers & a Sakura Souffle pen (white dots on black for the seat.)
1C) Add dots on nails with a silver metallic marker.


Step 2) Cut the rocking horse out: I find that cutting into the image (like I did here by cutting between the rockers is the easiest way to get a detailed cut) then you can just...


Step 3)
Reinforce the cuts with itty bits of paper glued on the back


Step 4)
Adhere bits of embroidery thread for his mane & trim it.


Step 5) Make a Frame:

5A) Paint a scalloped chipboard frame with white paint & press a wooden batik block in the wet paint for texture. (Or simply emboss it to get texture, instead).
5B)Colour over the paint with a silver metallic marker.
5C) Adhere My Mind's Eye 'Abbey Road-Nice Ride' paper to the back of the frame.

6--Adhere the Rock-a-Bye horse to the front of the frame

Step 6) Adhere the Rock-a-Bye horse to the front of the frame.


Step 7) Make a Felt card & mat:

7A) Cut black mat (3 1/4" square) from stiff black felt & cut the card from that as well.
7B) Adhere soft white felt (3" square) to white cardstock & stitch it onto the black felt mat.


Step 8) Add details to the patterned paper:

8A) Add a line of dots around the edge of the patterned paper (this black graph paper is from BasicGrey Origins 6x6 pack) & a shade around it with Copic marker.


8B) Stamp stars from Rock-a-Bye on more paper (this green patterned paper is BasicGrey Origins too. The stars were stamped in Brilliance ink & embossed with clear embossing powder.
8C) Colour edge of the cardstock with black marker, to create a faux mat
8D) Pierce holes beside the black marker edging & stitch in white thread.


Step 9) Make a label:

9A) Stamp Rock-a-Bye sentiment onto CSS tag in Green with Envy ink.


9B) Pierce & stitch around it in black thread. Fill in every other stitch with black permanent marker to save time.
9C) Colour edge with green Copic marker.


9D) Pierce holes on either side to add 2 snaps


9E) Put snaps in 2 the holes: back-snap on the back of the label & front-snap on the front. No glue or anything. ;o)

(Insert embellishment rant here: Snaps on baby cards are my fave--they are ultra affordable and they're a little funky or modern since they're metal, but they remind me of onesie jumpers, so they just seem to be an embellishment that really fits the baby theme).


9E) Add a tiny embroidery thread bow.


Step 10) Assemble the card (adhere papers etc. to the felt with a strong glue)
and there you have it...

... a black stiff-felt card:

(blogger photos for those who like to click for close-ups)

And here's the softer version:


Thanks for having a look.
Hope you're feeling great!
Read More
Posted in Caardvarks, techniques, Tutorials | No comments

Saturday, 8 January 2011

Déjà vu??? Tiffany Doodles cards!

Posted on 21:20 by Unknown

Have you seen these before? ;o)

I would swear that I have blogged these cards already, but in looking over old posts it seems that I have not. I freaked out when I saw that, since they are all made using images drawn by a dear online friend who is very talented: Tiffany Richards.

...and they were ever so fun to make...

Tiffany Doodles Tea Time inchie card

My timing is not horrible though, I suppose, since Tiffany just opened her first official store: Tiffany Doodles. It's looking lovely and I'm enjoying making some new things with other images of hers.

Despite their being older cards, it is really handy to have some cards to post. My duties on the home-front are keeping craftiness from happening (Charles can't walk, of course, and is in desperate need of a nurse, cook, waitress, and chief bottlewasher or general gofer...) which means the half-made new cards will wait a wee bit... He is being a trooper though!

Well, enough of my blah-blah, onto the cards!...

This one was my first inchie card ever:


I bought this set ages ago, but was waiting to get an inchie punch (That's why I'd never made an inchie card before this one.) LOVE this sweet tea cup and the fact that you can print digis wee so you can go crazy with inchies!

To make the little tea bag tag...

A) Printing "TEA" on cardstock in black marker
B) Cut them out (tiny) and edge in silver gel pen
C) Glue them onto tea cup inchies
D) Draw a silver tea bag string

You can find the Teacup & Teapot digital set here
(it has sayings in the classiest font--used here on the "Tea Time" tag)


The next card uses the sweetest little lamp...

Tiffany Doodles Lamp Freebie

Another Tiffany Doodles digi image
that I'm just in love with.

The lamp is available here (for $1)


It's embossed on digital patterned
paper to paper piece it (from TracyAnnDigitalArt on etsy)

The sentiment is a sticker from SRM stickers


the "Thinking of You" sheet available here.


Tiff makes some stunning flowers (real & doodley):

Tiffany Doodles Mom card

This Mom's day card is made using Tiffany's
photographic flower line art called Velvet Flower.

She even shares a tutorial on how you can make your own digi
like this from your Photographs here (Completely Genius!)


To make the image into 3D flowers:

A) Change the colour of the image to turquoise
B) Print it in different sizes and emboss them in clear embossing powder
(here's a post with a write-up of a quick way to emboss from the ink jet printer)
C) Cut them out (trimming in between petals)
D) Shape the flowers & adhere them to the card mat
E) Stitch turquoise seed beads onto the centers

To make the matching leaves:

A) Colour some of the flowers over with green copic marker
B) Cut into leaf shapes & adhere them around the flowers

The paper is GCD Paris Nights patterned paper stamped with this paisley stamp
in Versamark ink then embossed in clear and distrssed over it with white pigment ink.

Tiffany Doodles It's a Love Thing Monarchs

Tiffany's Butterfly image is available here (for $1!)
(I cut the butterfly in half to make 2 butterflies--Two for a buck! hehehe)


The butterflies are embossed and their bodies are stitched with seed beads.
(The paper is more digital patterned paper from TracyAnnDigitalArt on etsy)


You can see many more cards with Tiffany's gorgeous images
in the Caardvarks Challenge sponsored by Tiffany in May here:

(Stunning cards by those 'Varks, lemme tell Ya!)

AND loads more in the Tiffany Doodles
gallery on Flickr here.

Clickable Blogger photos (for those who prefer them):


Thanks for stopping by.
Hope you have a gorgeous day!
Read More
Posted in Caardvarks, Tiffany-Doodles | No comments

Tuesday, 27 April 2010

Caardvarks' Coredinations Monochromatic Challenge!

Posted on 13:50 by Unknown
Caardvarks Core-dinations Monochromatic card mel stampz

A little monochromatic Core-dinations fun for the latest Caardvarks challenge...


1...Caardvarks Celebrating Core-dinations Challenge!
2...How to make this monochromatic card (painted Core-dinations etc...)

-1-


This is for the

Core-dinations Monochromatic
Challenge here.

The cards the team has made are a droolfest!
Hope you can play along with us!

And for more inspiration you might wanna
have a visit here:


-2-

...make this monochrom Core-dinations card:


  • Core-dinations Jenni Bowlin Studio Core Impressions Collection (pre embossed yumminess!)
  • White cardstock
  • White acrylic paint, brayer, sanding block
  • Circular stuff to trace (glue bottle, bowl, & cup), pencil, scissors
  • Paper piercer, thread, needle,
  • Nursery Boy RP 78 paper by the Bottled Image Paper Co.
  • Flowers (felt, cardstock, old book pages, Mod Podge, paint, bugle beads)
  • Fred She Said leaves (Dancing Daisies digital set)
  • Putty Copic marker, silver gel pen, silver marker.


Step 1)
Cut Core-dinations cardstock & Brayer a little white acrylic paint onto it
(this is cut to measure 5.5 inches square.)

A little a lot of rambling about Core-dinations cardstock & paint: Granted, sanding this paper is wonderful (especially with its pre-embossed loveliness) but paint! It really knocked my socks off...

...the pure white colour with no dust...not to mention the way that snazzy waffle Core-dinations texture picked up the paint & looked like fabric. It looked even more fabric-like with a little bit of sanding, distressing, & stitching:


Of course, you could use a different colour of paint or a combination of colours for all kinds of crazy looks: faux verdigris copper with turquoise paint & rusty colours or something would be hot, no? :-D


Step 2) Round the corners. To get a large radius rounded corner with no punch, just trace something round in pencil, cut it out with scissors & erase the pencil line.

(This was a Judikin's diamond glaze bottle, but you could use anything, of course. Why even limit it to circles? You could make your own funky shaped corner "jigs" out of cardstock to trace instead.) :o)


Step 3) Pierce, stitch, & distress the Core-dinations cardstock.


Step 4) To make the folded card & round the corners on it:

A) Fold a piece of cardstock (this one is a piece of cardstock cut to measure 11 inches x 5.5 inches & scored in the middle to make a 5.5" square card)
B) Attach the textured piece with the rounded corners
C) Trim with scissors to cut the excess cardstock off
D) Distress with the edge of the scissors, if you like that look


Step 5) Cut a circular ring frame from more painted coredinations pierce & stitch it with black thread (every other stitch.) Fill in between with faux stitches in black multiliner; then, smooge the stitches with white paint to distress them.

Cheap trick: Tracing circle stuff from around the house is great if you have no circle cutter (or no clue which box it's still packed in. hehehe)


Step 6) Make a scallop-type frame for under the stitched ring
--this one was made by:

A) Drawing a circle as a guide to doodle two curvy bracket shapes
B) Cutting the bracket shapes out to make a paper jig (to trace)
C) Tracing another circle on a piece of white cardstock
D) Laying the "jig" over the circle & tracing the bracket shapes all around it
E) Cutting it out with scissors & erasing the pencil line
F) Filling in the brackets with hand printed "Happy" repeated in pencil
G) Edging it in silver marker (from the dollar store)
H) Roughly cutting out the center (so it won't show under the Core-dinations frame)


Step 6) Cut out some images. (These images are from some paper my supah sweet best friend Kimmy gave me so I'm not sure if it's still available, but it's called: Nursery Boy RP 78 paper by the Bottled Image Paper Co.


Step 7) Adhere the 2 frames to the card.


Step 8) Make some flowers.

( If you'd like to see more on how these flowers were made, please see these 2 tutorials: this one for the Mod Podge book page texture & this one for altering the 5-petal EK Success punch.)


Step 9) Add some flower centers.

These ones are wee homemade felt flowers:


To make some easy peasy cheap-o felt flowers:

A) Glue any old felt to cardstock.
B) Draw or stamp a flower on the back of the cardstock (or you could print digital ones before gluing the felt on, instead.)
C) Cut them out.

(I just doodled circles on the back of my white felt cardstock--to make 5 petals around a center--and cut it out. Pierced a hole in the middle & shaped them with my hands.)


Step 10) Make some leaves. These are Fred She Said leaves (from a Dancing Daisies digital set I bought here.) They were made like this...

A) Printed this silk flower vintage text on white 100lb cardstock
B) Printed the FSS leaves right over it
C) Coloured them with a Putty Copic marker
D) Doodled on the leaf vein lines with silver gel pen
E) Smooged over it all with white paint on my finger tip
F) Shaped them a little with my hands


Step 11) Adhere the Mod Podge & the felt flowers & stitch them on with silver bugle beads. Pierce and stitch the inside of the circular frame.


Step 12) Make a 3D sentiment flag shape:

A) Paint a piece of the Core-dinations with white paint

B) Cut into into 3 pieces: Cut one middle rectangular piece & fold it so it sits like a staple &
Cut two flag-type sides (to look like the ends of ribbon with V's cut in them)

C) Adhere the two flag bits to the back of the folded middle piece
Cut a sentiment from patterned paper (or stamp it) & glue it on


Step 13) Embellish an image. I glued the smaller image onto the larger, pierced around the edge & stitched.


Step 14) Adhere the stitched image inside the frame.


Step 15) Adhere the sentiment flag & pierce it along the sides.


Step 16) Finally, stitch the sentiment on.


...and then you have some monochromatic-ness:


Thanks for taking time to visit;
hope your day is filled with happy!


(Please click if you'd like to visit the blog
from an email or reader)

Read More
Posted in Caardvarks, cheap-tricks, Faves, Fred-She-Said, techniques, Tutorials | No comments
Older Posts Home
Subscribe to: Posts (Atom)

Popular Posts

  • free Butterfly Silhouette .studio cut files (in 3 styles)
    Hi, All! Here are those butterfly Silhouette .studio cut files. They are for only for the Silhouette machine... But I do hope to share other...
  • Graphics Fairy Inspiration (+vintage printables)
    Thank You all so much for your wonderful comments about the papers I've been obsessed with. Your kind words make me grin so big that I g...
  • New Popcorn Box template set (pretty stamp room storage) :o)
    Are you in the mood for a template or two? I was going to wait until I had really good photos and a full pictorial, but then I would take fo...
  • "Honey, I shrunk the stationery!" (Hero Arts typewriter notebook)
    Still trying to make more of my cards into little gifts. This Hero Arts typewriter card is another take on the card turned refillable notebo...
  • Making Your Own Colour Shimmer Sprays--Links & Info
    Info & Links Links for how to Mak e yo ur o w n Sh im mery s prays: (These are for you sweet Beth! oxo) ( more info on these colours in...
  • over 100 free pattern overlays ... at a glance
    Would you believe that the free overlay total is at 139 overlays and counting? (I might have a wee little addiction) ;-) Since overlays can ...
  • Felt-based cards (Rock-a-Bye Baby tutorial)
    New idea, Old projects.... I've been debating whether or not to post some older projects/tutorials since the big bad insecurity beast...
  • Circle Overlays (to revamp your papers!)
    Can you ever have too many ways to use your stash? No card today, just popping in with a cheap trick for revamping your "old" pat...
  • Everything I've Ever Made (at a glance)
    This post is a visual overview of my blog history-- with thumbnails that are linked to tutorials & templates for pretty much everything ...
  • 3 Clean And Simple cards (with SRM stickers)
    You guys may know that I was tragically born without the gene that let's you achieve a C lean A nd S imple card. ;-) Not sure why I find...

Categories

  • 'Mouse'-the-cat (10)
  • *TEMPLATEs (98)
  • 3D-projects (144)
  • A-Day-For-Daisies (7)
  • Amber Ink (9)
  • Angel's-Landing (2)
  • BASICS (47)
  • Blogging-tips (7)
  • Caardvarks (48)
  • Cat's-Pajamas (2)
  • cheap-tricks (224)
  • Christmas (33)
  • Claire-Keay (2)
  • Cricut (3)
  • cut-file (2)
  • Cuttlebug (45)
  • decor (6)
  • Digital-Images (131)
  • Distress-Inks-etc (14)
  • DIYstamps (1)
  • Eat-Cake-Graphics (11)
  • Faves (207)
  • Fred-She-Said (5)
  • Freebies (77)
  • GESSO (9)
  • Halloween (10)
  • Heather Ellis (3)
  • Hero-Arts (14)
  • ISC (7)
  • Jessica-Sprague (2)
  • Just-Rite (2)
  • LPS (63)
  • Mo's-Digital-Pencil (16)
  • My-Favorite-Things (33)
  • organizing (7)
  • Other-People's-Tutorials (36)
  • Paper-Garden-Projects (54)
  • Paper-Temptress (39)
  • Punches (21)
  • Purple-Onion-Designs (23)
  • S.U. (1)
  • SCOR-PAL (4)
  • silhouette (4)
  • Skipping-Stones-Design (7)
  • Squigglefly (6)
  • SRM-Stickers (8)
  • techniques (191)
  • templates (26)
  • Tiffany-Doodles (4)
  • Tutorials (252)

Blog Archive

  • ▼  2013 (16)
    • ▼  July (4)
      • A Triple-stamped Fancy-cut Flower card
      • Flying by to say ... 'hello'
      • a Silhouette Challenge project
      • Silhouette Cameo - Sketch pen Camera card
    • ►  June (4)
    • ►  May (3)
    • ►  April (1)
    • ►  March (1)
    • ►  February (3)
  • ►  2012 (53)
    • ►  December (2)
    • ►  November (2)
    • ►  October (1)
    • ►  August (3)
    • ►  July (2)
    • ►  June (5)
    • ►  May (7)
    • ►  April (8)
    • ►  March (9)
    • ►  February (13)
    • ►  January (1)
  • ►  2011 (74)
    • ►  December (1)
    • ►  November (5)
    • ►  October (10)
    • ►  September (9)
    • ►  August (12)
    • ►  July (5)
    • ►  June (9)
    • ►  May (2)
    • ►  April (6)
    • ►  March (7)
    • ►  February (4)
    • ►  January (4)
  • ►  2010 (84)
    • ►  December (7)
    • ►  October (1)
    • ►  September (6)
    • ►  August (1)
    • ►  June (1)
    • ►  May (7)
    • ►  April (21)
    • ►  March (3)
    • ►  February (17)
    • ►  January (20)
  • ►  2009 (234)
    • ►  December (16)
    • ►  November (21)
    • ►  October (11)
    • ►  September (23)
    • ►  August (29)
    • ►  July (26)
    • ►  June (10)
    • ►  May (16)
    • ►  April (26)
    • ►  March (22)
    • ►  February (27)
    • ►  January (7)
  • ►  2008 (39)
    • ►  December (14)
    • ►  November (25)
Powered by Blogger.

About Me

Unknown
View my complete profile