StampznewBright

  • Subscribe to our RSS feed.
  • Twitter
  • StumbleUpon
  • Reddit
  • Facebook
  • Digg
Showing posts with label Fred-She-Said. Show all posts

Tuesday, 27 April 2010

Caardvarks' Coredinations Monochromatic Challenge!

Posted on 13:50 by Unknown
Caardvarks Core-dinations Monochromatic card mel stampz

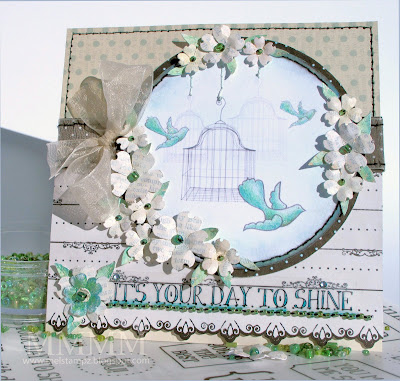
A little monochromatic Core-dinations fun for the latest Caardvarks challenge...


1...Caardvarks Celebrating Core-dinations Challenge!
2...How to make this monochromatic card (painted Core-dinations etc...)

-1-


This is for the

Core-dinations Monochromatic
Challenge here.

The cards the team has made are a droolfest!
Hope you can play along with us!

And for more inspiration you might wanna
have a visit here:


-2-

...make this monochrom Core-dinations card:


  • Core-dinations Jenni Bowlin Studio Core Impressions Collection (pre embossed yumminess!)
  • White cardstock
  • White acrylic paint, brayer, sanding block
  • Circular stuff to trace (glue bottle, bowl, & cup), pencil, scissors
  • Paper piercer, thread, needle,
  • Nursery Boy RP 78 paper by the Bottled Image Paper Co.
  • Flowers (felt, cardstock, old book pages, Mod Podge, paint, bugle beads)
  • Fred She Said leaves (Dancing Daisies digital set)
  • Putty Copic marker, silver gel pen, silver marker.


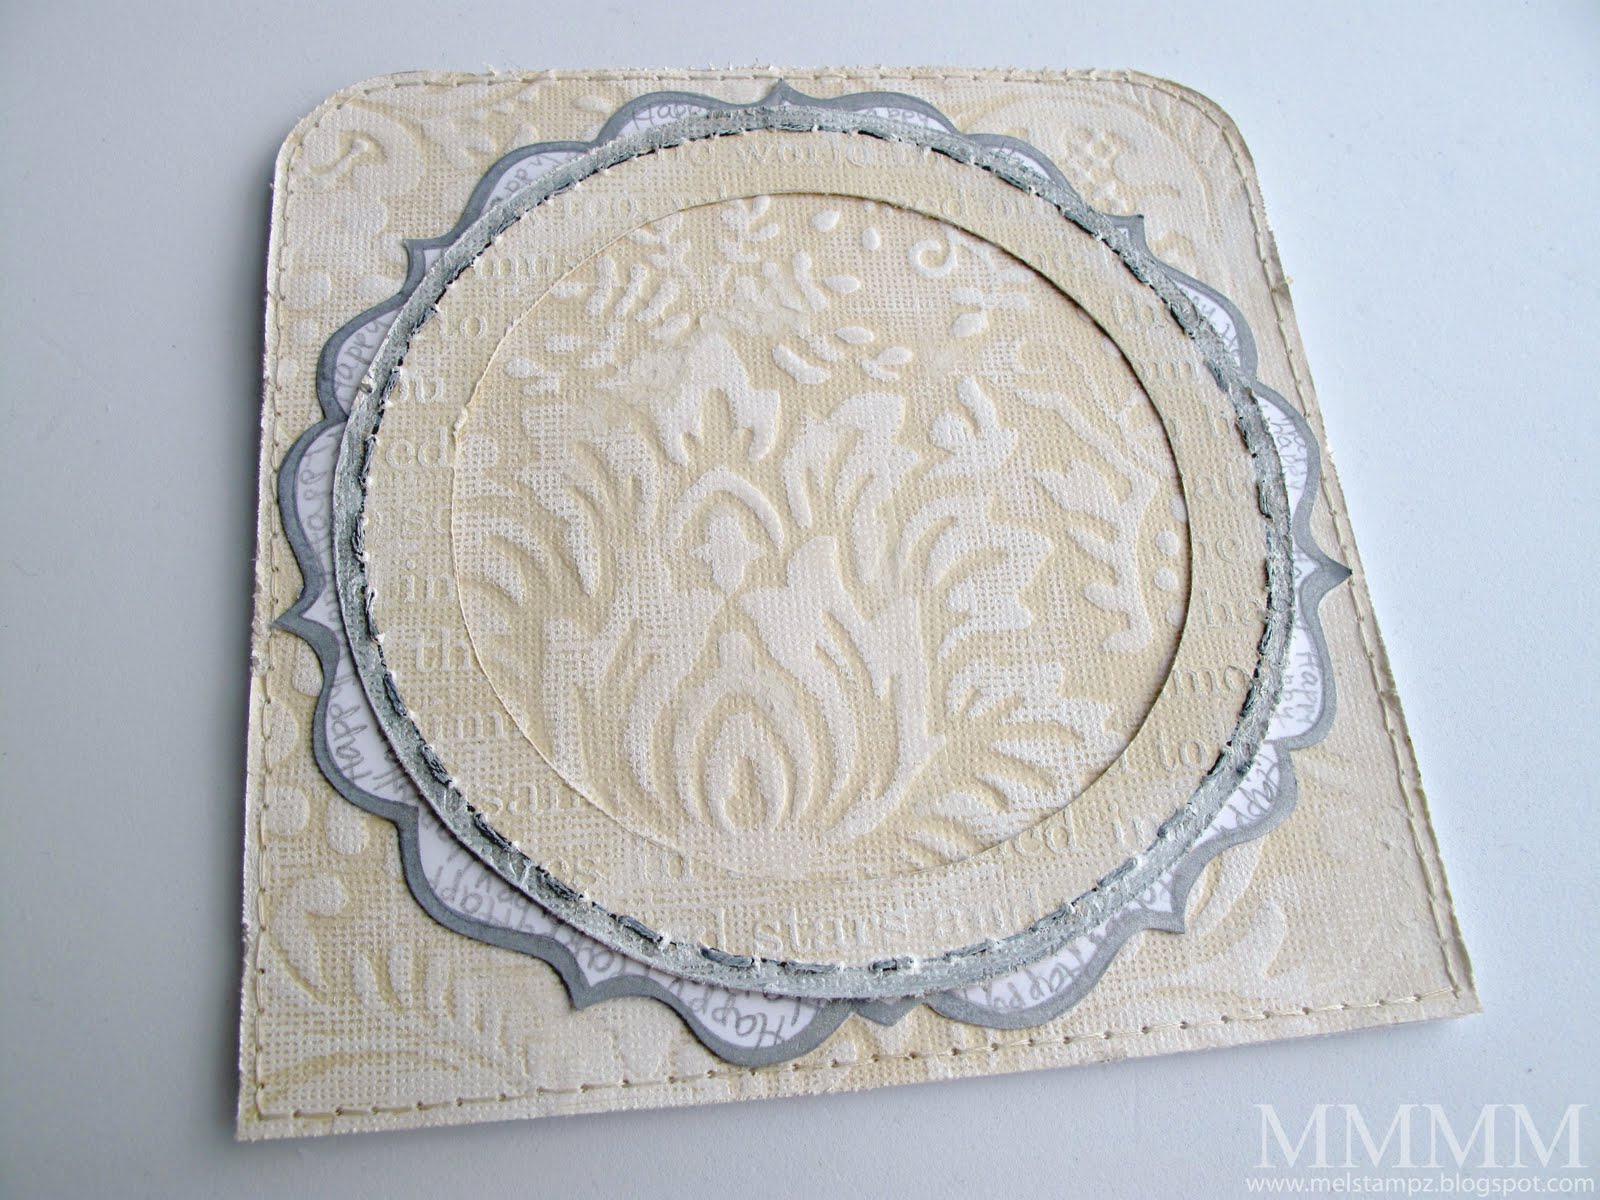
Step 1)
Cut Core-dinations cardstock & Brayer a little white acrylic paint onto it
(this is cut to measure 5.5 inches square.)

A little a lot of rambling about Core-dinations cardstock & paint: Granted, sanding this paper is wonderful (especially with its pre-embossed loveliness) but paint! It really knocked my socks off...

...the pure white colour with no dust...not to mention the way that snazzy waffle Core-dinations texture picked up the paint & looked like fabric. It looked even more fabric-like with a little bit of sanding, distressing, & stitching:


Of course, you could use a different colour of paint or a combination of colours for all kinds of crazy looks: faux verdigris copper with turquoise paint & rusty colours or something would be hot, no? :-D


Step 2) Round the corners. To get a large radius rounded corner with no punch, just trace something round in pencil, cut it out with scissors & erase the pencil line.

(This was a Judikin's diamond glaze bottle, but you could use anything, of course. Why even limit it to circles? You could make your own funky shaped corner "jigs" out of cardstock to trace instead.) :o)


Step 3) Pierce, stitch, & distress the Core-dinations cardstock.


Step 4) To make the folded card & round the corners on it:

A) Fold a piece of cardstock (this one is a piece of cardstock cut to measure 11 inches x 5.5 inches & scored in the middle to make a 5.5" square card)
B) Attach the textured piece with the rounded corners
C) Trim with scissors to cut the excess cardstock off
D) Distress with the edge of the scissors, if you like that look


Step 5) Cut a circular ring frame from more painted coredinations pierce & stitch it with black thread (every other stitch.) Fill in between with faux stitches in black multiliner; then, smooge the stitches with white paint to distress them.

Cheap trick: Tracing circle stuff from around the house is great if you have no circle cutter (or no clue which box it's still packed in. hehehe)


Step 6) Make a scallop-type frame for under the stitched ring
--this one was made by:

A) Drawing a circle as a guide to doodle two curvy bracket shapes
B) Cutting the bracket shapes out to make a paper jig (to trace)
C) Tracing another circle on a piece of white cardstock
D) Laying the "jig" over the circle & tracing the bracket shapes all around it
E) Cutting it out with scissors & erasing the pencil line
F) Filling in the brackets with hand printed "Happy" repeated in pencil
G) Edging it in silver marker (from the dollar store)
H) Roughly cutting out the center (so it won't show under the Core-dinations frame)


Step 6) Cut out some images. (These images are from some paper my supah sweet best friend Kimmy gave me so I'm not sure if it's still available, but it's called: Nursery Boy RP 78 paper by the Bottled Image Paper Co.


Step 7) Adhere the 2 frames to the card.


Step 8) Make some flowers.

( If you'd like to see more on how these flowers were made, please see these 2 tutorials: this one for the Mod Podge book page texture & this one for altering the 5-petal EK Success punch.)


Step 9) Add some flower centers.

These ones are wee homemade felt flowers:


To make some easy peasy cheap-o felt flowers:

A) Glue any old felt to cardstock.
B) Draw or stamp a flower on the back of the cardstock (or you could print digital ones before gluing the felt on, instead.)
C) Cut them out.

(I just doodled circles on the back of my white felt cardstock--to make 5 petals around a center--and cut it out. Pierced a hole in the middle & shaped them with my hands.)


Step 10) Make some leaves. These are Fred She Said leaves (from a Dancing Daisies digital set I bought here.) They were made like this...

A) Printed this silk flower vintage text on white 100lb cardstock
B) Printed the FSS leaves right over it
C) Coloured them with a Putty Copic marker
D) Doodled on the leaf vein lines with silver gel pen
E) Smooged over it all with white paint on my finger tip
F) Shaped them a little with my hands


Step 11) Adhere the Mod Podge & the felt flowers & stitch them on with silver bugle beads. Pierce and stitch the inside of the circular frame.


Step 12) Make a 3D sentiment flag shape:

A) Paint a piece of the Core-dinations with white paint

B) Cut into into 3 pieces: Cut one middle rectangular piece & fold it so it sits like a staple &
Cut two flag-type sides (to look like the ends of ribbon with V's cut in them)

C) Adhere the two flag bits to the back of the folded middle piece
Cut a sentiment from patterned paper (or stamp it) & glue it on


Step 13) Embellish an image. I glued the smaller image onto the larger, pierced around the edge & stitched.


Step 14) Adhere the stitched image inside the frame.


Step 15) Adhere the sentiment flag & pierce it along the sides.


Step 16) Finally, stitch the sentiment on.


...and then you have some monochromatic-ness:


Thanks for taking time to visit;
hope your day is filled with happy!


(Please click if you'd like to visit the blog
from an email or reader)

Read More
Posted in Caardvarks, cheap-tricks, Faves, Fred-She-Said, techniques, Tutorials | No comments

Thursday, 1 April 2010

Caardvarks Photo Inspiration card (late late late out of date)

Posted on 00:01 by Unknown
Caardvarks Photo Inspiration spring mel stampz

Sadly, I missed posting in time for the Caardvarks challenge
that this card was for, a photo inspiration challenge:


And the challenge was even sponsored by our very own Vark, Eva! :o( but hopefully this tutorial might still have something interesting... it's pretty basic. I'm still under the weather, so it's all that I have finished for now, BUT I'm working on some nifty things to share with you soon!


  • Calendar stamp used as a Background stamp --from Purple Onion Designs
  • light green ink
  • "Happy Birthday to You" sentiment is from S.R.M. stickers.
  • Moths are from a Two Pea's Digi Kit - Mod Moths Mini Kit by Holly Brooke Jones
  • Black rose paper Two Pea's digi paper - Glitterati: Uptown By Betsy Tuma
  • Flower image (Fred She Said's Digi flowers from the Smelling Cherry Blossoms set)
  • 100lb cardstock (white)
  • Paper piercer, green, turquoise & cream thread, needle, beads


Step 1) Make the background:

1A) Stamp the POD Calendar stamp in light green ink onto white cardstock & trim it.

1B) Add the S.R.M. "Happy Birthday to You" sentiment sticker.

1C) Place some flowers on the image temporarily (where you'd like them) & pierce lines for their stems using a paper piercing tool.


Step 2)
Stitch the flower stems & add the flowers:

2A) Sew the stems on in green thread.

2B) Stitch the flowers on:

1) Come up with a threaded needle, through back to the front of the image & adhere the thread-end at the back of the cardstock to secure it.
2) Add a flower (with a hole in its center) to your needle and add a bead to it to
3) Go back down the same hole in the image & adhere the thread end on the back of the image.)


Step 3)
Glue the leaves on & pierce a hole a bit of a ways up on the base of each leaf (to add the stitched stem in the next step...)


Step 4) Stitch a stem on each leaf.


Step 5) Grow some grass: Pierce lines & add grass with more green stitching.


Step 6) Make a mat with patterned paper. This is digital paper from Two Pea's Betsy Tuma Glitterati uptown papers--printed and adhered on a black mat of cardstock that I fringed with scissors, ruffled & then stitched a little with turquoise thread.


Step 7) Make Moths: Print the Mod Moths (these are lightened quite a bit & then printed (at 10% 7% 6%) on cardstock that I painted with gesso (to keep the ink wet long enough to heat emboss them in clear embossing powder.)


Step 8) Adhere the flower image & glue and stitch the moths: Glue the image with the flowers to the stitched patterned mat; adhere the mod moths onto it & then pierce & stitch their little moth bodies.

...and that's it:


If you're curious how to make these flowers & leaves,
please see the tutorial in this previous post:


Things are starting to shape up around our place. I've been: trying to get caught up on all the email; trying to cook some healthy meals for my hard working sweetie (love the gas stove); cuddling the sweet baby Mouse (our new kitten); and I have a semi-fab stamp room already!

Thanks for stopping by!

Read More
Posted in Caardvarks, cheap-tricks, Fred-She-Said, SRM-Stickers, Tutorials | No comments

Tuesday, 30 March 2010

Book-page Mod Podge blossoms--(3D cherry blossoms à la Fred She Said)

Posted on 00:01 by Unknown


Do you buy your flowers or make them yourself?
I must admit, I can never bring myself to spend cash on pre-made flowers;
some of them are so very pretty (but they also seem ultra pricey!)

Caardvarks photo inspiration with book page Mod Podge blossoms mel stampz

Granted, making your own flowers can take a bit of time, but are you like me (a bit of a cheapie)? Do you get that little thrill when you think of all the money you save making your own embellishments? (And then grin to think that you can spend it on other crafty goodness?!?...and still enjoy how unique your flowers are, too?) ;o) Being "cheap" can be such a crafty-blast, hey? ;o) giggle giggle.


1...making Book Page Mod Podge flowers
2...cheap tricks: textured leaves from scraps
3...a couple of variations

-1-
...make Book Page Mod Podge flowers:


These are made with plain cardstock & pages from an old book,
but you could use all kinds of things, in place of book paper:
  • Patterned 12x12 papers
  • Wrapping paper
  • Fabrics
  • Phone book pages
  • Maps
  • Magazines
  • Sewing Patterns
  • Lined/Graph paper
  • Ledger paper
  • Stamped or inked colour cardstock
  • Wallpaper
  • Patterned tissue papers


  • A flower image (digital or stamp) in different sizes (I used Fred She Said's Digi flowers from the Smelling Cherry Blossoms set)
  • Computer & Printer; 80lb or 100lb cardstock (white)
  • Pages from a book (or your favourite paper or fabric etc...)
  • Mod Podge & a scrap of cardstock to spread it
  • White acrylic paint (and an optional stamp to texture it with)
  • Scissors, hole punches (for the divots at the petal tips)
  • To shape: stylus tool (or the rounded end of a paint brush/pen) & a soft surface (fun foam or mouse pad)
Optional:
  • For flower colouring: Copic refill & paint brush-Frost Blue B00 (or alcohol ink or diluted acrylic paints
  • For leaves: Scraps from the flowers & a paper piercing tool to texturize
  • Copic Marker or other medium to tint leaves YG23 New Leaf
  • Calendar stamp used as a Background stamp --from Purple Onion Designs
  • "Happy Birthday to You" sentiment is from S.R.M. stickers.
  • Moths are from the Hero Arts DigiKit - Mod Moths Mini Kit by Holly Brooke Jones


Step 1) Prepare a document in order to print lots of flowers out on one piece of cardstock (or stamp the flowers out if you like.) I like digital the best for this, because you can size them differently for various flowers, in exactly the sizes you like best.

I used Fred She Said's Digi flowers from the Smelling Cherry Blossoms set as a Photoshop brush--but if you are a beginner with that type of technology, you could use whatever method you're most comfortable with to paste a whole bunch of the three sizes that come in the set in one document.

Step 2) Print the flowers on thick 80lb or 100lb cardstock.

Step 3) Glue pages from an old book to the blank back of the paper that the flowers are printed on (I used Mod Podge matte to glue):

My method of choice for applying Mod Podge:


3A) I like to pour Mod Podge straight onto the cardstock and then very quickly...


3B) ...spread the Mod Podge in an even layer--not too thinly or too thickly. (Green tip: using a piece of heavy cardstock to spread it saves having to clean a brush or waste a disposable foam brush.) I love it when my sheer laziness & cheapness is good for the environment, hehehe.


Step 4) Press book pages (or whatever paper type you like) into the wet Mod Podge. Of course, different book pages give different results; old book pages that are falling apart will give you an old distressed wall paper look.


Step 5) Apply some white paint (or any colour you like.) I used white acrylic paint mixed with Mod Podge and applied it with a rag (still no dirty brush to clean.)


Step 6) You can add interesting texture by pressing a rubber stamp into the wet paint (it may pull up some of the paper, but I love that look.)


To avoid damaging your stamps when using them in paint: Prep the stamp with a generous coating of Versamark & just be sure to clean your stamp as soon as you're done with it.

To clean it very well: I find scrubbing the paint of gently with a toothbrush & warm water with a touch of dish soap works wonders. :o)


Step 7) Rough cut the flowers: After the page is dry, flip it over & roughly cut to trim around a section of flowers.


Step 8) Cut into separate flowers & punch. I like to cut them apart but leave some of the rough outline intact (in other words, don't trim it perfectly yet.) It gives you more paper to hold while you punch....


Step 9) Punch the little divots at the tip of each petal using different sized hole punches for the different sized flowers (so much easier than trying to cut those little divots by hand & it's faster!)

The Fred She Said flowers have a built in guide for where to punch the holes. No need to punch in the exact center, since it looks more natural if you're not exact.


Step 10) Cut the flowers out (the FSS flower centers end up on the back of the flower--they're so cute that it's a shame to hide them, but they make a fantastic guide for cutting--especially if you want to cut deeper petals than the original flower for shaping.)


Step 11) Shape the flowers. Use a stylus (or the rounded end of a paint brush or a pen) on top of something soft. I used a homemade fun foam mat (but you could use a soft mouse pad) to shape the flowers...

Here's the way I like to shape.
It's very fast & gives a distressed look...


11 A) Press down once in the middle from the front.


11 B) Next, flip the flower so the back is showing and press once in the middle of each petal.


11 C) To finish, flip it over again (so the front of the flower is showing) and press once again in the middle to reshape.

Many people work their shaped flowers much more nicely than this (by using various sizes of stylus in little circles) but I like the speedy (lazy) shabby-chic look for these. You might find that your shaping technique may need to be different with different paper types. :o)


Step 12) Pierce a hole in the center of the shaped flower (if you want to stitch them on, or if you just want to have a decorative hole in the flower center.)


Step 13) Add colour--paint on Copic marker refill with an old brush (if you don't want to clog Copic marker tips.) This Copic Colour is Frost Blue B00.

Copic markers: The chisel or broad end often serves as my "do-anything-messy-with-it" end of my Copic markers--since acrylic paint can damage Copic tips, but I refuse to be limited by that, LOL.) Alternatively, you could use alcohol inks or thinned-down acrylic paints...

and here are the finished flowers:
close flower
(stitched on with beads in the center.)

-2-

(as if this wasn't cheap enough, LOL)

Can't leave those scraps alone!


You can save the scraps that you cut away to make leaves:


Step 1) Just cut leaves out, free-hand (or if you'd rather have an outline you can draw or stamp a leaf shape).


Step 2) "Draw" lines on with the pointed end of a paper piercing tool (turned on it's side a little on a similar angle as you would hold a paint brush).


Step 3) Colour your leaves. (This photo is evidence of me being BAD & colouring with that broad chisel end of the Copic marker...gotta have some rebellion in your life, right? Stamp dork style.) ;o) This is YG23 New Leaf.


A little Sticky Point: The Copic ink may make the Mod Podge or paint on the leaves sticky, so you might want to let them dry (to cure the ink) before handling or you might get a fingerprint-y style. If you're impatient like me & you get them fingerprinted up, you can just reapply a bit of colour to fix it. ;o)

Finicky schtuff:
  • Drawing the leaf lines on first & then colouring with Copics seems to give more colour, as it builds up a little in the grooves.
  • Depending on your book paper & the saturation level of paint, you may get a more mottled look (the older paper I used tore a bit and the Copic colour was deeper).
  • Paint resists the colour, but any torn or scratched bits let the ink soak into the scored lines--making darker leaf veins.
  • To get a shiny finish on your leaves you can add an extra coat of Mod Podge on top (it makes them more durable too...)
-3-
Here are some vintage-y ones
(really distressed and un-coloured):

Caardvarks SRM Stickers & Hero Arts cages & my freebie  birds mel stampz - Copy

If you want a really distressed look, you can use older crumbly book pages
(that are really easily torn) and that should let you flake off a bit of the layers, like these:


or you could sand off a little of the paint.

...and here's a layered one:
...it has glitter & a couple of Copic colours (aqua & new leaf green)

You can see the whole card with the more vintage
looking flower here, if you like:


Thanks so much for checkin' this out!
Hope you have the most gorgeous day,


Edited to Add:
Thanks to the sweetness of Nance, here's the text PDF download
(You're amazing Nance! Thank You!!!)

Edited to Add:
Here's the PDF of this post, in case you'd like it:
Download Book-Page Mod Podge Blossoms PDF

(It's with photos; I still need to learn how to take them out for a text only version) :O)
(please click if you'd like to visit the blog
from an email or reader)
Read More
Posted in BASICS, cheap-tricks, Digital-Images, Faves, Fred-She-Said, techniques, Tutorials | No comments
Older Posts Home
Subscribe to: Posts (Atom)

Popular Posts

  • free Butterfly Silhouette .studio cut files (in 3 styles)
    Hi, All! Here are those butterfly Silhouette .studio cut files. They are for only for the Silhouette machine... But I do hope to share other...
  • Graphics Fairy Inspiration (+vintage printables)
    Thank You all so much for your wonderful comments about the papers I've been obsessed with. Your kind words make me grin so big that I g...
  • New Popcorn Box template set (pretty stamp room storage) :o)
    Are you in the mood for a template or two? I was going to wait until I had really good photos and a full pictorial, but then I would take fo...
  • "Honey, I shrunk the stationery!" (Hero Arts typewriter notebook)
    Still trying to make more of my cards into little gifts. This Hero Arts typewriter card is another take on the card turned refillable notebo...
  • Making Your Own Colour Shimmer Sprays--Links & Info
    Info & Links Links for how to Mak e yo ur o w n Sh im mery s prays: (These are for you sweet Beth! oxo) ( more info on these colours in...
  • over 100 free pattern overlays ... at a glance
    Would you believe that the free overlay total is at 139 overlays and counting? (I might have a wee little addiction) ;-) Since overlays can ...
  • Felt-based cards (Rock-a-Bye Baby tutorial)
    New idea, Old projects.... I've been debating whether or not to post some older projects/tutorials since the big bad insecurity beast...
  • Circle Overlays (to revamp your papers!)
    Can you ever have too many ways to use your stash? No card today, just popping in with a cheap trick for revamping your "old" pat...
  • Everything I've Ever Made (at a glance)
    This post is a visual overview of my blog history-- with thumbnails that are linked to tutorials & templates for pretty much everything ...
  • 3 Clean And Simple cards (with SRM stickers)
    You guys may know that I was tragically born without the gene that let's you achieve a C lean A nd S imple card. ;-) Not sure why I find...

Categories

  • 'Mouse'-the-cat (10)
  • *TEMPLATEs (98)
  • 3D-projects (144)
  • A-Day-For-Daisies (7)
  • Amber Ink (9)
  • Angel's-Landing (2)
  • BASICS (47)
  • Blogging-tips (7)
  • Caardvarks (48)
  • Cat's-Pajamas (2)
  • cheap-tricks (224)
  • Christmas (33)
  • Claire-Keay (2)
  • Cricut (3)
  • cut-file (2)
  • Cuttlebug (45)
  • decor (6)
  • Digital-Images (131)
  • Distress-Inks-etc (14)
  • DIYstamps (1)
  • Eat-Cake-Graphics (11)
  • Faves (207)
  • Fred-She-Said (5)
  • Freebies (77)
  • GESSO (9)
  • Halloween (10)
  • Heather Ellis (3)
  • Hero-Arts (14)
  • ISC (7)
  • Jessica-Sprague (2)
  • Just-Rite (2)
  • LPS (63)
  • Mo's-Digital-Pencil (16)
  • My-Favorite-Things (33)
  • organizing (7)
  • Other-People's-Tutorials (36)
  • Paper-Garden-Projects (54)
  • Paper-Temptress (39)
  • Punches (21)
  • Purple-Onion-Designs (23)
  • S.U. (1)
  • SCOR-PAL (4)
  • silhouette (4)
  • Skipping-Stones-Design (7)
  • Squigglefly (6)
  • SRM-Stickers (8)
  • techniques (191)
  • templates (26)
  • Tiffany-Doodles (4)
  • Tutorials (252)

Blog Archive

  • ▼  2013 (16)
    • ▼  July (4)
      • A Triple-stamped Fancy-cut Flower card
      • Flying by to say ... 'hello'
      • a Silhouette Challenge project
      • Silhouette Cameo - Sketch pen Camera card
    • ►  June (4)
    • ►  May (3)
    • ►  April (1)
    • ►  March (1)
    • ►  February (3)
  • ►  2012 (53)
    • ►  December (2)
    • ►  November (2)
    • ►  October (1)
    • ►  August (3)
    • ►  July (2)
    • ►  June (5)
    • ►  May (7)
    • ►  April (8)
    • ►  March (9)
    • ►  February (13)
    • ►  January (1)
  • ►  2011 (74)
    • ►  December (1)
    • ►  November (5)
    • ►  October (10)
    • ►  September (9)
    • ►  August (12)
    • ►  July (5)
    • ►  June (9)
    • ►  May (2)
    • ►  April (6)
    • ►  March (7)
    • ►  February (4)
    • ►  January (4)
  • ►  2010 (84)
    • ►  December (7)
    • ►  October (1)
    • ►  September (6)
    • ►  August (1)
    • ►  June (1)
    • ►  May (7)
    • ►  April (21)
    • ►  March (3)
    • ►  February (17)
    • ►  January (20)
  • ►  2009 (234)
    • ►  December (16)
    • ►  November (21)
    • ►  October (11)
    • ►  September (23)
    • ►  August (29)
    • ►  July (26)
    • ►  June (10)
    • ►  May (16)
    • ►  April (26)
    • ►  March (22)
    • ►  February (27)
    • ►  January (7)
  • ►  2008 (39)
    • ►  December (14)
    • ►  November (25)
Powered by Blogger.

About Me

Unknown
View my complete profile