


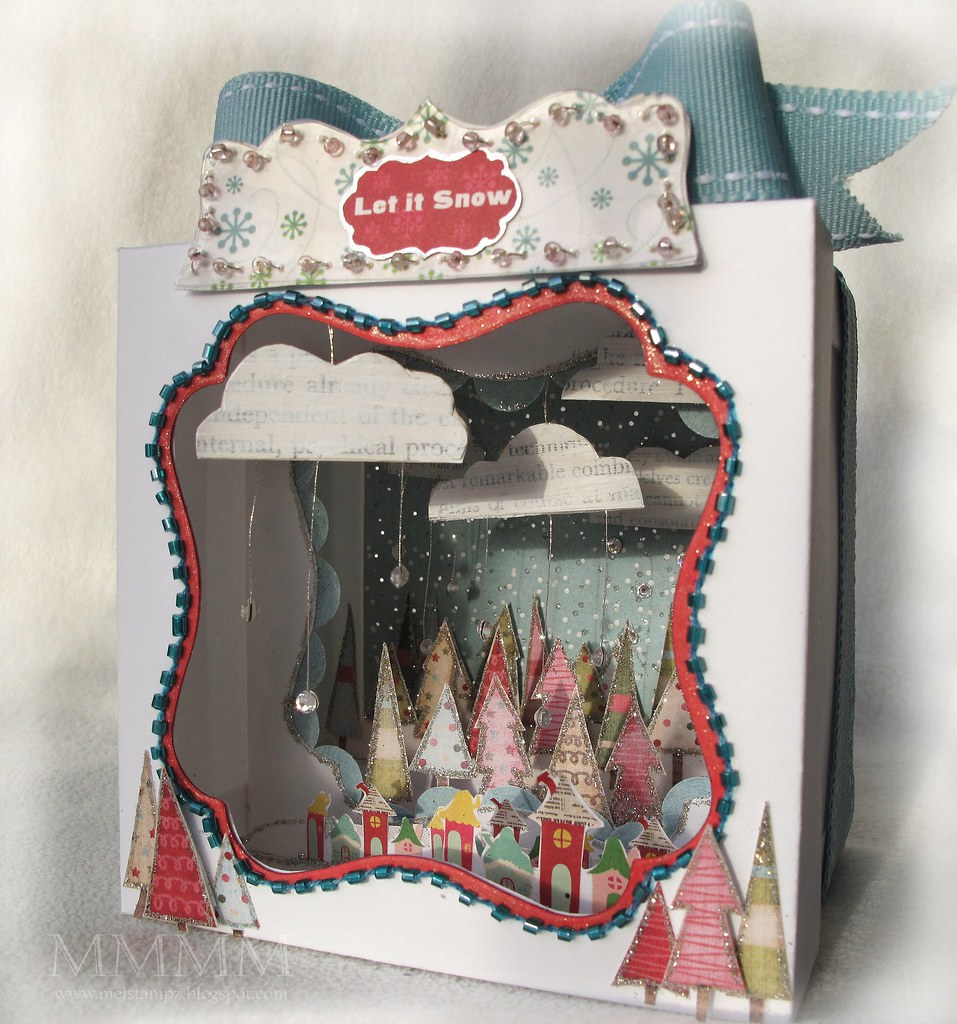
This was messy (a glitter explosion!) but oh so fun to make. I wish you could see the sparkles & spinning of the clouds in person. Makes ya feel like a kid again!

a whole lot o' how to make a cupcake box into this diorama:
part 1...the back layers of the diorama (the main box)
part 2...the middle layers (trees, clouds, & the cupcake holder section)
part 3...the lid (or front)
part 4...the clouds

make a diorama


Creative Cuts & More die cuts used for this:
Antique Label -in acetate
Antique label -in chip board-medium weight
Cupcake Box Set -in coconut swirl
You can read more about the handy-dandy die cuts in this post, if you like
& the remainder of the materials are detailed below. :o)
& the remainder of the materials are detailed below. :o)

part one
the back layers
(the sky etc...)
(the sky etc...)
Step 1a) Adhere a piece of patterned paper (4 inches by 4 inches) to the inside (bottom) of the CCM cupcake box.
Step 1b) Pierce it randomly with a paper piercer (It will let the light sparkle through like sparkly snow.) :o)

Step 2) Add white Souffle pen dots randomly all over the sky.

Step 3) Add dots of Quickie glue pen randomly (like you did with the white dots)
Step 4) Sprinkle glitter onto the Quickie glue white the dots are still wet. (This is Martha Stewart White Gold glitter.)

Step 5) Make the glittery trees.
A) Cut out some trees. (These are from My Mind's Eye Trim the Tree paper.)
B) Adhere them to white cardstock (cut in a curvy line)
C) Add glitter to them too (with a Quickie glue pen.)
Step 6a) Adhere the first tree layer to the sky (Popping it up with foam tape or extra layers of cardstock & adhesive.)
Step 6b) Add a cloud in the same manner & adhere some crystals to the sky below the cloud.

Step 7) Add the second layer of trees to the left & right sides of the box (inside)

Step 8) Add the first hanging cloud. I threaded it with a needle, but you could adhere it to the ceiling of the box, if you like. Then you'd have no knot on top of the box to have to hide later. :o)
part two
the middle layers

Step 1) Alter the inside piece (it's meant to be the cup cake holder but this turns it into another Diorama layer):
A) Lay the lid over the cupcake holder (it looks like a circle with ears)
B) Make sure it's centered & trace the curvy label shape of the cupcake box lid
C) Cut the label shape you've traced out...

Step 2) Add scallops to the cupcake holder middle layer of the box & a piece of paper to the back of it (the back of the die cut box measures 4x4 inches)
The scallop was created by punching circles & adhering them to the inside of the lid:

(I used the same blue BasicGrey paper that the sky was cut from, a 3/4" circle punch, & Tombow Monomulti to adhere them--which lets you move the circles around a little to get them fairly even.)
Step 3) Add more clouds to the back of that scalloped middle layer & glue it into the diorama box.

Step 4) Cut wee houses out

Step 5) Make folded pieces of card to hold houses up. This shimmery paper is Lustre from Paper Temptress.

Step 6) Add the 2 rows of houses
part three
the lid (or front)

Step 1) pierce & colour around the curvy label shape in the lid

Step 2) Bead the cupcake box lid
Step 3) Make the let it snow label:
A) Cut a CCM Antique label (medium weight chipboard) in half and cover it in patterned paper (the snowflake paper I used here is more paper snuck from the Cosmo Cricket catalogue.) :o)
B) Cut a second CCM Antique label (acetate this time) in half
C) Pierce the acetate & and lay it over the chip board
D) Use the pierced acetate as a guide to pierce the chipboard (medium weight pierces like butter--LOVE that stuff!)
E) Stitch the acetate on & add beads, if you like.
F) Cut the wee let it snow label (from the Cosmo Cricket cattie) Glitter it & adhere it on top of the acetate.
Step 4) Add a couple of extra trees to the front
part four
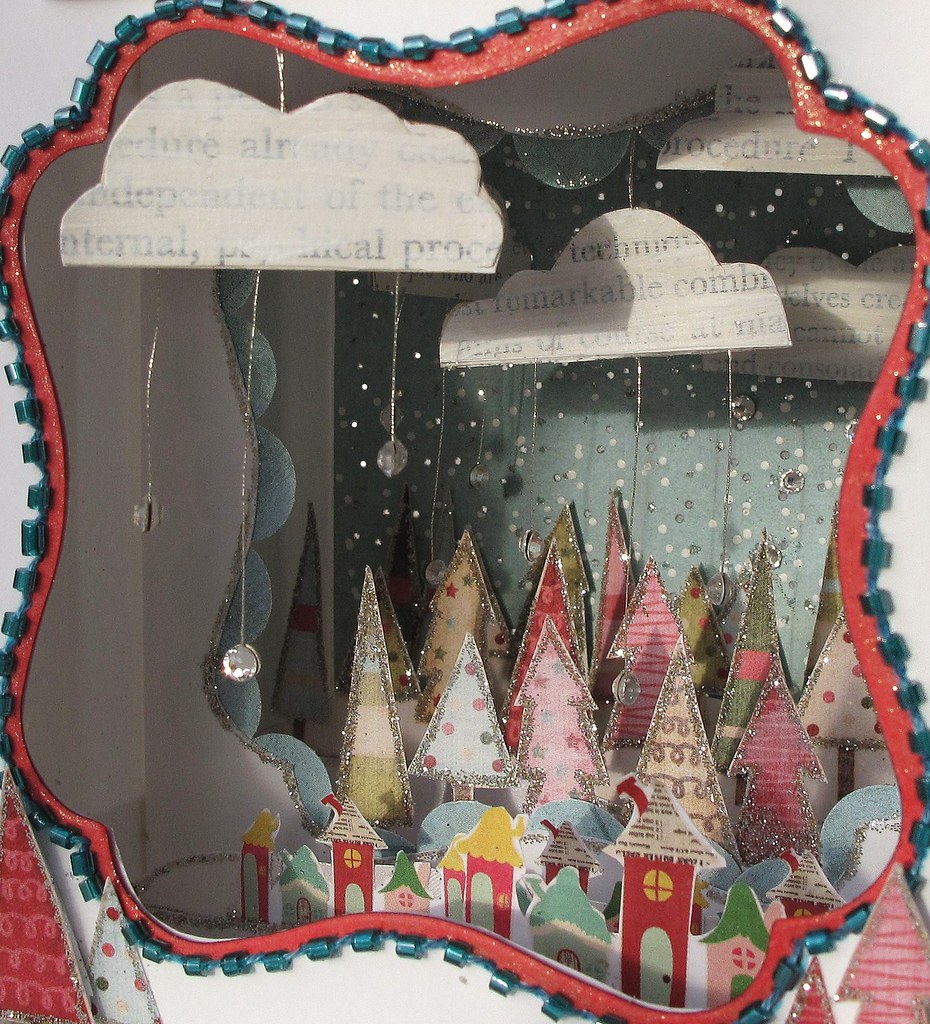
the gem clouds


Step 1) clouds draw clouds & cut them out (make mirror images of each cloud so they can stick together--like a cloud sandwich)

Step 2) Add adhesive to the backs of the clouds. I like to use Alene's tack it over & over (or tombow monomulti adhesive)...put it onto the back of all the clouds and let it set up (makes life so much easier, LOL)

Step 3) Add 3 threads (hanging down from the cloud) for the gems (silver thread)

Step 4) Add more silver thread at the top of the cloud (2 strands to hang the cloud with --leave extra length to work with it more easily.)

Step 5) Sandwich with another cloud shape on the back to cover the thread ends inside

Step 6) Add adhesive to the tips of the thread ends & let it set

Step 7) Use that sticky adhesive (that has set up) to pick up the back of a gem

Step 8) Sandwich a second gem on the back of the first one
and there you have it...a teensy little microcosm of craftland, LOL...
Thank You for takin' a peek into
my crazy lil' world!
my crazy lil' world!


0 comments:
Post a Comment