StampznewBright

  • Subscribe to our RSS feed.
  • Twitter
  • StumbleUpon
  • Reddit
  • Facebook
  • Digg

Thursday, 11 December 2008

Props to da Pencil & Vellum resist 'A Year of Flowers' (& 4 2/8" box tutorial)

Posted on 16:17 by Unknown


This puppy is a pizza-ish box for those of you who might wanna make note card sets as gifts for the holidays, but who find 3 x 3 too small. It's a 4 2/8" square box made with 12 x 12 cardstock. (No printable template for this one, due to its size, but hopefully the instructions are clear. If not, lemme know. :O) It's really easy one you try it once.)


The PDF of the directions are here linked on SplitCoastStampers & there's a printable template for envelopes to fit in it too (the envelope is resized from an older one to be sure it's fit the cards & then fit in this box.)


The technique for the stems was super exciting for me...using the lowly but lovable pencil (I have a thing for pencil sketches.) It combines with embossing & a Putty coloured Copic marker. The flowers are Vellum resist & have little embroidery knots in the center.

Supplies:

Stamps: Melanie's loverly A Year of Flowers stamp set (Love how they can give you so many different styles) :O)
Paper: 12x12 cardstock: Textured In Colour Cardstock (River Rock-retired); Naturals White cards, river rock cs, black cs. Vellum cardstock. Patterned gesso cardstock.
Colour n Schtuff: Stems: River Rock ink, Versamark, Clear embossing powder, Pencil & eraser. Flowers: River Rock ink, clear ep, Black Craft ink, Black marker, Black Embroidery thread
Goodies: Beads, Cuttlebug border Frills embossing folder


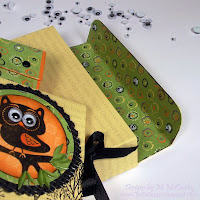
The box opens like a gift box. Rounding the corners means the flaps can tuck inside it for a tidy look. :O) Of course, if they're misbehaving, you can always trim 'em a little to make them squeeze in there.

How to make the box:


click the pic to see the directions closer

Makin' the Flowers 'n' Stems
:
(and the cards)


Step 1)
Emboss flowers from A Year Of Flowers onto vellum.
The neat thing about vellum cardstock (SU) is that you can emboss regular (dye-based) Classic inks if you're speedy with the embossing powder. This is with clear e.p.


Step 2)
Swipe on ink. This is black Craft ink. I like the smoothness of Craft ink (pigment ink) but other inks that you use for resist would work too.


Step 3)
Wipe off the excess ink. You may want to let the ink set for a little bit first (10-20 seconds)


Step 4) Reheat it. A secondary quick heating up with the heatgun will restore the gloss to your embossing.


Step 5) Add depth by shading with marker. This is a Black Close to my Heart marker.


Step 6)
Cut out the flowers


Step 7) Emboss leaves from A Year of Flowers onto patterned gesso cardstock. The gesso lets you emboss the River Rock classic ink. You could also use any vellum or glossy cardstock that lets the ink stay wet long enough to powder it.

For how to make gesso cardstock
please see this post:


Step 8) Draw in stems with a pencil. This is SO cool... you can use an eraser to pick up some of the pencil & then draw with the eraser onto the embossing. It smudges and creates a kind of pastelly or charcoal blended look. Different pencils & erasers may work differently... the gesso is what seems to make this work

You can also use a Copic marker to pick up the pencil (or go over it and make it permanent.) The Putty YG-91 colour goes perfectly with River Rock ink.


Step 9) Adhere the flowers to the paper & pierce holes in the center for knots
Step 10) Sew in knots for centers
Step 11) Add image to mat & sew on beads
Step 12) Cut cardstock to measure 4 2/8 by 8 1/2 inches and fold in half to make 4 2/8 square cards (love that size, not too big not too small.) :O)
Step 13) Emboss the bottom of the card with flowery Frills embossing folder
Step 14) Adhere matted image to the card


And that's all she wrote. Hope it was useful to ya!


P.S. There's another style (top opening) 4 2/8" square box here:
Email ThisBlogThis!Share to XShare to FacebookShare to Pinterest
Posted in cheap-tricks, Faves, techniques, Tutorials | No comments
Newer Post Older Post Home

0 comments:

Post a Comment

Subscribe to: Post Comments (Atom)

Popular Posts

  • free Butterfly Silhouette .studio cut files (in 3 styles)
    Hi, All! Here are those butterfly Silhouette .studio cut files. They are for only for the Silhouette machine... But I do hope to share other...
  • DIY digital paper (some freebies)
    The lull in posts (over the last couple of days) was for me to finish up this looooong post I've been wanting to share with you for eons...
  • New Popcorn Box template set (pretty stamp room storage) :o)
    Are you in the mood for a template or two? I was going to wait until I had really good photos and a full pictorial, but then I would take fo...
  • Missing with a migraine, Craft room BEFORE pics, & LINKs for Organizing the craft room
    Edited to add: Sorry guys. I feel like I was hit by a truck. Migraine's lasted so long... but I will be back with a post by tomorrow eve...
  • Graphics Fairy Inspiration (+vintage printables)
    Thank You all so much for your wonderful comments about the papers I've been obsessed with. Your kind words make me grin so big that I g...
  • "Honey, I shrunk the stationery!" (Hero Arts typewriter notebook)
    Still trying to make more of my cards into little gifts. This Hero Arts typewriter card is another take on the card turned refillable notebo...
  • 3 Clean And Simple cards (with SRM stickers)
    You guys may know that I was tragically born without the gene that let's you achieve a C lean A nd S imple card. ;-) Not sure why I find...
  • Making Your Own Colour Shimmer Sprays--Links & Info
    Info & Links Links for how to Mak e yo ur o w n Sh im mery s prays: (These are for you sweet Beth! oxo) ( more info on these colours in...
  • over 100 free pattern overlays ... at a glance
    Would you believe that the free overlay total is at 139 overlays and counting? (I might have a wee little addiction) ;-) Since overlays can ...
  • Felt-based cards (Rock-a-Bye Baby tutorial)
    New idea, Old projects.... I've been debating whether or not to post some older projects/tutorials since the big bad insecurity beast...

Categories

  • 'Mouse'-the-cat (10)
  • *TEMPLATEs (98)
  • 3D-projects (144)
  • A-Day-For-Daisies (7)
  • Amber Ink (9)
  • Angel's-Landing (2)
  • BASICS (47)
  • Blogging-tips (7)
  • Caardvarks (48)
  • Cat's-Pajamas (2)
  • cheap-tricks (224)
  • Christmas (33)
  • Claire-Keay (2)
  • Cricut (3)
  • cut-file (2)
  • Cuttlebug (45)
  • decor (6)
  • Digital-Images (131)
  • Distress-Inks-etc (14)
  • DIYstamps (1)
  • Eat-Cake-Graphics (11)
  • Faves (207)
  • Fred-She-Said (5)
  • Freebies (77)
  • GESSO (9)
  • Halloween (10)
  • Heather Ellis (3)
  • Hero-Arts (14)
  • ISC (7)
  • Jessica-Sprague (2)
  • Just-Rite (2)
  • LPS (63)
  • Mo's-Digital-Pencil (16)
  • My-Favorite-Things (33)
  • organizing (7)
  • Other-People's-Tutorials (36)
  • Paper-Garden-Projects (54)
  • Paper-Temptress (39)
  • Punches (21)
  • Purple-Onion-Designs (23)
  • S.U. (1)
  • SCOR-PAL (4)
  • silhouette (4)
  • Skipping-Stones-Design (7)
  • Squigglefly (6)
  • SRM-Stickers (8)
  • techniques (191)
  • templates (26)
  • Tiffany-Doodles (4)
  • Tutorials (252)

Blog Archive

  • ►  2013 (16)
    • ►  July (4)
    • ►  June (4)
    • ►  May (3)
    • ►  April (1)
    • ►  March (1)
    • ►  February (3)
  • ►  2012 (53)
    • ►  December (2)
    • ►  November (2)
    • ►  October (1)
    • ►  August (3)
    • ►  July (2)
    • ►  June (5)
    • ►  May (7)
    • ►  April (8)
    • ►  March (9)
    • ►  February (13)
    • ►  January (1)
  • ►  2011 (74)
    • ►  December (1)
    • ►  November (5)
    • ►  October (10)
    • ►  September (9)
    • ►  August (12)
    • ►  July (5)
    • ►  June (9)
    • ►  May (2)
    • ►  April (6)
    • ►  March (7)
    • ►  February (4)
    • ►  January (4)
  • ►  2010 (84)
    • ►  December (7)
    • ►  October (1)
    • ►  September (6)
    • ►  August (1)
    • ►  June (1)
    • ►  May (7)
    • ►  April (21)
    • ►  March (3)
    • ►  February (17)
    • ►  January (20)
  • ►  2009 (234)
    • ►  December (16)
    • ►  November (21)
    • ►  October (11)
    • ►  September (23)
    • ►  August (29)
    • ►  July (26)
    • ►  June (10)
    • ►  May (16)
    • ►  April (26)
    • ►  March (22)
    • ►  February (27)
    • ►  January (7)
  • ▼  2008 (39)
    • ▼  December (14)
      • Happy New Year! and a project recap :o)
      • Over 50 links for Stitching paper (tutotials & exa...
      • I'm getting a stamp room!!!! (& Over 100 ways to u...
      • Thanks for the Love & no need to worry :O) OXO
      • Sorry no posts for a few days
      • Props to da Pencil & Vellum resist 'A Year of Flow...
      • M is for Monogram Templates & Tuts
      • LPS Penguin Box with stitched acetate (template & ...
      • Cardstock Blog Candy from Paper Temptress!
      • Note Top Purse Templates
      • Sleighful Scene, Dark Rectangular Labels, & Ideas ...
      • Square Label or Note shape Templates (& some cards)
      • "Have a Cookie" Box for Ruzzer (gift idea)
      • Have You been Naughty or Nice? ;O) (& a virtual pe...
    • ►  November (25)
Powered by Blogger.

About Me

Unknown
View my complete profile