I've been thinking about Christmas gifts and how to make a million on a budget, LOL. The 3D challenge blog got me started with the template they posted of an Open Top Box.
I needed some cute paper with enough heft so I thought of the Putting on the Glitz paper kit that I got from Paper Garden Projects:
It has a lot of paper & goodies for a great price and it's so cute, so I thought I'd make some things with it and buy an extra pack to give to my friend Kim. Which I'm thinkin' will be perfect for her princess-themed scrapbook of her family's trip to Disneyland.
The patterned paper has glitter & the Bazzill Bling rocks the shimmer. In honour of her twin girls' love of pretty glitz, I made some shimmery brads & homemade primas & thickers using the patterned paper (perfect because they love purple and pink & it has little touches of that.)
Hope this gives you some ideas for the stamper or scrapper on your gift list... :O)
The Double Open Top Box:

Step 1) Cut patterned paper paper to 8.5 inches wide. Print the box template onto it.
(You can find the template linked on the 3D challenge blog here.) You can erase the dotted lines in photoshop (or leave a comment & I'll reply to you with the attachment.

Step 2) Cut & Score the box.

Step 3) Punch holes where the template indicates & add eyelets, if you like. I've used cheap Satin ribbon from Michael's but dressed it up with a bit of Shimmerz painted on.

Step 4) Assemble a 3x3 acrylic box (I got mine here) & slide the patterned paper open top box in. If Cathy is sold out, not to worry. She replenishes stock often when items are available. Maybe email her? :O)

I wrapped the white with pink polka dotted ribbon around the box (the ribbon comes in the kit too.) Please see below for how to make the flower...
Altered Brads:
I got some brads at the dollar store that were sort of poorly made (the sticker finish was marred or they were on crooked, but I noticed the fronts were easy to take off, so I bought a whack to alter. Here's how I did these ones...

Step 1) Peel stickers off of the brads

Step 2) Add adhesive to the brads.
I like Tombow monomulti for this because it'll stay sticky and gives you time to work with it. You could leave this step for later if you only have a fast drying adhesive.

Step 3) Punch or cut shapes to fit.
If you don't have punches, you can use the sticker as a guide & cut pieces to fit (depending on how sticky your sticker is, I guess. These weren't overly sticky so I stuck them on the back of the Putting on the Glitz paper & cut around the sticker.

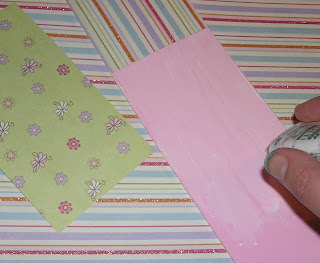
Step 4) Paint some glimmer onto the paper
I used Shimmerz here, but you can also use Pearlescent paints (the white is lovely for this), or Lumiere, or a glitter pen...

Step 5) Coat the brads with Crystal Lacquer. If you're adding embellishments you can drop them into the lacquer. I added some of the dewdrops that come in the kit.
(More altered brad ideas here if you wanna check 'em out.)
Homemade Thickers:
I love cutting fun foam with Cuttlebug dies & sticking paper on it makes homemade thickers that are all matchie-poo! :O) (My friend Kim loves matching things.)

Step 1) Cut some paper & fun foam to a good size to fit your dies
Step 2) Coat the fun foam in Tombow monomulti
Step 3) Stick the paper on & let dry well
Step 4) Cut the fun foam with your die cuts (these are Provocraft Flowers)
Step 5) Add glimmer (Shimmerz, Pearlescent paints, glitter pen, Lumiere)
Step 6) Emboss with Cuttlebug embossing folders
Step 7) Embellish with microbeads, glitter.. I've used dew droplets
The embossing stays nicely in the paper & the foam makes any die cut shape dimensional. You can match your colour of foam too:
This little jar & package was from some beads, but it was just the right size for wee primas made with the Putting on the Glitz paper & Stampin' Up!s "Three For You" punch. To make them just punch the flower & then on a mouse pad or fun foam mat, press down with the end of a paint brush.
The package was made by tracing the original backing onto the Putting on the Glitz paper & cutting it out, and that's it... a little gift set that I hope my friend Kim will enjoy for her princess pages. :O)
Thanks so much for taking time out of your busy day,


0 comments:
Post a Comment