finally, a post! Hope there's still a handful of my blog buddies out there after my long absence. Sorry for being gone; I kept longing to post & then getting half way through writing some, but I've been so ill and exhausted.
I'm still struggling to keep up with email requests, so please forgive me & please kindly email me again if I've missed replying to you (I am so sorry. I feel terribly guilty, but I'm just finding it impossible to catch up.) I'm hoping to get back to regular posts & business as usual around here.
On a more personal note, the weirdest part is that my thinking is in a majorly fuzzy state. My sweet C is most worried about how long I've been feeling like this, but especially my inability to remember things or think clearly at all. Maybe it's early senility? Feels like it! Thankfully, brain scans have found nothing, so in the words of the Governor of California "It's not a tumour!"
but enough of that and onto a stamping project already!

This is a 5x7 file box from Club Scraps for the latest Caardvarks challenge. When you open it, there's a little surprise....

flowers! :O)

1- Caardvarks challenge (3D!) Sponsored by Club Scrap
2-curvy template for the file section
3- making embroidered flowers
4-...fashioning a beaded wire handle:
-1-
Caardvarks 3D!
3D challenge
The Caardvarks crew has made a whole variety of stunning 3D projects. Can't wait to see what You All make.
The Caardvarks crew has made a whole variety of stunning 3D projects. Can't wait to see what You All make.
The Prize is... a huge assortment of Club Scrap product -- a sheet of UM rubber, Club Scrap exclusive projects, a POP (pound of paper), plus a whole lot more!
...from the sponsor:
We worked with the yummy kits from Club Scrap. What a joy to have someone else do all the hard work; the cutting & planning are all done for ya. I could get addicted to those kits in a big way.
I made just two changes to the fab instructions: the ribbon ties around the outside of the whole thing & slips off so that no one has to retie a bow. There's lots of ribbon in the kit, so that's lovely. And I added a curve in the files with this...
-2-
(for curve on file section)
I just...
- ...traced printed the curvy template
- ...cut out the 2nd curve down
- ...traced it (centered) onto one file section
- ...cut it out & used that file section piece as a template (they describe that process perfectly in the Club Scrap instructions...)
-3-
Homemade prima flowers...
Cheap as dirt to make, but lots of colour & texture...
Cheap as dirt to make, but lots of colour & texture...

- white cardstock
- flower stamp (SU stamp: Wonderful You)
- Black ink & clear embossing powder
- Copic markers: cool gray no.7, Cool Gray no.3, Red Lipstick R29, Cadmium Orange YR07, Cardinal R59, & a colourless blender
- Microglaze (to make flower colours pop)
- Embroidery thread (red) & needle

To make the flower, i did this stuff:
Step 1) Printed text on a sheet of cardstock
Step 2) Embossed flowers (black ink, clear e.p.)
Step 3) Pierced holes in the center of all the flowers
Step 4) Embroidered them by making knots
Step 5) Coloured the flowers with Copic markers. I like how the colouring shaded the knots, but if you prefer you can colour first & sew later, of course.
I coloured them like this:
Red flowers:
- Made cool gray no.7 stripes around the center
- Filled in between the dark gray with Cool Gray no.3
- Added Red Lipstick R29 (striping it into the grays & leaving the outside white)
- Added hits of Cadmium Orange YR07
- Darkened the shadows with Cardinal R59 & blended it all with a colourless blender.
- Used the red that was picked up onto the colourless blender to colour the outside white edge of the red flowers (makes a pink wash)
- Added Cool Gray no.3 centers & shading to the white petals
- Used the red-tinted colourless blender to add some pale pink

Adding Microglaze over top of your colouring (Copics or an medium at all) makes the colour more intense; just smudge it on there with a fingertip.

-4-
...fashion a beaded wire handle:


I thought that the chipboard might be hard to make a hole in, since it's a nice sturdy thickness--and since I don't have a cropodile or the like--but it was actually a piece of cake. The paper piercer went through it like butter:

- wire & wire cutters
- beads (i used wooden beads from a dollar store years ago)
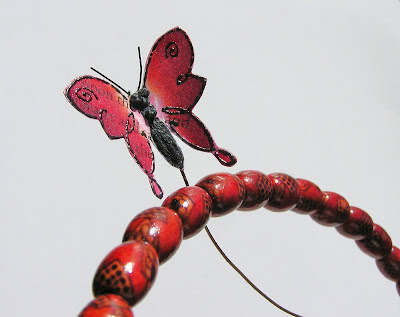
- Butterfly (stamp is retired SU s.a.b. set Merci)
- Gray embroidery thread
- thin wire for antennae

Step 1) Make a hole through the lid with paper piercer

Step 2) Pull wire through the hole.

Step 3) Add a bead to end of wire (on the inside of the lid) to secure it

Step 4) Bead the wire handle & finish off with another bead add butterfly on a wire, if you like
I made some 3x3 cards to go inside the file folder, but since it is 5x7 it's the perfect size for storing--or gifting--full sized cards...

note cards made with: white embossed flowers from Simply Said & text gaffer tape (7 Gypsies)
The note cards fit quite nicely in the file pockets...

I'm going to fill these 8 pockets with 3x3 cards, bookmarks, tags, cards and whatever else I can think of and give it to someone special for their birthday. :O) The neat thing about the file box is that it can be reused when all the goodies are gone (for recipes or receipts or whatever...) :O)
Other embellishment


+If+you%27d+like+to+pierce+you+can+create+a+guide+line++on+the+back+of+your+paper-trace+the+same+circular+object+again+higher+up.JPG)


0 comments:
Post a Comment