StampznewBright

  • Subscribe to our RSS feed.
  • Twitter
  • StumbleUpon
  • Reddit
  • Facebook
  • Digg

Saturday, 2 June 2012

how to make your own custom coloured papers with gimp (which is free!)

Posted on 22:20 by Unknown
Finally, that gimp tutorial I've been meaning to make!
...
You know those yummy colour samplers
that are being served up everywhere?


Well why not translate them
into patterned papers?

You can make speedy monochromatic papers:

colour sampler papers
or
some multicoloured papers:

multicolour_Chevron_tight_zigzag_12_and_a_half_inch_SQ_350dpi_melstampz


things needed to make your own DIY coloured patterned papers

You will need these things
for this tutorial:


-a colour sampler or photo with colours you like
-a digital overlay (free ones here)
-the program gimp


You can find all the overlay freebies
that I've made in this set on flickr:

sample overlay NOT FOR PRINT antique ledger WHITE SCRIPT on transparent bkgrd 12 and half inch SQ melstampz

please note: overlays can look ugly or weird on flickr, but
they are lovely and easy to use. Just drag & drop!
&
(There's a tutorial here, if you need help with
how to download from flickr).


"BIG!"

I made a BIG old powerpoint presentation
that you can download from here
(on acrobat) if you like:


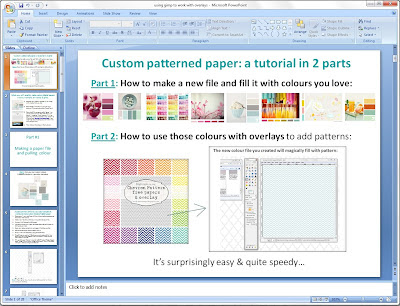
(It might be a lot easier to read than this blog post is,
since it can be viewed much larger)...

but

...if you prefer a quick look, or need google translate,
then here is the tutorial:


...use gimp to pull colour &
add overlays to make DIY papers:


1 open GIMP - You should see something similar to this

Step 1) Open GIMP - (You should see something similar to the screen pictured in the image above).

If you need help installing Gimp, please see the bottom of this tutorial.

2 select 'file' and then choose 'new' to create a new image file

Step 2) Select 'file' and then choose 'new' to create a new image file

3 in order to use my free overlays create your image size in pixels as 4375 pixels by 4375 pixels


Step 3) In order to use my free overlays create your image size in pixels as 4375 pixels by 4375 pixels.

4 to make papers for printing INCREASE the DPI - click on the + sign by the advanced options to open them


Step 4) To make papers for printing INCREASE the DPI. Just click on the + sign by the advanced options to open them...

5 SET resolution to 350 pixels per inch (or your preference)

Step 5) ...Then, set the resolution to 350 pixels per inch.

6 to select colours from a colour sampler or other source open that image - then select 'file' and choose 'open' to open it

Step 6) To select colours from a colour sampler or other source open that image - then select 'file' and choose 'open' to open it...

7 choose the location where you have your colour sampler or other image file

Step 7) Choose the location where you have your colour sampler or other image file.

My colour sampler file (from Design Seeds) was on my desktop:

8 my colour sampler file (from Design Seeds) was on my desktop - just double click the image file name to open

Step 8) Then, just double click the image file name to open.


9 select the colour picker tool to use it - click on the icon that looks like an eye dropper

Step 9) Select the colour picker tool to use it - click on the icon that looks like an eye dropper.

10 Now you can hover over the colour you want & click to pick that shade up in your dropper

Step 10) Now you can hover over the colour you want & click to pick that shade up in your dropper.

11 select bucket tool and click on it to fill your document with colour

Step 11) To fill your new document with colour, open your new empty document again & select the bucket tool and click on it...

12 click to fill your file with colour You can use your coloured page as is, print it or whatever OR


Step 12) Click to fill your file with colour. You can use your coloured page as is, you can print it for plain solid colour ... or ... you can make a pattern in seconds by following the next couple of steps.

13 overlay open the folder with the overlay you want to use - drag & drop onto your new open colour file - click on the overlay & hold  it and drag it

Step 13) You can drag & drop an Overlay PNG onto your coloured file: Open the folder with the overlay you want to use. Drag & drop onto your new open colour file. Click on the overlay & hold it and drag it. Let go when you have it on your colour.

14 the new colour file you created will magically fill with pattern

Step 14) The new colour file you created will magically fill with pattern!

15 To quickly crop the layer (required in GIMP but not PS) just select 'image' then choose 'merge visible layers'

Step 15) To quickly crop the layer (required in GIMP but not Photoshop) just select 'image' then choose 'merge visible layers'....

16 a little window will open - click on 'merge'

Step 16) A little window will open. Click on 'merge' then just save your file.

...and that's it.


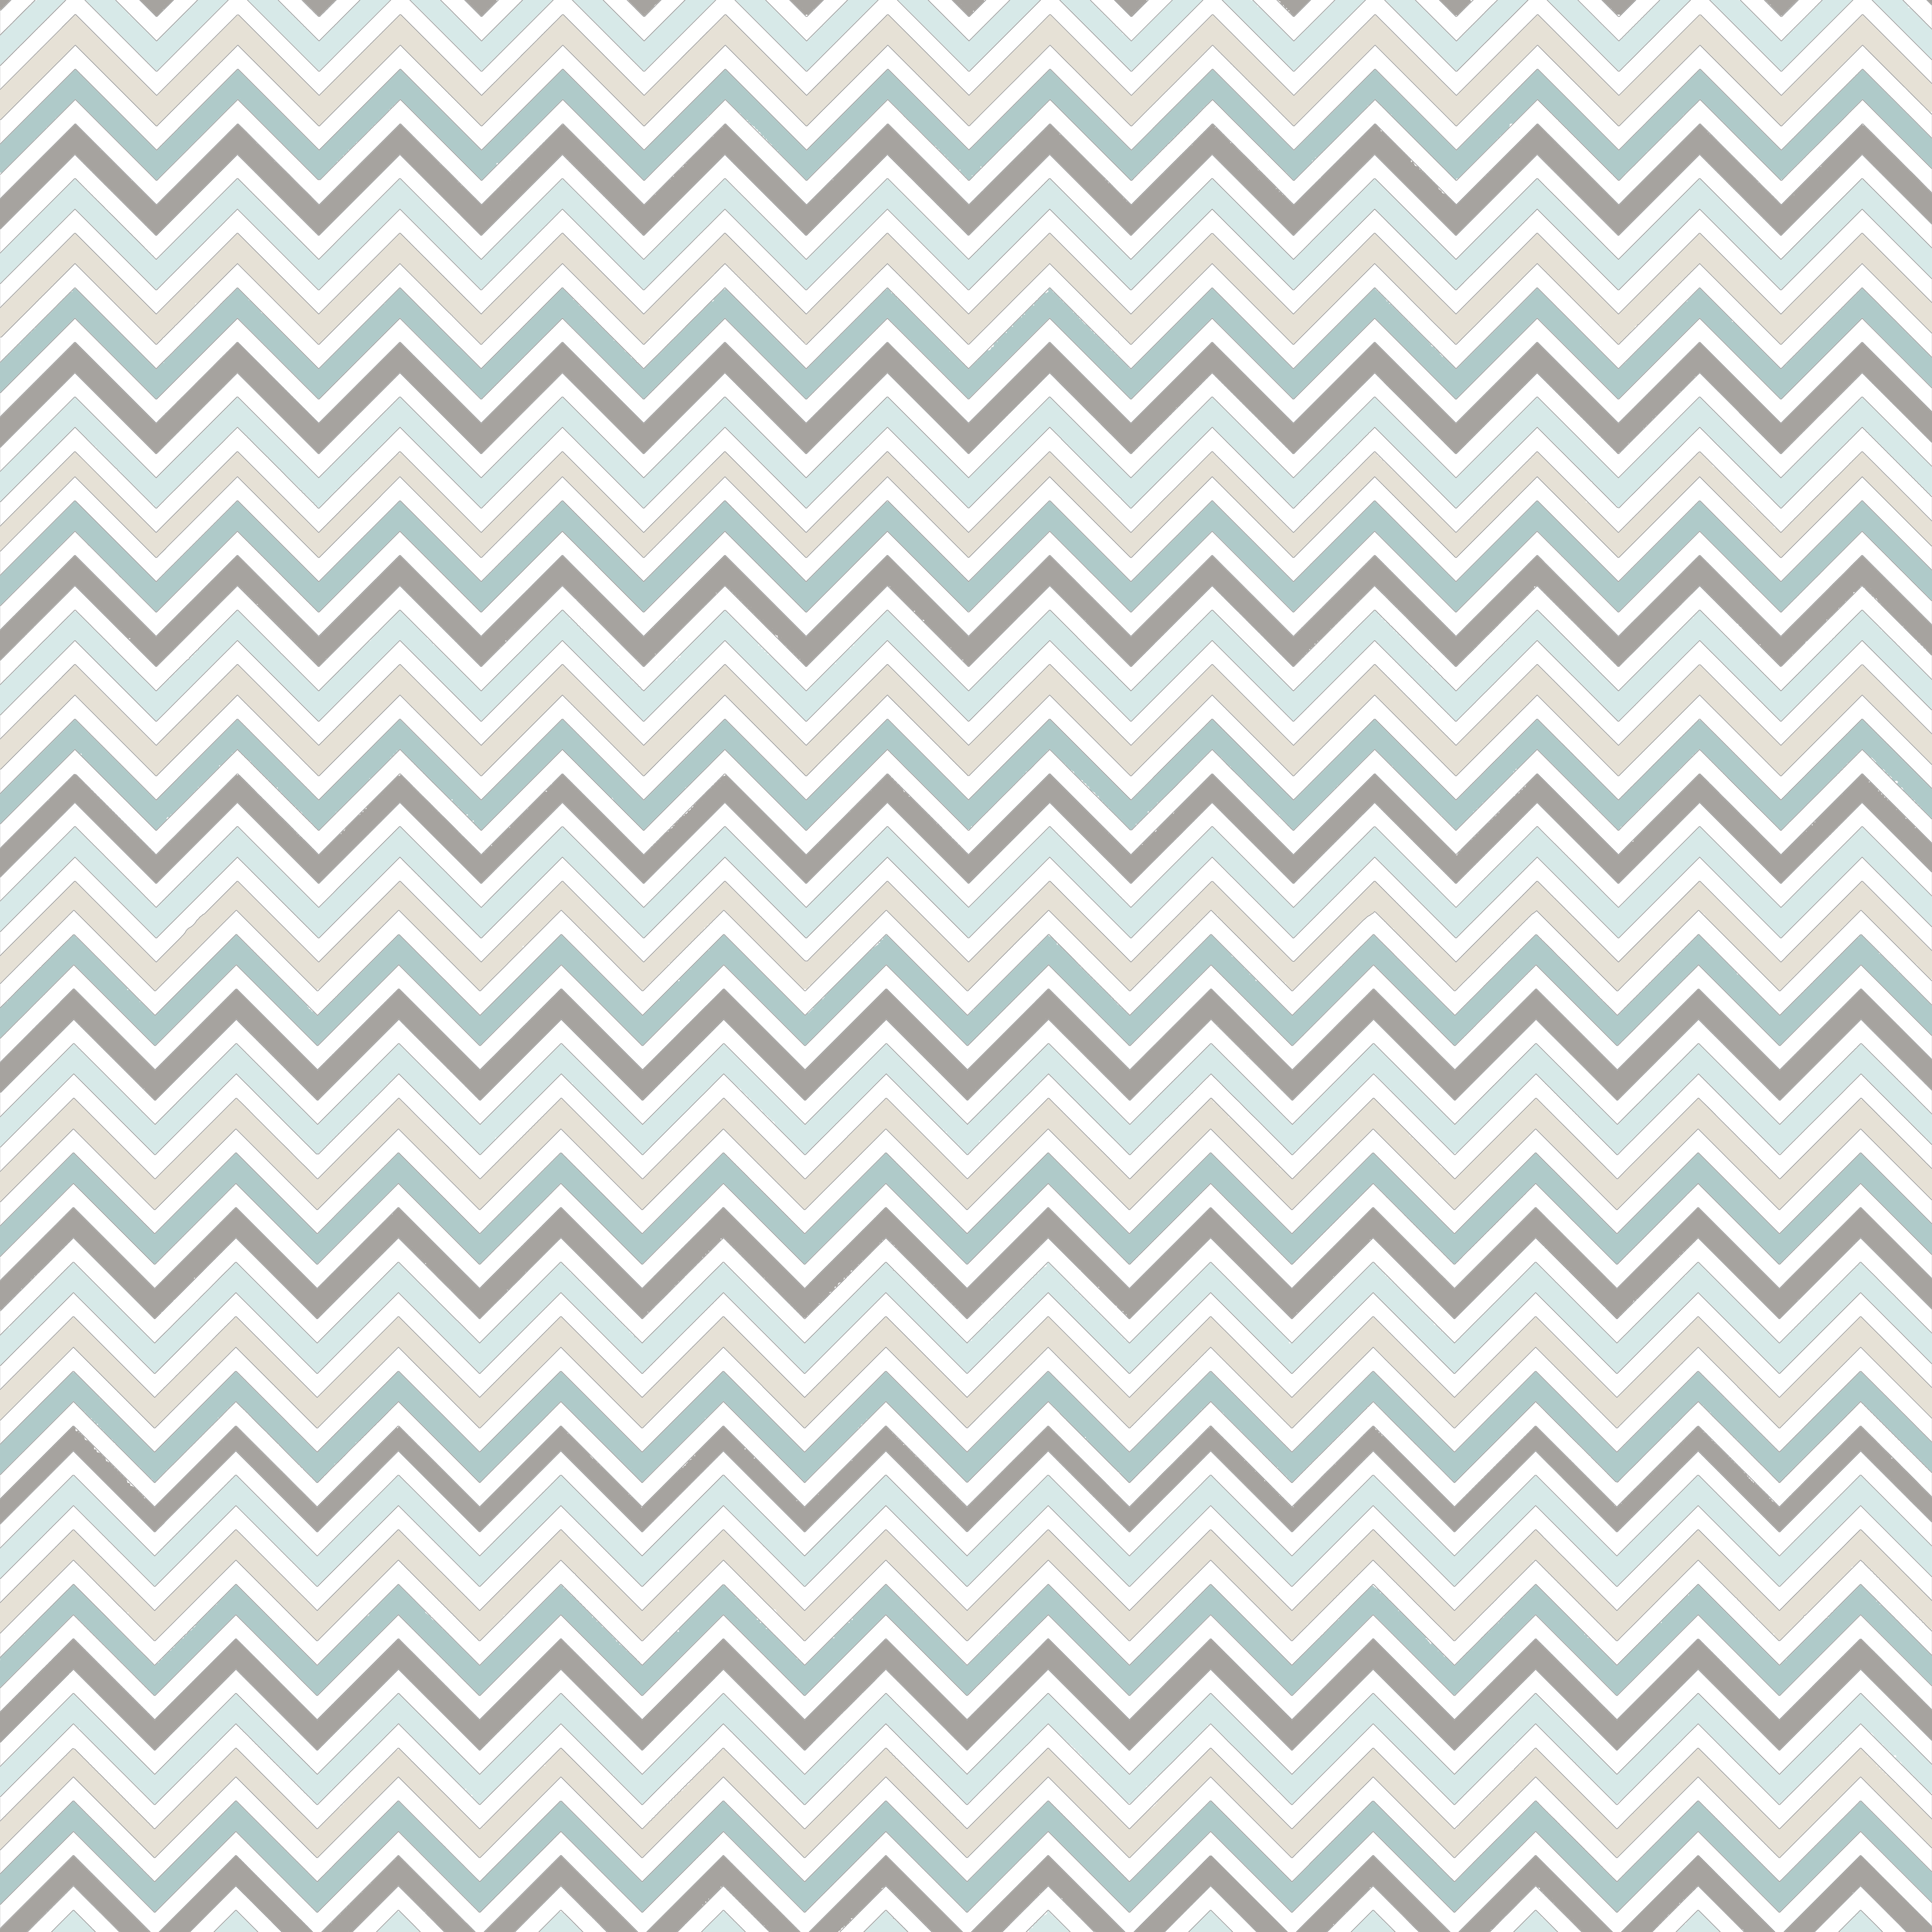
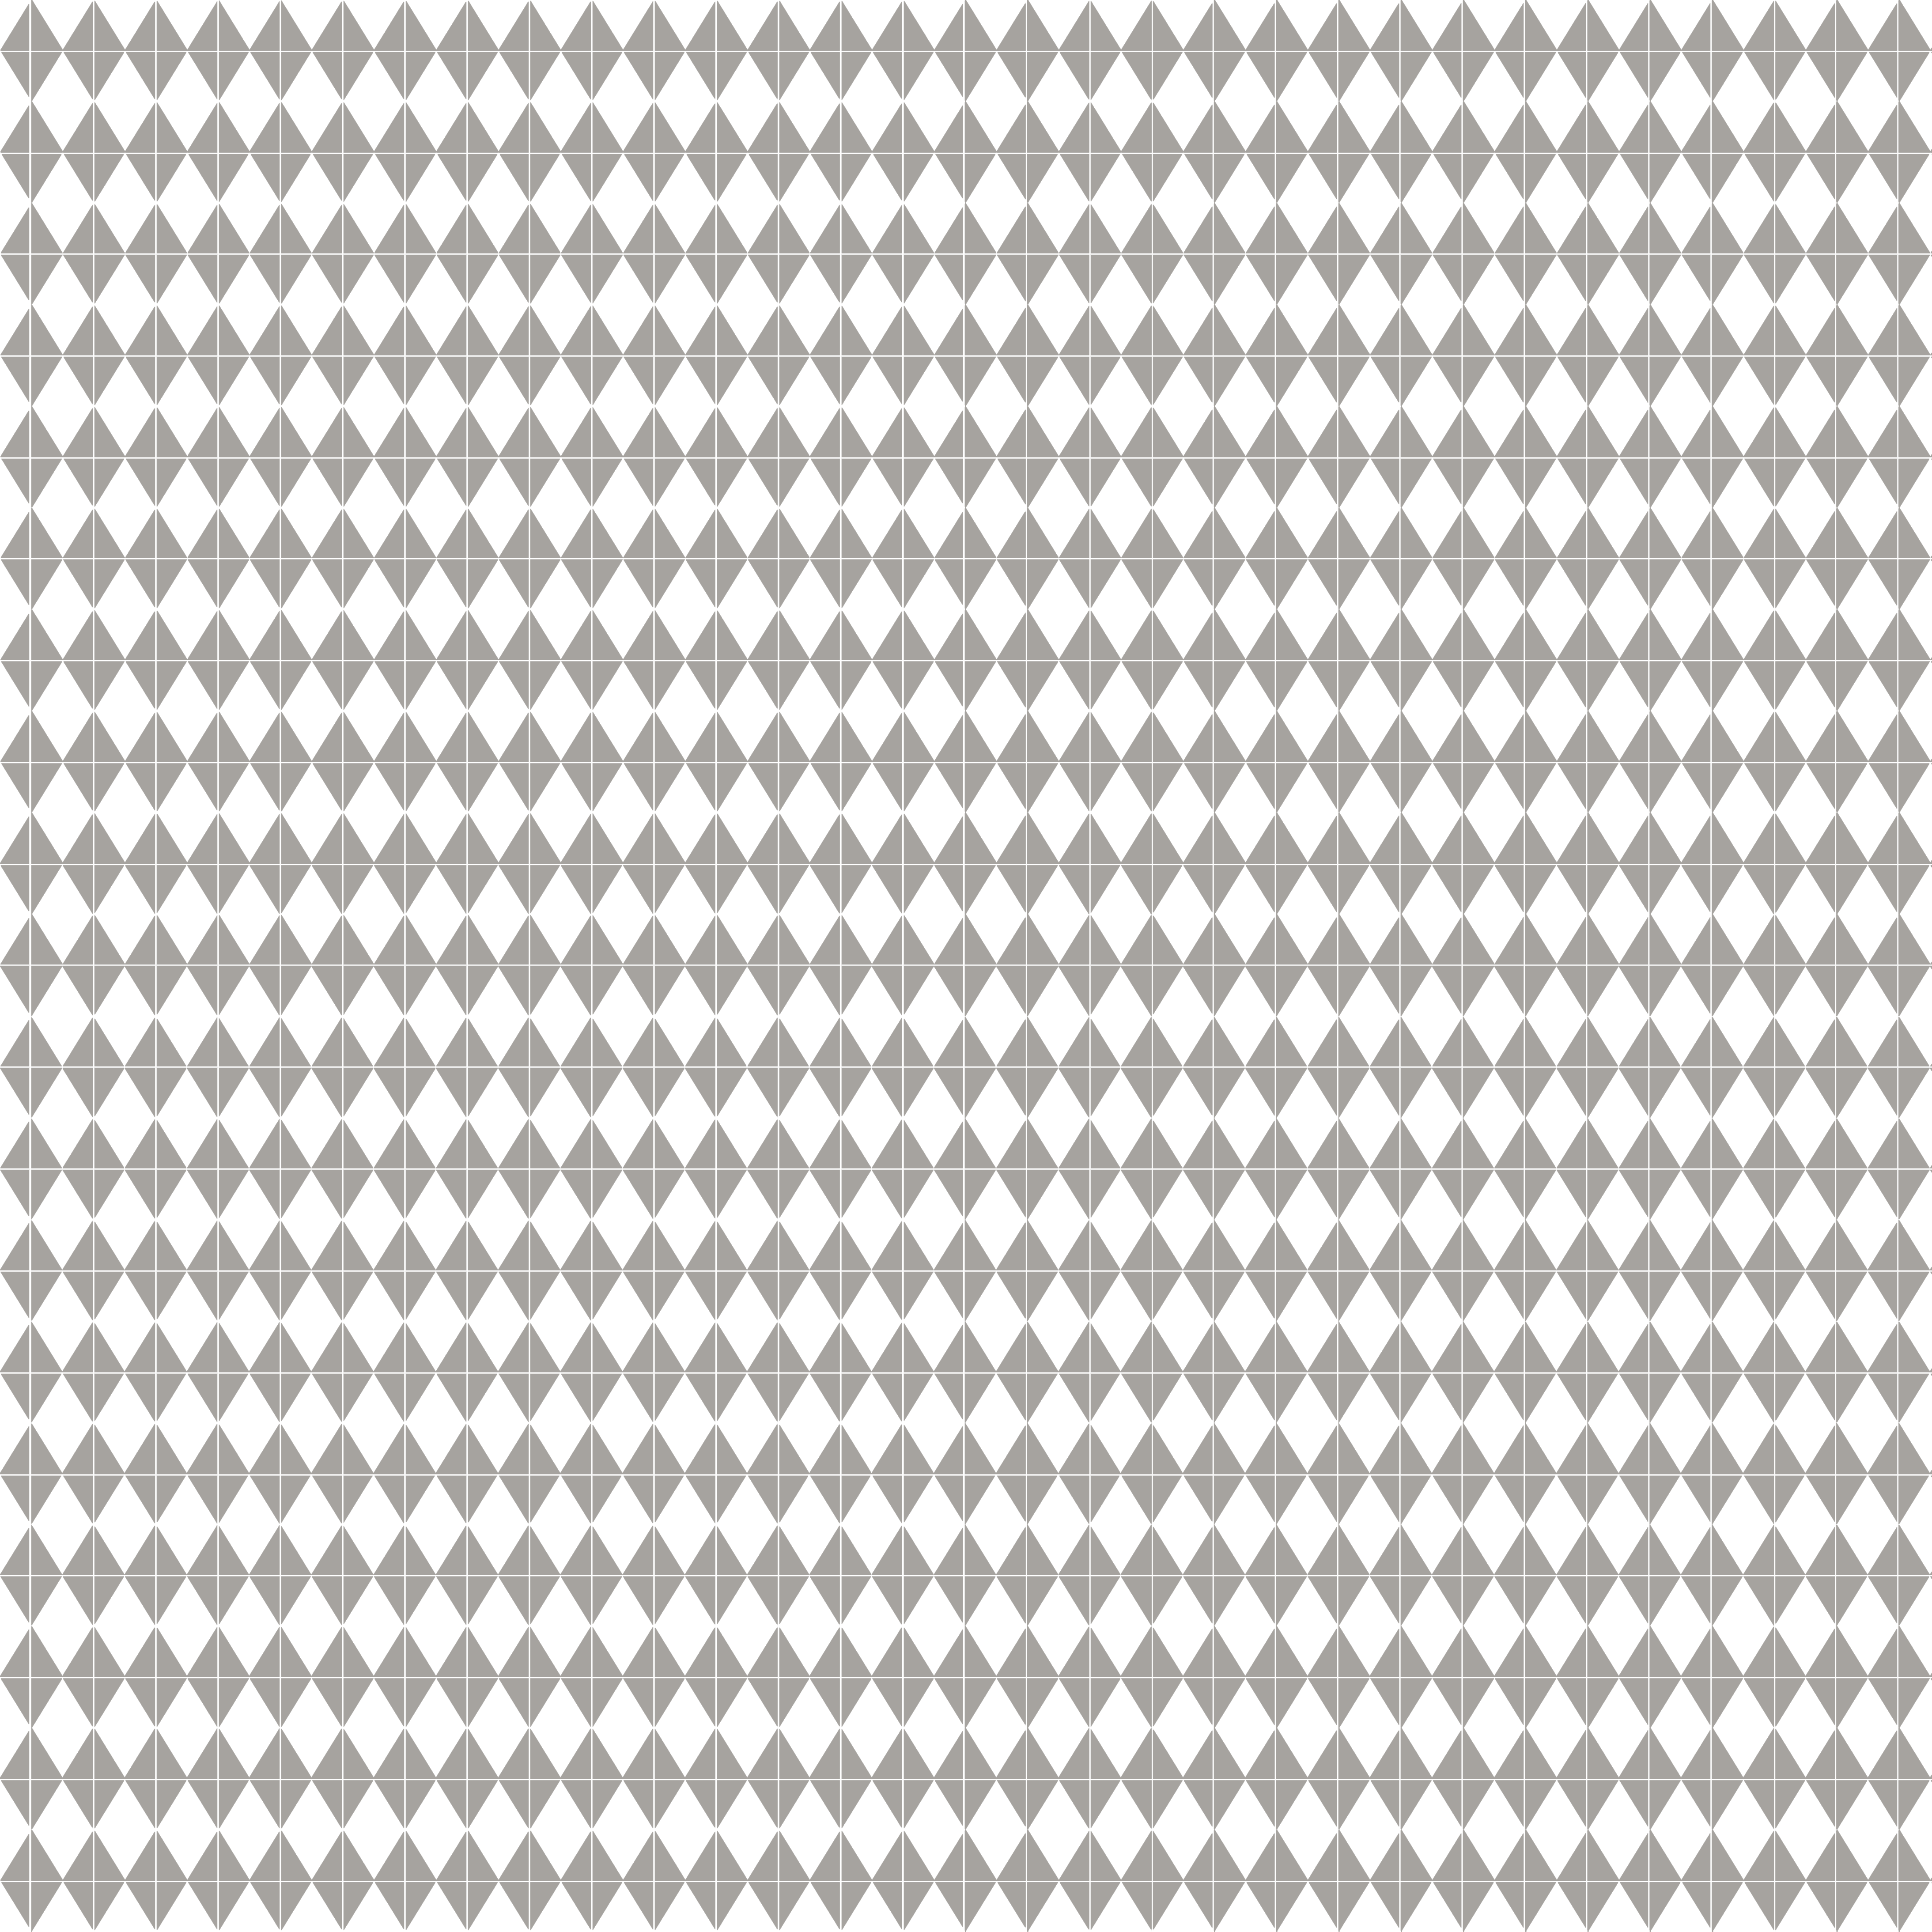
If you want to make patterned papers that have multiple
colours, simply open up an overlay in gimp & fill the
transparent sections with different shades of colour:

fill the gaps in overlays with different colours to make multicoloured papers

...or
you could use papers you have bought
and add overlays:

drag and drop over patterned papers

Just open the patterned paper in gimp, then drag & drop
the overlay onto it. (Crop, if needed, and save).


...get the program gimp
(a free photoshop-like software)

gimpy

Step 1)
First, make sure you are at the official gimp site: http://www.gimp.org/

Linkgimp (2)

Step 2) Click the download button.

click the link to download (assuming this is the right version for you)

Step 3) Click the link to download. It will begin the download
& you can run it from there.


If you need a different version try one of these:
Windows - Mac - Unix


(save ink by make a test run sheet)

Not sure whether the colours you've pulled
and made into papers will print nicely?

save ink by making a little colour sample for a print test

You can make a sheet with little sample squares
and print it out, so you can decide
if you like the colours or not.

And here are the papers,
if you'd like to use them:


To save these files:
Firefox/Chrome: right click on the image & choose "save link as"
Explorer: right click on the image & choose "save target as"

colour sample print test:
(on a 8.5" x 11" sheet):


soft coloured paper set:
(12.5 inch square at 350dpi)

multicolour_Chevron_tight_zigzag_12_and_a_half_inch_SQ_350dpi_melstampz

light_taupe_medium_dots_12_and_a_half_inch_SQ_350dpi_melstampz

very_light_teal_12_and_a_half_inch_SQ_350dpi_melstampz

very_light_taupe_tiny_Moroccan_tile_12_and_a_half_inch_SQ_350dpi_melstampz

light_teal_flower_making_text_12_and_a_half_inch_SQ_350dpi_melstampz

grey_argyle_12_and_a_half_inch_SQ_350dpi_melstampz

chevron_light_teal_12_and_a_half_inch_SQ_350dpi_melstampz

grey_extra_small_hexagon_12_and_a_half_inch_SQ_350dpi_melstampz

solid colours:

light taupe

very light teal

grey

light teal

very light taupe


You can read

(guidelines for use here)


Hope this was useful to you,


PS: Some places to find colours and-or samplers: Pantone, design seeds, Creature Comforts color inspiration, The Sweetest Occasions color inspiration posts, blog post about a neat sherwin william's color site, blog post about a nifty color palette generator, & of course, Pinterest...

my colour board "Call me Hue" is here:


Email ThisBlogThis!Share to XShare to FacebookShare to Pinterest
Posted in BASICS, cheap-tricks, Digital-Images, Freebies, Tutorials | No comments
Newer Post Older Post Home

0 comments:

Post a Comment

Subscribe to: Post Comments (Atom)

Popular Posts

  • free Butterfly Silhouette .studio cut files (in 3 styles)
    Hi, All! Here are those butterfly Silhouette .studio cut files. They are for only for the Silhouette machine... But I do hope to share other...
  • DIY digital paper (some freebies)
    The lull in posts (over the last couple of days) was for me to finish up this looooong post I've been wanting to share with you for eons...
  • New Popcorn Box template set (pretty stamp room storage) :o)
    Are you in the mood for a template or two? I was going to wait until I had really good photos and a full pictorial, but then I would take fo...
  • Missing with a migraine, Craft room BEFORE pics, & LINKs for Organizing the craft room
    Edited to add: Sorry guys. I feel like I was hit by a truck. Migraine's lasted so long... but I will be back with a post by tomorrow eve...
  • Graphics Fairy Inspiration (+vintage printables)
    Thank You all so much for your wonderful comments about the papers I've been obsessed with. Your kind words make me grin so big that I g...
  • "Honey, I shrunk the stationery!" (Hero Arts typewriter notebook)
    Still trying to make more of my cards into little gifts. This Hero Arts typewriter card is another take on the card turned refillable notebo...
  • 3 Clean And Simple cards (with SRM stickers)
    You guys may know that I was tragically born without the gene that let's you achieve a C lean A nd S imple card. ;-) Not sure why I find...
  • Making Your Own Colour Shimmer Sprays--Links & Info
    Info & Links Links for how to Mak e yo ur o w n Sh im mery s prays: (These are for you sweet Beth! oxo) ( more info on these colours in...
  • over 100 free pattern overlays ... at a glance
    Would you believe that the free overlay total is at 139 overlays and counting? (I might have a wee little addiction) ;-) Since overlays can ...
  • Felt-based cards (Rock-a-Bye Baby tutorial)
    New idea, Old projects.... I've been debating whether or not to post some older projects/tutorials since the big bad insecurity beast...

Categories

  • 'Mouse'-the-cat (10)
  • *TEMPLATEs (98)
  • 3D-projects (144)
  • A-Day-For-Daisies (7)
  • Amber Ink (9)
  • Angel's-Landing (2)
  • BASICS (47)
  • Blogging-tips (7)
  • Caardvarks (48)
  • Cat's-Pajamas (2)
  • cheap-tricks (224)
  • Christmas (33)
  • Claire-Keay (2)
  • Cricut (3)
  • cut-file (2)
  • Cuttlebug (45)
  • decor (6)
  • Digital-Images (131)
  • Distress-Inks-etc (14)
  • DIYstamps (1)
  • Eat-Cake-Graphics (11)
  • Faves (207)
  • Fred-She-Said (5)
  • Freebies (77)
  • GESSO (9)
  • Halloween (10)
  • Heather Ellis (3)
  • Hero-Arts (14)
  • ISC (7)
  • Jessica-Sprague (2)
  • Just-Rite (2)
  • LPS (63)
  • Mo's-Digital-Pencil (16)
  • My-Favorite-Things (33)
  • organizing (7)
  • Other-People's-Tutorials (36)
  • Paper-Garden-Projects (54)
  • Paper-Temptress (39)
  • Punches (21)
  • Purple-Onion-Designs (23)
  • S.U. (1)
  • SCOR-PAL (4)
  • silhouette (4)
  • Skipping-Stones-Design (7)
  • Squigglefly (6)
  • SRM-Stickers (8)
  • techniques (191)
  • templates (26)
  • Tiffany-Doodles (4)
  • Tutorials (252)

Blog Archive

  • ►  2013 (16)
    • ►  July (4)
    • ►  June (4)
    • ►  May (3)
    • ►  April (1)
    • ►  March (1)
    • ►  February (3)
  • ▼  2012 (53)
    • ►  December (2)
    • ►  November (2)
    • ►  October (1)
    • ►  August (3)
    • ►  July (2)
    • ▼  June (5)
      • 3 New free Paper Sets (subtle stripe, tiny graph, ...
      • "One, Two, Three... Get Loose, Now!"
      • Wrinkle-free Distress Ink technique
      • over 100 free pattern overlays ... at a glance
      • how to make your own custom coloured papers with g...
    • ►  May (7)
    • ►  April (8)
    • ►  March (9)
    • ►  February (13)
    • ►  January (1)
  • ►  2011 (74)
    • ►  December (1)
    • ►  November (5)
    • ►  October (10)
    • ►  September (9)
    • ►  August (12)
    • ►  July (5)
    • ►  June (9)
    • ►  May (2)
    • ►  April (6)
    • ►  March (7)
    • ►  February (4)
    • ►  January (4)
  • ►  2010 (84)
    • ►  December (7)
    • ►  October (1)
    • ►  September (6)
    • ►  August (1)
    • ►  June (1)
    • ►  May (7)
    • ►  April (21)
    • ►  March (3)
    • ►  February (17)
    • ►  January (20)
  • ►  2009 (234)
    • ►  December (16)
    • ►  November (21)
    • ►  October (11)
    • ►  September (23)
    • ►  August (29)
    • ►  July (26)
    • ►  June (10)
    • ►  May (16)
    • ►  April (26)
    • ►  March (22)
    • ►  February (27)
    • ►  January (7)
  • ►  2008 (39)
    • ►  December (14)
    • ►  November (25)
Powered by Blogger.

About Me

Unknown
View my complete profile