


Well this took a little while...
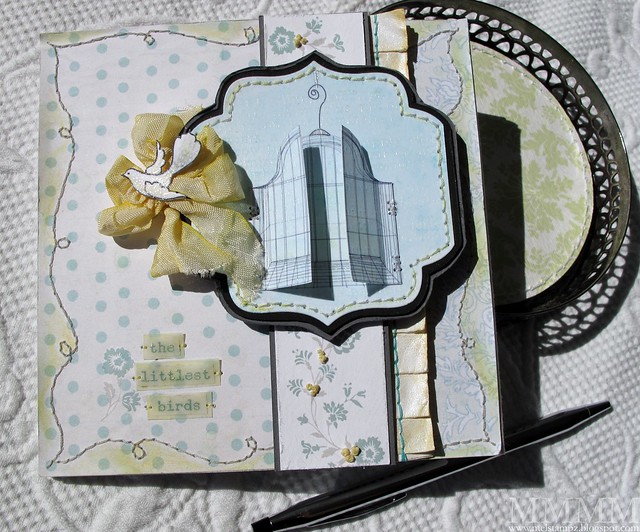
It's a 5-1/4" square hybrid card,
done in an off-set gate-fold style,
as you can see by the inside:

It has lots of printed (and water-distressed) digital papers
and a Hero Arts bird cage & my little doodled bird digi:

done in an off-set gate-fold style,
as you can see by the inside:
It has lots of printed (and water-distressed) digital papers
and a Hero Arts bird cage & my little doodled bird digi:
...And actually, it started off as a card, but during the process
it turned into a notebook holder:

The notebook is held in by ribbon,
so it's removable/refillable:

On the front, it says
The littlest birds...

...sing the prettiest songs:

(on the inside)
And somehow this ended up being the world's
longest tutorial ever made...
it turned into a notebook holder:
The notebook is held in by ribbon,
so it's removable/refillable:
On the front, it says
The littlest birds...
...sing the prettiest songs:
(on the inside)
And somehow this ended up being the world's
longest tutorial ever made...

...make a gatefold card with a
refillable notebook inside:
This is a step by step tutorial for a 5 1/4" square
refillable notebook inside:
This is a step by step tutorial for a 5 1/4" square
off-set gate fold style hybrid card turned notebook
(and a whack of odd details) ;o)
(and a whack of odd details) ;o)

- Bird Cage image from HERO ARTS digital set: Your bird can sing
- Ice Creamy dotted digital paper by Lauren Reid (Two Peas)
- Striped paper from TracyAnnDigitalArt on etsy
- Free digital bird image available in this older post (printed at 75% size)
- Free digital damask paper available in this older post
- White, black & grey cardstock;
- Illuminate text stamp , clear embossing powder, Soft Sky ink, sponge.
- White turquoise, Spellbinders Nestabilities Labels 9 die
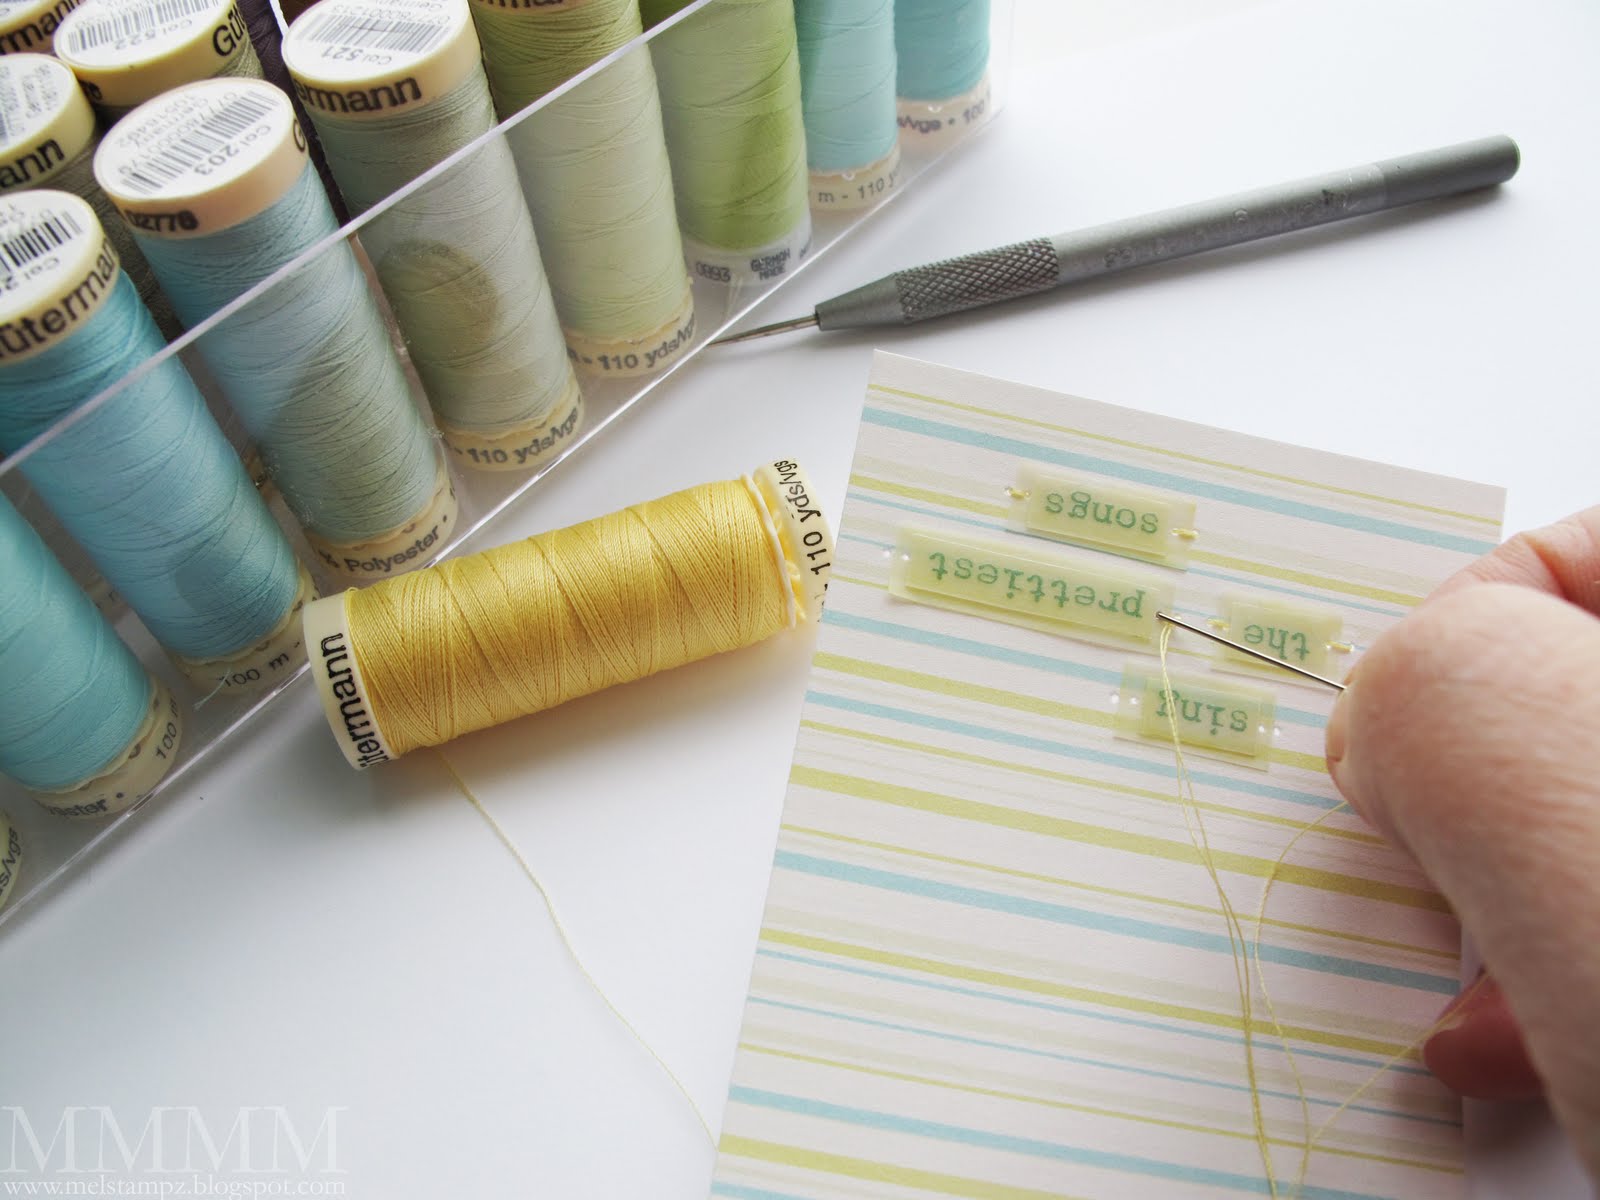
- Paper piercer, needle & thread (in white, turquoise & yellow)
- Yellow watercolour pencils, white signo pen, water spray bottle.
- Cosmo Cricket EverAfter flower rub-ons.
- Vanilla seam binding ribbon (dyed yellow with reinkers)

Step 1) Make the image & make 3D doors to go onto it:
A) Print two cage images from Hero Arts onto white cardstock.
B) Stamp over the two images with a text stamp in versamark ink and heat emboss it in clear embossing powder.
C) Let the heat embossing cool and sponge over it with turquoise in. (I used Tumbled Glass Distress ink).

D) Cut the two images with a Nestabilites Label die.
The heat embossed text gives a nice subtle texture:
D) Cut the two images with a Nestabilites Label die.
E) Choose your favourite of the two & set it aside for the main image.
F) Add stitching bordering the main image, if you like.
G) To make 3D birdcage doors: cut one cage in half & cut the two doors out.
H) Adhere the whole bird cage to a die cut mat
I) Mark two spots on each of the cut out cage doors where you’d like the hinges to be.
This is a trimmed Spellbinders Nestabilities Labels 9 die:
(i can't stop doing that)
(i can't stop doing that)

(side edges cut flat on the label nestabilities shape)
...with hand-cut black and gray cardstock mats around it:

That way the mat is not too fat. ;o)

Step 2) Adhere the tow 3D cage doors to the image.

Step 3) Pierce holes for the hinges (I pierced 3 pairs of teeny holes)
& then stitch the hinges on.
Stitching helps doors stay on as well as looking fussy-cutesy:

Of course, you could staple them on for a metal look,
or just glue them if you want a quick method.
or just glue them if you want a quick method.

Step 4) Print a little bird, colour it, & cut it out. This bird is one I doodled & shared as a free digital bird image in this older post (I printed for this project at 75% of its size.)

Step 5) Cut pieces to make a 5 1/4" square gatefold card:
Measurements for the 2 pieces of cardstock:
1) LARGE (card base) 10 1/2” x 5 1/4” (shown in turquoise above)
2) SMALL (right hand gatefold flap) 3” x 5 1/4” (shown in gray above)
Score the large piece at 4” and 9 1/4” (see photo above for visual of the score lines)

If you are stitching your patterned paper, you may want to cut 2 second pieces for the back of the 2 gatefold flaps (to hide the messy back of the stitching) for the RIGHT: 3” x 5 1/4” again and one for the LEFT a little larger:

If you are adding a notepad, you can score two extra lines to make the card fold like a book (see the red dotted lines in the photo above).

Step 6) Print digital papers & cut them out
DOTS: 5 1/2"tall x 3 3/4"wide
DAMASK: 5 1/2"tall x 2 3/8" wide (Cut an extra piece to decorate the top of a removable notebook inside: topper for the notebook in a card this size would measure 5 1/8" by 3 inches). Stitch the patterned paper pieces, if you like.
I added colour to distress the border (using watercolour pencils blended with a damp sponge)

Step 7) Make a decorative band: I put rub-ons onto white cardstock (1 1/4" wide & just under 5.5" tall. You can cut it to save rub-ons) Of course, If you have no rub-ons you could stamp or use patterned paper or whatever.

I used Cosmo Cricket Ever After rub-ons and then added yellow knots of thread to tie in the yellow on other elements:


Step 8) Adhere the rub-on bits to a strip of dark gray cardstock 5 1/2" tall

Step 9) Adhere the cage image onto the dark gray strip

These ruffle strips were made with paper that was: accordion folded,
taped together, spritzed with shimmer, then pierced and stitched
They have shimmeriness:
(The DIY shimmer spray has Lumiere pearl paint & Barely Banana reinker). After spraying them, I added some reinker directly to a brush and used it to dye the edges of the ruffle more concentrated yellow.

Step 11) Adhere the ruffle behind the image (on the gray strip)
Here's a front view of the image with the paper ruffle added:

It covers up a fair bit on the front, but the rest of the
ruffle will show from the inside of the card.

Step 12) Adhere the ruffle strip (with the image)
12 A) Add another gray strip to the back-i folded this one to balance out the layers.

12 B) Stick dimensional pieces on the gray strip to balance out the thickness of the paper ruffle layers

12 C)Adhere image & gray strip with rub-ons and ruffles to the card (i find it easiest to line up on the inside so i can be sure that the gray paper that shows is even

Step 13)Adhere the right-hand side gatefold piece:
13 A) Put adhesive on the inside Small right hand-side flap
13 A) Put adhesive on the inside Small right hand-side flap

13 B) Stick the smaller piece of plain cardstock cut in step 5B onto that adhesive
Here's the front view--with gatefold piece attached

(As you can see, the left side is bigger so the fold is off-set)

Step 14) Assemble Outside panels of the card:
14 A) Adhere largest patterned paper panel (dots) onto the left gatefold front: left side of the card, stick it on aligned all the way to the left.

14 B) Adhere the right paper panel (damask) to the right gatefold piece, stick it on aligned all the way to the right.
Step 16) Add the saying:
**
16 A) Emboss saying on vellum (from a word document printed on an inkjet printer heat embossed with clear embossing powder).
16 B) Cut the words apart & add vellum behind them (tinted with Copic Marker)
**
16 C) Stick the first three words of the sentiment ("the littlest birds") on the front & Adhere the rest of the words on the inside of the card.
16 D) Add a little stitch on either side of the words.

It's sort of a sneaky way to make sure that your project keeps
looking nice, since any wear and tear it takes will look
like it's part of the distressing. ;)
Step 16) Add the saying:
**

16 A) Emboss saying on vellum (from a word document printed on an inkjet printer heat embossed with clear embossing powder).
16 B) Cut the words apart & add vellum behind them (tinted with Copic Marker)
**
16 C) Stick the first three words of the sentiment ("the littlest birds") on the front & Adhere the rest of the words on the inside of the card.
16 D) Add a little stitch on either side of the words.

A little cheap trick I've shown ya before, but one I adore:
distressing digi paper (printed on an inkjet printer) with water.
distressing digi paper (printed on an inkjet printer) with water.

It's sort of a sneaky way to make sure that your project keeps
looking nice, since any wear and tear it takes will look
like it's part of the distressing. ;)
...make a re-fillable Notebook
for inside a card:

** 
Step 2) Staple it together.

**

**

To make the notebook removable:
A) Wrap some ribbon around
B) Adhere both ribbon ends to the back.
C) Add adhesive and more cardstock/patterned paper to hide the ribbon ends & hold them in place.
**

D) Slide the notebook into the ribbon on the inside of the card
**

Having some pages above the ribbon & some below it will make it sturdy.
All that shows in the end is a little bit of matching ribbon:
**

And there you have the notebook (inside the card)
**

For an extra special gift, you can give several refills as well.
And that's it...

Unfolded part way:

Fully unfolded:

Hope your day is sunny & fun,


0 comments:
Post a Comment