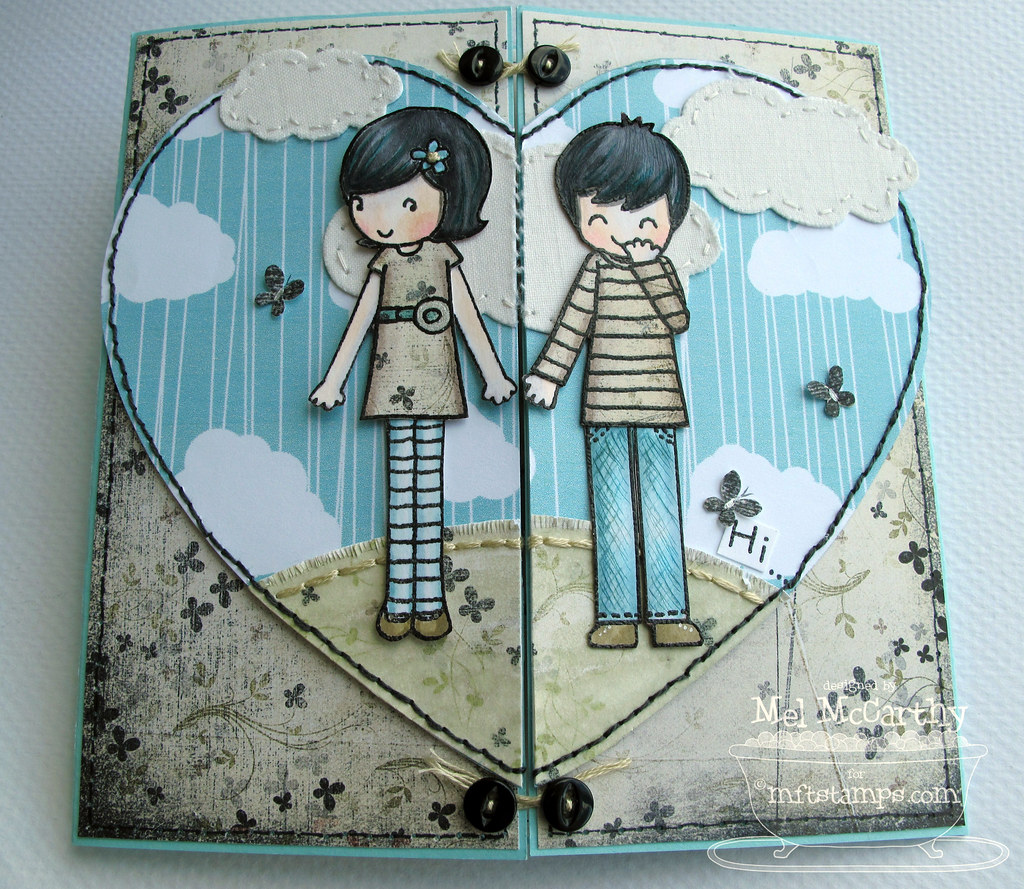
Ahhhh, don't you just love LOVE?
This pair of smitten sweeties gives me the giggles.
They're two of MFT's newest characters Emma & Wyatt
...and another giggle-worthy thing:
my Die-namics arrived! Yeaaaah for Happy Mail!
They're two of MFT's newest characters Emma & Wyatt
...and another giggle-worthy thing:
my Die-namics arrived! Yeaaaah for Happy Mail!
Cloud dies! If I could have invented a die of my dreams,
these would be it. Fo' sho'! (Brilliant idea, Jody!)
...and please don't pass out on me, but I did the inside of the card...
these would be it. Fo' sho'! (Brilliant idea, Jody!)
...and please don't pass out on me, but I did the inside of the card...
(kind of had to, since it's a gatefold.) ;o)

1... New & Nifty: Meet Emma & Wyatt (and Die-Namics!?!)
2... How to make this gatefold card
-1-

New Characters...
Okay, I think I might owe your wallet an apology...
this month's sets are too cute. Sorry! heehee
Here are today's new My Favorite Things sets:
You'll find all of today's projects linked up here on Kim's Blog
--at 11:00 AM E.S.T. today.
Die-namics Clouds $14.95
Small – 1.25” wide and .70” tall
Medium – 1.89” wide and 1.06” tall
Large – 2.51” wide and 1.41” tall
-2-

- New MFT clear stamp set: Meet Emma & Wyatt
- ...stamped on Perfect paper panels
- ...with Black Brilliance ink, clear embossing powder & a heat gun
- Copic markers
- Sno Cone heavy weight 100lb cardstock
- MFT digital cloud paper--Sheltering Tree collection.
- Scrap of fabric (I used an old pillowcase that had torn); Mod Podge
- Cuttlebug machine; Die-namics Clouds
- Vinnie Pearce Old Things Papers (two peas)
- Paper piercing tool, needle & thread, seed beads
- Paint brush; black Multiliner/permanent marker

Step 1) Stamp, Colour, & cut out Emma & Wyatt (They're embossed, as usual: heat embossed in black brilliance ink on Perfect Paper panels, with clear embossing powder and a heat gun.) ;O)
Step 2) Paper piece Emma's dress & Wyatt's shirt (Vinnie Pearce digital paper shaded with Copic marker Champagne E71 & a colourless blender)
I added an embroidery thread knot to make the center of the flower in Emma's hair:

heeheehee Love that little expression!

Step 3) Make a plain 5 and 1/2 inch square gatefold card:
- Cut a standard piece of Sno Cone cardstock to measure 11 x 5 and 1/2 inches
- Score it at 2 and 3/4 inches
- Rotate the cardstock & Score at 2 and 3/4 inches on the other side

Step 4) Add some patterned paper Cut 2 rectangles to measure 2 and 5/8" x 5 and 3/8" Adhere them to the square gatefold card. (I used Vinnie Pearce digi paper)

Step 5) Make a heart to go on the gatefold card.
5A) Print & Trace a heart template onto MFT digital cloud paper, from the Sheltering Tree collection. I used this heart template from Kiddyhouse.com. Printing it at 115% & cutting the large heart out to get one that's 5.5" wide.
5B) Make & add a hill:
- Trace the heart again (the bottom) to make a hill (more Vinnie Pearce paper)
- Distress the hill (I used a wet paint brush to smudge the inkjet printer ink
- Adhere it to the heart sky

Step 6) Make some Die-namics clouds:

Do It Yourself Mod Podge fabric/canvas (on cardstock)
(It's surprisingly quick to make, easy to use, and superbly cheap) ;o)
6A) Tear or cut a piece of fabric. (This is a piece from an old pillowcase)
6B) Pour some Mod Podge onto heavy weight cardstock
6C) Spread the wet Mod Podge evenly (I use a scrap piece of cardstock)
6D) Put the fabric on the wet Mod Podge, rub it gently & Let dry

6E)Cut the fabric cardstock in your pressure machine...
this is the Cuttlebug sandwich (or stack) for Die-namics:
Machine: Cuttlebug
Material: Fabric Fabric glued to heavy weight 100lb card stock
Stack (from top to bottom)
C plate ("Thin die adapter")
Die-namics Clouds Die (face down)
Fabric glued to heavy weight 100lb card stock
B plate ("Cutting pad")
A plate ("Spacer")

Step 7) Adhere the clouds to the 2 heart halves (cutting the big cloud in half)
Step 8) Adhere the sentiment from Emma & Wyatt "Hi" and add black elispses "..." with a black Multiliner (or other permanent marker)

Step 9) Pierce & stitch the clouds Punch holes with a paper piercing tool, & stitch with ivory thread.
Step 10) Finish it up:
10A) Stitch the heart (I pierced holes around the edge & stitched in black thread) and...
10B)...add some button closures:

They're sewn on & then wrapped with embroidery thread (to keep the gatefold closed so the cuties hold hands.) :-D

10C) Add some butterflies; these are cut from the Vinnie Pearce digi paper. They're doodled on with silver pen (for their bodies) & pencil (for their antennae.)

10D) Cut panels for the inside [These panels are made with the same digi paper--lightened by increasing the lightness in the saturation setting in Photoshop. The middle section is cut to measure 5 3/8", the two side panels are 2 and 5/8 x 5 and 3/8") I pierced & added faux stitches inside with a Multiliner (black fine marker.)]
10E) Cut one of the small heart templates for the inside, trace it on the MFT cloud digi paper, pierce, stitch it with black thread, and add the rest of the sentiment: ...Sweet Cheeks.
And that's it!
Thanks for bein' You!

P.S. For those of you who are wonderful enough to wonder/worry about


0 comments:
Post a Comment