This is for the latest Little Paper Shop challenge (to create a monochromatic card.) All the pink "DP" here is a whack of digital papers from some drawings that I scanned & altered.
I've been obsessively lurvin' the flexibility of digital images lately, especially how you can make them any size & print them on any paper (with no stampy mistakes, which I often make.) Haven't seen the LPS digis yet? You can find 'em here.
Embossing digital images gives them such a lovely texture & lets you colour however you want. Mary asked about embossing (and I realized that I hadn't added any directions for it on here.)
To Emboss a Digital Image:
Step 1) Have all supplies ready (I use clear detail embossing powder and as an embossing tray (to catch all the powder) I use a cookie tray (baking sheet) that I reserve for crafting. You want to have it on hand so that when your printing is out of the printer you can emboss asap while the ink is still wet.
Edited to add: So sorry, I forgot to mention the most important part here: that this only works on certain papers. It works wonderfully on Vellum cardstock (used vellum here.)
NB: The main requirement is that the paper resists the ink for a bit so that the ink stays wet enough to take the embossing powder. :O)
Other favorite papers for this:
The Iridescent family (at Paper Temptress.)
You can see a post here with a digi printed on that gorgeous shimmery cardstock (and it's still on sale if you'd like some: 40% off)
You can see a post here with a digi printed on that gorgeous shimmery cardstock (and it's still on sale if you'd like some: 40% off)
Mica or Metallic cardstock (such vibrant colours!)
Step 2) Set up your print settings. Set printer to print the size you want & I like the standard setting (not too fast that the quality will be compromised & not too slow...highest quality printing takes so long that the ink can dry before you have a chance to emboss.)
Step 3) Print the image out
Step 4) Sprinkle embossing powder on the image as soon as you can & heat set it.
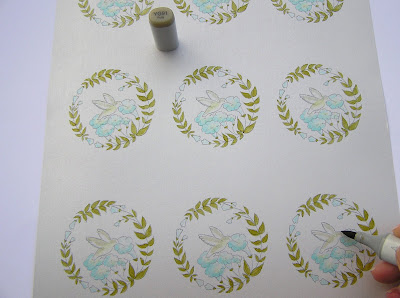
Step 5) Finish it up with colouring etc... Since the embossing powder seals the ink, it prevents smudging, so you can colour with whatever you like. I love to use Copics on em (especially on vellum cardstock; it goes on like butter!) ;O)
It might sound tricksy if you've never tried it, but it really is as easy as 123:
1) print image on the cardstock,
2) sprinkle embossing powder on it asap,
3) heat-set the embossing powder with a heat gun.
I actually like it better than stamping now! :O) gasp!
Sorry no deets yet. I'm not feeling all that hot, so I'll be back with the templates & other details later today.
Happy Monday to You, :O)

P.S. For the box templates and tutorial, please visit this post:


0 comments:
Post a Comment