The Animals are in da House!!! Or should that be the Farm Friends are outta da Barn? You get the idea... ;o) It's here!
This loverliness is the new Paper Garden Projects
FarmYard Friends Stamp Kit:

Click the pic to check it out in the store.
FarmYard Friends Stamp Kit:

Click the pic to check it out in the store.
It comes with...(The Goods!): Farmyard Friends by Pink Cat: rubber stamps on EZ mount (registered my favourite way.) With textured Bazzill Cardstock...And Basic Grey paper & embellishments too...and May Arts ribbon. It also comes with photos & instructions for projects... Last, but not least, a Tabbed Chipboard album (too snifty!)
I can't wait to show you the fun stuff I've been up to with these guys (and templates & tutorials too). I think Cathy had a psychic stampin' thing going on when she made this kit (I have longed for a sheep stamp for ages (there are 3 sheep in this set) and these are my favourite papers & goodies.) I want to show you everything at once, but I'd better quell my stampanimal instints! ;O)
This little cupcake was too fun (and mmmm... chocolate.) I can just imagine a hold herd of these party animals...
To make the Little Grazing Sheep:
Supplies:
(These are from the Paper Garden Projects FarmYard Friends Stamp Kit)
Stamp: Sheep with flower in its mouth ( design by Pink Cat Studio)
1 small piece of Wedding White Cardstock
Other Materials:
(From your stash or Paper Garden Projects)
Black ink
Copic Markers: Black, BG-15 Aqua, & RV-11 Pink
watercolour pencil crayons
White Marvy Uchida Puffy Velvet marker
Scissors or a Stampin' Up word window punch
Tombow Monomulti
Tooth pick or Skewer
Cupcakes & Icing (Here's the recipe I used: Chocolate Cupcakes from Martha.)
Paper Cupcake cups
Step 2) Colour your image however you like (I used Copics on the flower (BG-15 Aqua) & for a blush on the face (RV-11 Pink)
Step 3) Add a little shadowing (I used watercolour pencil crayons in grey & a light touch of black)
Step 4) Make your sheep puffy using a White Marvy Uchida Puffy Velvet marker. To add puffy pen details:
- Shake it up
- Colour it on (I like to dab in dots)
- Heatgun it right away for lots of puff (for less puff, let it dry before heat gunning it)
To get a super white paper cup cake wrapper: just double or triple it up. :O)
Making Icing Grass:
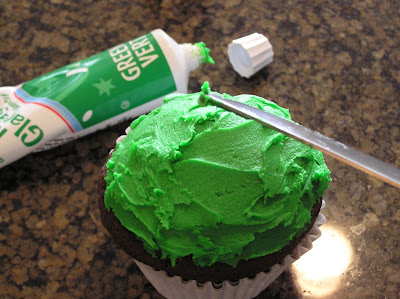
To make icing look like grass, you can use a number 233 tip (if you have an icing gun.) For those who don't have an icing gun, you can get store-bought icing and pierce the tip of it to make the strands of grass. I found 2 tubes handy (1 for the crumb coat & 1 to create a grass tip with):

Step 1) Add a quick crumb coat of icing

Step 2) Sterilize your paper piercer (boiling water does the trick) & pierce the end of the icing tube to create several holes in it.

Step 3) Test it out & make sure your holes are large enough. Sometimes the easiest way to manipulate the store-bought tubes is to twist the end of it. Apply the icing to the cuppiecake & pull away to create tufts of grass...
Thanks so much for stopping in!
Want to see more Farm Fun?
Quick Links:
The Kit
Cathy's Blog
Tracy's blog
:O)


0 comments:
Post a Comment