


When Adela, the magnificent Queen of all things 3-dimensional
asked if I would guest-host for the Paper Craft Planet 3D challenge,
I was honoured (and thrilled to get back to making something 3D!)
I hope you can play along!
This project made me feel like a little kid again!
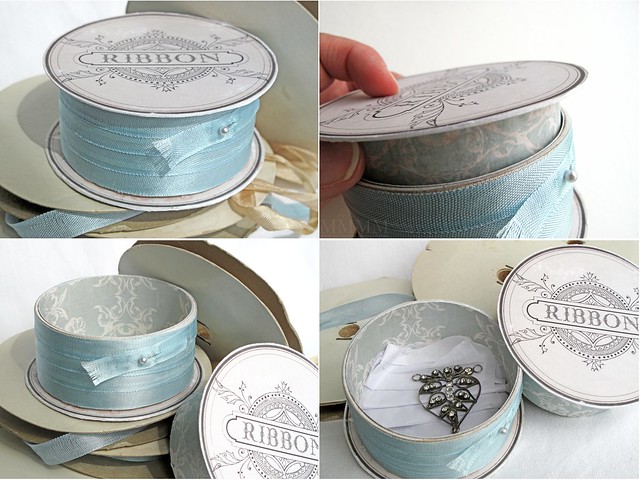
At first glance it looks pretty grown up...

...It's an empty ribbon spool
made to look like a antique ribbon.
At first glance it looks pretty grown up...
...It's an empty ribbon spool
made to look like a antique ribbon.
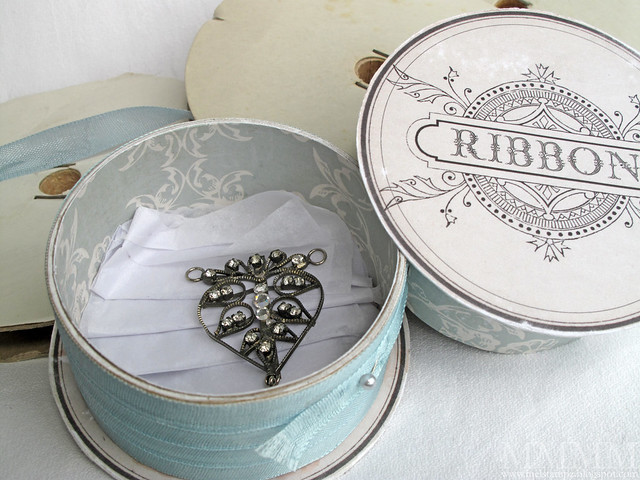
But the 'little kid part' is the secret compartment:
Can you picture giving one of these as a Mother's day present? ...
Mom: "Oh a spool of ribbon. Um. Thanks?"
You: "Open it up, Mum!"
Mom: "Huh?.... Ouuuu, jewelery!"
A much better surprise for my Mom than that time (in my early misspent youth) when I used smooshed up blackberries to make an empty jewelery box with a hole cut into it (and my finger poking through the cotton) look like a severed finger I had found in the ditch. Sorry, Mom! (It was my Cousin's idea, honest!) :-D Not on Mother's Day, by the by, because that would just be wrong.Mom: "Huh?.... Ouuuu, jewelery!"
-1-

Since April is Earth month,
The challenge is...
What Goes Around comes Around!

You can find the 3D challenge page here on PCP.

Want to Join in
the challenge?
1) Simply make something 3D that reuses something
that you might normally recycle or throw out.
Or if you've already emptied the bins, just make something
3D that's round (or that has round elements on it).
You can find the 3D challenge page here on PCP.

Want to Join in
the challenge?
1) Simply make something 3D that reuses something
that you might normally recycle or throw out.
Or if you've already emptied the bins, just make something
3D that's round (or that has round elements on it).
2) Upload your project to Paper Craft Planet.
3) Be sure to use this challenge tag: 3d161
so that we can see what you've made!
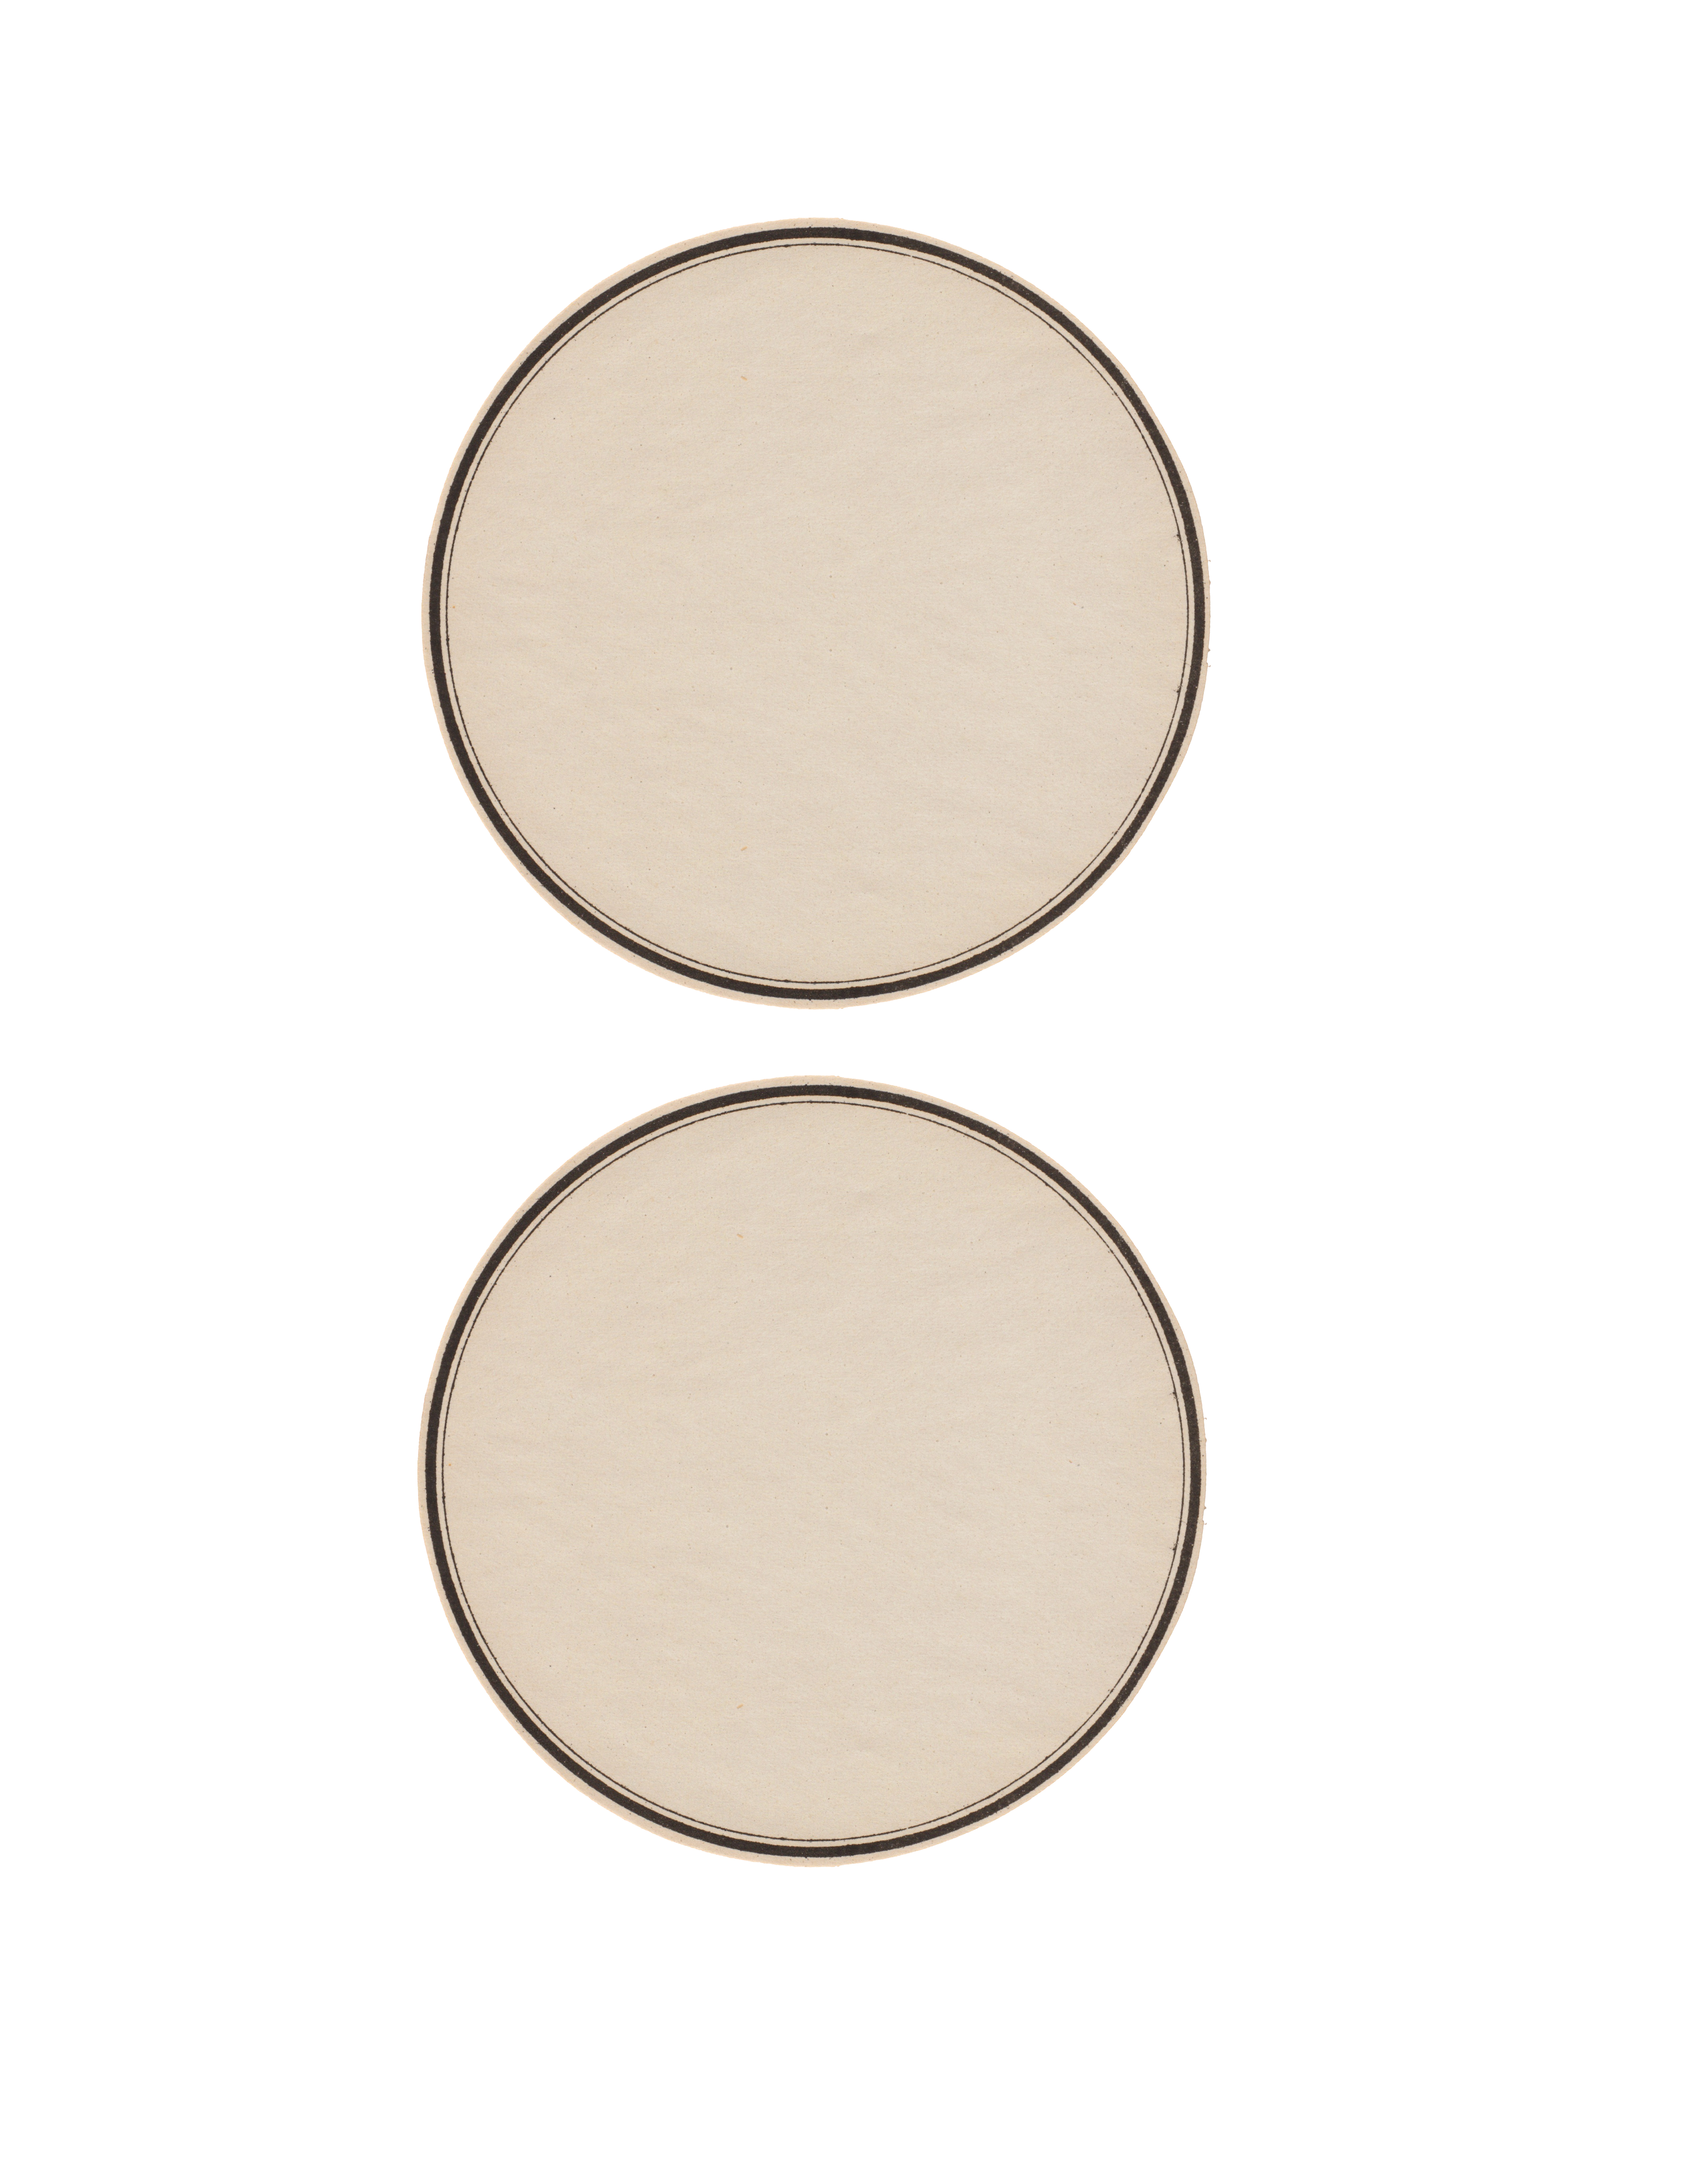
If you'd like to make a hidden ribbon spool box of your own
please feel free to use these
printable labels that I made to share with you...


To save these files:
Firefox/Chrome: right click on the image & choose "save link as"
Explorer: right click on the image & choose "save target as"
Round Antique Ribbon Labels:
 &
& 
or you can find the fronts on Flickr here
& the back on Flickr here
Credits: These were Frankenstein'ed together using
this label base, this label decoration & this free font.
3) Be sure to use this challenge tag: 3d161
so that we can see what you've made!
If you'd like to make a hidden ribbon spool box of your own
please feel free to use these
printable labels that I made to share with you...
-2-

To save these files:
Firefox/Chrome: right click on the image & choose "save link as"
Explorer: right click on the image & choose "save target as"
Round Antique Ribbon Labels:
 &
& 
or you can find the fronts on Flickr here
& the back on Flickr here
Credits: These were Frankenstein'ed together using
this label base, this label decoration & this free font.
-3-

...make a ribbon spool box
with a hidden compartment:

with a hidden compartment:
You'd be surprised how easy this is, even though
this tutorial may look a little complicated (or long!),
since I've included every last step.

this tutorial may look a little complicated (or long!),
since I've included every last step.

Basically it goes together like this:
A) Cover two empty ribbon spool rings with patterned paper.
B) Add some ribbon to the bottom spool & a pin.
C) Stick printed labels on the top & bottom to finish it off.
A) Cover two empty ribbon spool rings with patterned paper.
B) Add some ribbon to the bottom spool & a pin.
C) Stick printed labels on the top & bottom to finish it off.
It came together surprisingly quickly
and it looks and feels just like a real spool of ribbon.
and it looks and feels just like a real spool of ribbon.

- Old ribbon spools in 2 sizes (empty packing tape rolls work great too)
- White cardstock & a printer
- Heavy cardstock or watercolour paper
- Decorative patterned paper
- Scissors & adhesive
- Ribbon & a pin

Step 1) Find two old ribbon spools and remove their labels leaving just the cardboard rings (if you don't have any ribbon spools, empty spools from packing tapes would work nicely as well).
The only thing to make sure of is that they fit one inside
the other, something like this:

(With a little room to spare for paper layers).

Step 2) Sand off any bits of paper left from the original ribbon labels.

Step 3) Print the label printables front & back (They are available as free downloads above). They measure 4" in diameter, but you might want to re-size them to fit your ribbon/tape spools.

Step 4) Cut out all four labels. You could use a circle cutter, if you prefer.

Step 5) To make a nice strong top & bottom for the ribbon box, you can adhere the decorative label fronts to watercolour paper or some other sturdy cardstock.
Step 6) Cut the labels out again.

Step 7) Flip the front label circle over (so you can see the watercolour paper or plain cardstock side) and adhere the plain back label onto it.

Step 8) Score the edges of your new double-sided labels with scissors to the edges out & distress them.

Step 9) Distress the fronts of labels to make them look all antiqued.
Then Add decorative paper to the ribbon rings...

Step 10) Cut 3 strips of 12 x 12 patterned paper to fit the width of your ribbon spool rings. (Cut 2 to fit the 'top' smaller ring, and cut 1 to fit the bottom larger ring).

Step 11) To make round liners for the inside of the bottom & top, trace the inside of each ribbon spool ring onto the same patterned paper & cut those two circles out.

Step 12) Stick the patterned paper on the outside of the top ring.

Step 13) Stick another strip of patterned paper on the inside of the top ring.

Step 14) Stick the final strip of patterned paper on the inside of the bottom ring.
Step 15) You should be left with something like this:

It might be a good idea to ensure that they still fit together before you finish things all nicely. :-)

Step 16) Wrap the outside of the bottom (larger) ring with ribbon. (I used some very affordable white seam-binding ribbon as an initial base, so that I could use less of the blue antique seam-binding that I finished with).

Step 17) Finish wrapping the bottom larger ribbon ring with ribbon.

Step 18) If your ribbon is the type that will fray, like this seam-binding, you may want to seal the end with a bit of glue as a fray check. (I used Weldbond glue since it dries matte and isn't visible).

Step 19) Add a pearl pin as a finishing touch, pushing it into the cardboard to secure it. If it's very sharp, you might want to sand the end to dull it down a little.

Step 20) Add your adhesive of choice to the bottom of each ribbon ring. (I used more Weldbond glue).

Step 21) Adhere the covered ribbon rings to the plain side (back) of the label circles you made

Step 22) Adhere the two patterned paper circles to the inside of the box bottom & top. (The circles that you traced and cut from patterned paper in step 11).
Finally, Slide the lid into the box:

And no one will know (until you tell them)
that there's a hidden compartment
inside that antique ribbon!
that there's a hidden compartment
inside that antique ribbon!

Please remember to add the tag 3d161 :-)
Hope you can join us on Paper Craft Planet to play along
with the challenge (or simply check the entries out!),

P.S. Quick links: Paper Craft Planet can be found here.
Not a member yet? It's free & easy to sign up here.
Once you are signed in, the 3D challenge page is here.


0 comments:
Post a Comment