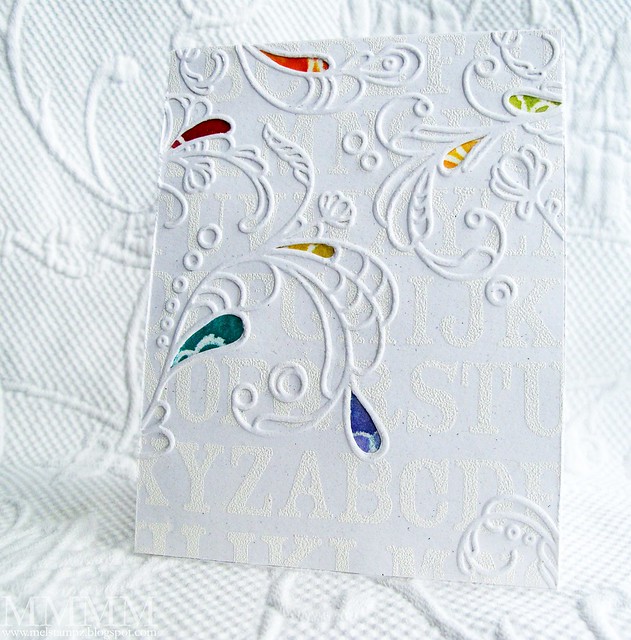
Don't you love when a frustrating mistake turns into a fun thing to try out?
I was embossing a piece of cardstock and it got several tears in it (and I had
done some fancy heat embossing on it and everything!):

To save it, I ended up cutting the more obvious torn bits out,
and it was fun,
so I thought I'd share this schtuff...
and it was fun,
so I thought I'd share this schtuff...

1... a pictorial for how to do 'cut out pressure embossing'
2... general tips for better embossing
-1-

- Pressure embossing machine: Cuttlebug, Big Shot, Wizard
- Embossing folder (this one is S.U.'s Elegant Lines embossing folder
- Cardstock (8olb or more is nice)
- Exacto blade or hobby knife
- Patterned or coloured paper
- Scissors & Adhesive (I used double-sided tape)

Step 1) Pressure emboss a piece of cardstock & cut out select areas with a hobby knife. (If you are more comfortable with scissors you could stab them into the center of the area & cut in towards the outline instead, but the hobby blade fits little spots nicely).


Step 2) Snip bits of paper to add to the back of your embossed piece of cardstock where the cut outs are.

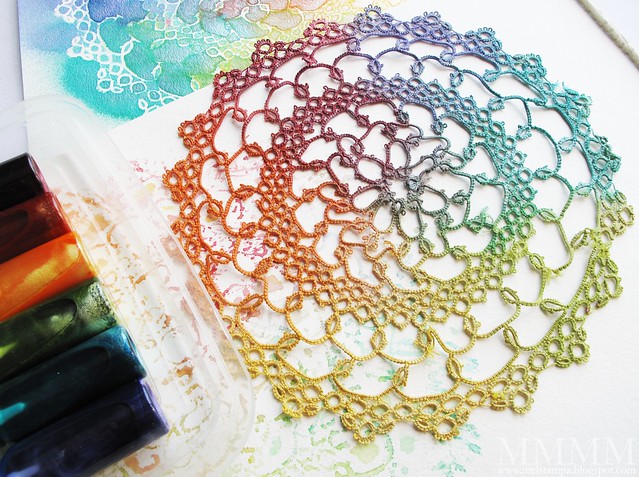
I used sprayed paper left over from colouring a doily using DIY shimmer spray

Step 3) Lay it all out behind cut outs before adhering to be sure you like it

Step 4) Adhere bits to the back of cut out embossing...

Step 5) Trim, if necessary.

Step 6) Finally, mount your embossed piece onto a card the same size (this one is a standard A2: 5 1/2" x 4 1/4" card with a top fold):


.................................(clickable blogger pics)

I used sprayed paper left over from colouring a doily using DIY shimmer spray

Step 3) Lay it all out behind cut outs before adhering to be sure you like it

Step 4) Adhere bits to the back of cut out embossing...

Step 5) Trim, if necessary.

Step 6) Finally, mount your embossed piece onto a card the same size (this one is a standard A2: 5 1/2" x 4 1/4" card with a top fold):


.................................(clickable blogger pics)
Little Tip: Use a thin enough paper underneath. The spritzed paper
is a delight colour-wise & it has a really nice sparkle to it
from the shimmer mist...
is a delight colour-wise & it has a really nice sparkle to it
from the shimmer mist...
...but next time I'd use thinner paper (the 140lb watercolour paper made bumps under the embossed piece that look less than perfect in person. Thankfully, through the magic of photography you can't really see that here! sneaksneak)
There's another version of
cut out pressure embossing here


(and a men's suiting pattern freebie)
There's another version of
cut out pressure embossing here


(and a men's suiting pattern freebie)
-2-

for better pressure embossing:

If you'd like a deeper embossing impression, you can...
1) You can shim your embossing stack: add a piece of cardstock (or 2 or 3) to your plate stack/sandwich.
2) Use thicker cardstock - I've had great results with Strathmore 100lb Bristol Vellum paper
3) Or spritz your cardstock with water or alcohol & emboss it while damp.
P.S. Fancy photo bits thanks to: Pugly Pixel tape (recoloured) from here & the Ambrosia Creative Polaroid Frame from here


0 comments:
Post a Comment