This card might be painfully simple, but I've been thinking a
great deal lately about making cards to give away
versus making cards just for the sake of making cards.
great deal lately about making cards to give away
versus making cards just for the sake of making cards.
Do you give all of your cards away?
How long does it take you to make a card?
You guys may know that I used to spend an insane amount of time making each card, but what you might not know is that I gave a limited amount away. I never seemed to have the right envelope & the cards were often too cute or too specific for general occasions. I think I was more focused on tutorials and design team work and not living in the moment, ya know?
Soooooh... all that blahblahblah to say that lately, I'm making cards
after choosing the envelope (How basic, I know, but
I am truly dyslexic, so that's my excuse for not
figuring out this basic element sooner. LOL)
I'm also trying to make much quicker cards that are more "generic" so that
C and me can give many more cards to the people we know & love.
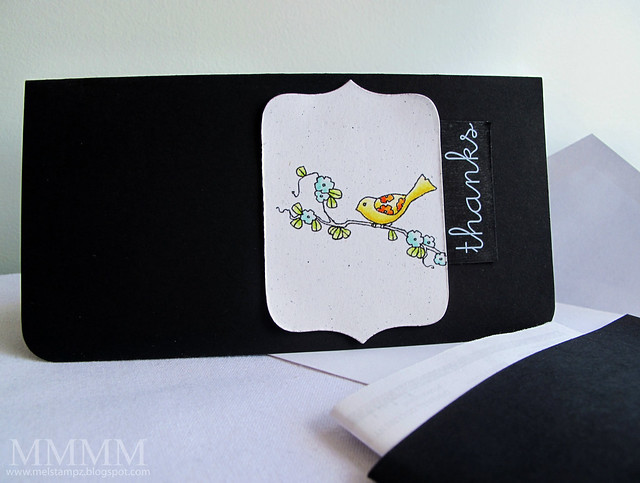
In that spirit, here's a quick card, with a quick & cheap trick.

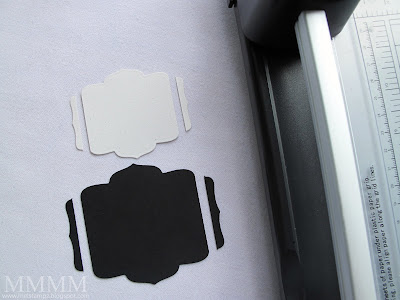
(cutting nesties shapes)

It doesn't get any simpler than this:
Trim your die cut to get new shapes
(This one is Spellbinders' nestabilities label 9)

Here's another "brand new" label shape made
from Nestabilities Label 5:

The neat part is that you can make different shapes with one die cut,
so it's stretching your dollar nicely.

With your imaginations, I'm sure you can think of a million ways
to cut nesties

The digital image is Bird Blossom Digital Stamp
I bought it from adayfordaisies (a day for daisies) on etsy.
Her artwork is stunning and so unique.

To heat emboss this digital image:
(and make the card)
Thanks so much for readin'
Hope you're doing wonderously great.
How long does it take you to make a card?
You guys may know that I used to spend an insane amount of time making each card, but what you might not know is that I gave a limited amount away. I never seemed to have the right envelope & the cards were often too cute or too specific for general occasions. I think I was more focused on tutorials and design team work and not living in the moment, ya know?
Soooooh... all that blahblahblah to say that lately, I'm making cards
after choosing the envelope (How basic, I know, but
I am truly dyslexic, so that's my excuse for not
figuring out this basic element sooner. LOL)
I'm also trying to make much quicker cards that are more "generic" so that
C and me can give many more cards to the people we know & love.
In that spirit, here's a quick card, with a quick & cheap trick.

(cutting nesties shapes)

It doesn't get any simpler than this:
Trim your die cut to get new shapes
(This one is Spellbinders' nestabilities label 9)

Here's another "brand new" label shape made
from Nestabilities Label 5:

The neat part is that you can make different shapes with one die cut,
so it's stretching your dollar nicely.

With your imaginations, I'm sure you can think of a million ways
to cut nesties

The digital image is Bird Blossom Digital Stamp
I bought it from adayfordaisies (a day for daisies) on etsy.
Her artwork is stunning and so unique.

To heat emboss this digital image:
(and make the card)
- Prep speckled cream cardstock (brayer on a thin layer of Matte Medium)
- Print bird image on standard setting
- Sprinkle on clear embossing powder as soon as it's out of the printer
- Heat set the embossing powder to melt
- Colour with Copics: BG10, B00, YG03, YG23, YG00, Y02, YR16, R35
- Cut with nesties label (use scotch tape to keep die centered) & trim sides
- Stick the "thanks" sticker from SRM Stickers onto black cardstock
- Adhere it all onto a plain black card (easy peasy!)
I'm so excited that SRM Stickers has white & brown now!!!
Thanks so much for readin'
Hope you're doing wonderously great.
P.S. This is not a "paid" blog post. I scrounged around for the birdy art and bought it out of pocket. ;0) BUT I was lucky enough to receive some of my fave SRM Stickers as a surprise gifty in the "happy mail" :-)


0 comments:
Post a Comment