


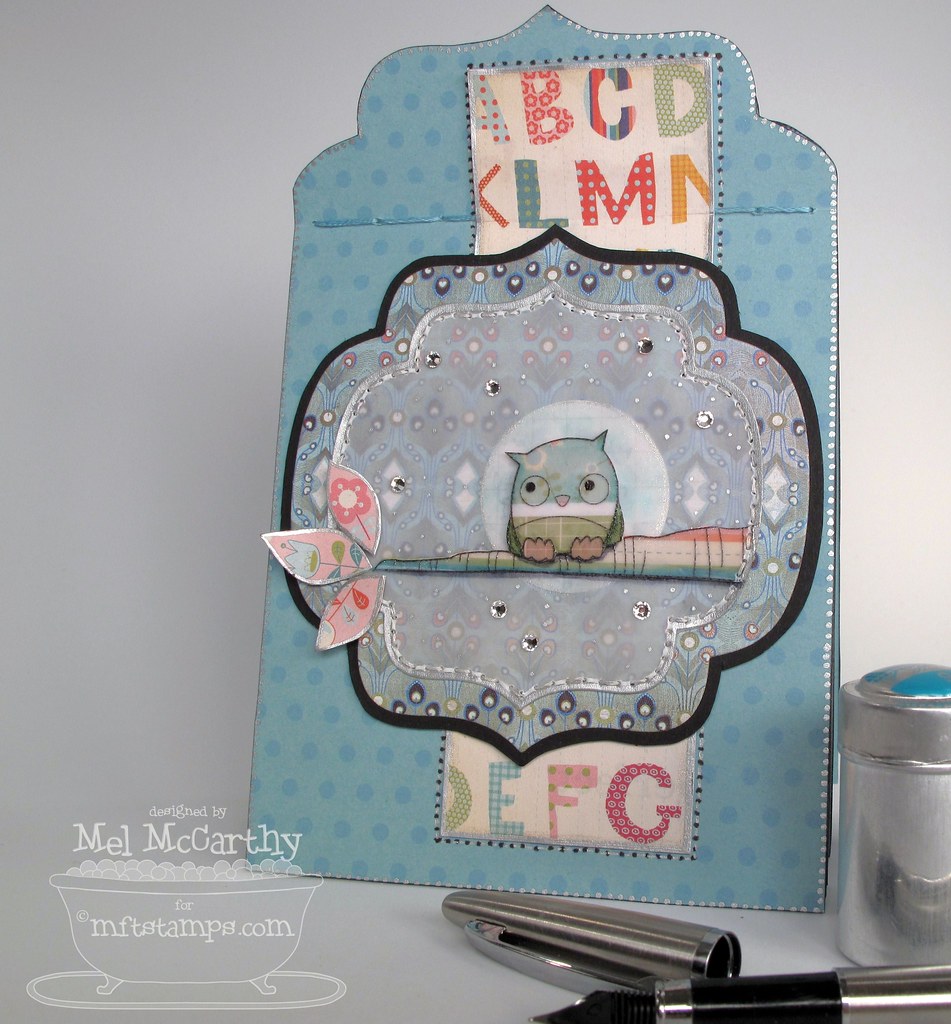
Hi All! Welcome to the MFT blog Hop. It's a release night hop & shop. (My first one! *GRIN*) I made a wee purse-sized calendar for it...with a couple of new MFT stamp sets (Make the Date & Thinking of Hoo) & a couple of MFT digital goodies--a gorgeous calendar template & sweet dotted digital paper.
Here's the inside:

I thought a calendar would make a little nice gift with
a mini fountain pen & brightly coloured ink cartridges.
a mini fountain pen & brightly coloured ink cartridges.

The calendar could stand up too, for a nice little office-themed gift.

1...My Favorite Things blog hop!
2...Free curvy mini book templates
3...How to put the calendar together
4...Vellum collage Thinking of Hoo owl
-1-

These is the My Favourite Things hop order:
- Please start with Kim here, if you're not already hopping!
- Susan
- Megan
- Frances
- Barbara
- Joanne
- Julie
- Jessie
- Amy
- Christina
- Michele
- Lisa Henke (guest designer!)
- Melody
- Sherrie
- Cindy
(you are here with me ;o) Mel)
Up next is the ultra talented Jody!!!
-2-
(curvy mini 4x6" book)
This is a set of templates to make a curvy-topped mini book
(the front & back cover & the inside pages.)
pages

Download 6x4 inside pages PDF here
Download 6x4 inside pages JPG here
cover

Download 6x4 covers PDF here
Download 6x4 covers JPG here
The PDFs print to make a book that is roughly 6" tall x 4" wide
It's sized to coordinate with the MFT Small Calendar Sheets (2010).
(the front & back cover & the inside pages.)
pages
Download 6x4 inside pages PDF here
Download 6x4 inside pages JPG here
cover
Download 6x4 covers PDF here
Download 6x4 covers JPG here
The PDFs print to make a book that is roughly 6" tall x 4" wide
It's sized to coordinate with the MFT Small Calendar Sheets (2010).
-3-

Make the Date 2010 purse calendar

- MFT stamp sets: Make the Date & Thinking of Hoo
- MFT Digital Template All Calendar Files 2010
- or you can get just the Small Calendar Sheets (2010) here.
- MFT Digital Paper Simply Spring Collection: Dots
- Patterned paper scraps (BasicGrey & Cosmo Cricket)
- Shades of blue cardstock (for the book)
- White cardstock (to print the calendar)
- Vellum Cardstock (for the image)
- Nestabilities Label 9 & Cuttlebug/other die cut machine
- Copic Markers
- Swarovski crystals
- Tombow Monomulti
- Paper piercer, Needle, Thread
- Pen & cartridges from Paper-Ya on Granville Island

Step 1) Make the calendar book covers: Print the cover template on one side & the Simply Spring Collection: Dots on the other (I used the blue dots, but there are 10 different colours.) Cut the covers out & score along the dotted line.

Step 2) Make the calendar pages. This is really speedy, since you can just print everything off & stamp the months out.
2A) Stamp the months from the MFT set Make the Date.
2B) Cut the months out. Mat them on cardstock. Trim & stitch them.
2C) Print the Small Calendar Sheets from MFT Digital Template All Calendar Files 2010. (I printed them at 94%)
2D) Trim them (a paper cutter makes this super fast) :o)

Step 4) Assemble the covers & pages. Score along the dotted line (on all the printed templates) & pierce & stitch the book together.

Piercing & stitching gives you a fancy little fan detail at the top, but gluing would make a nice sturdy top & there's plenty of room for adhesive on the templates.

Step 4) Make the calendar pages. Print 3 copies of the page template & cut them out. (You should have 6 pages total for the 12 calendar months. I printed my pages on pale turquoise paper.)

Step 5) Adhere the calendar months to your cut out pages & add the stamped vellum months.


Step 1) Stamp the image on vellum & stick it to patterned paper. Stamp The owl & branch from the MFT set Thinking of Hoo onto vellum cardstock. Cut it out and cut the owl away from the branch.
To get a patterned paper piecing under the vellum: adhere the pieces to patterned paper scraps & cut them out again. (I also added layers of cardstock to get dimension--like homemade chipboard.)

Step 2) Die-cut a shape in patterned paper & a smaller nesting one in vellum. (These are cut with Nestabilities Label 9.)

Step 3) Adhere the Thinking of Hoo branch & owl to the vellum.
and
Step 4) Embellish & Assemble the die cut shape:
4A) Punch a circle--for a moon.
4B) Adhere it under the vellum behind the owl.
4C) Copic colour the vellum moon & add shading to Hoo.
4D)Adhere the vellum die cut over the patterned paper.
4E) Pierce & stitch around where they meet, if you like.

Step 5) Add finishing touches: Cut leaves from patterned paper, edge them in silver & add them to the tip of the branch. Adhere Swarovski crystals for stars & adhere the image to the book....
....and that's it...


Thanks so much for stopping in!


0 comments:
Post a Comment